Now that Halloween and Thanksgiving are behind us, it's time to embark on the final stretch of the holiday season! As I move towards the end of the year, it's also time to once again re-organize my plans and priorities and figure out what I think I can get done.
New Ironing Board Cover and Shop Hop Stash Dive
Well, one thing that has already gotten done is to replace my ironing board cover. The old one was pretty dingy and what better way to head towards a new year than to make your ironing board cover new, shiny and pretty!
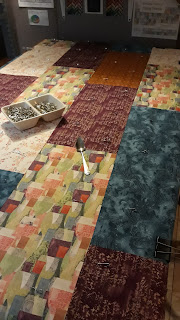
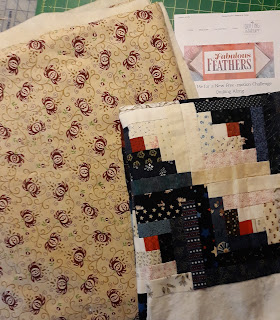
Much better! The old cover had been made up four years ago so it was definitely time for a change. This little project was helped by the Shop Hop I attended in NC when we visited my MIL back in October. I had purchased a pretty collage print on the sale rack at Cary Quilting from the MODA "Sew & Sew" line by Chloe's Closet from a few years back.
My plans were to use it to make a "sewing/quilting themed" collage-style quilt by fussy cutting some of the sections with sayings on them and surrounding them with other coordinating fabrics. The additional prints shown here were also purchased at Cary and I picked up a few more at some of the other stops on the Hop.
However, when I lay the fabric on my ironing board, I realized that a couple of the sayings panels would also fit perfectly on the tapered and wide ends of it and a plan was hatched! Then while shopping the web for fabrics for another project (more about that later), I came across another "sewing sayings" print by Timeless Treasures. I thought it would make great inserts in the collage quilt but also realized that it could be used to complete the ironing board cover plans too!
 |
| From this.... |
 |
| ....to this! |
Definitely brightens up the quilt space!
Blue and White Christmas Decorating Is Ready To Start
Now that December has arrived, I'm pulling out what I have so far for this year's Blue and White Christmas decorating.
Normally we buy a small natural tree but given the problems we had last year and the new color scheme, I decided an artificial tree was in order for this year.
 |
| After some assembly, we'll be good to go! |
The plus is that I've now decided to do a red and white scheme for next year so this tree will work for that too!
The only problem now is that I haven't been able to get the lights I want for it. I want blue or blue and white lights on a white string. I've checked a few stores locally and so far haven't found any in that combination. Also it's only a four foot tree so I really don't need a long string of lights -- only a 50 count set or smaller. I have a few more local places to check and then to the web it might be!
WIPS-B-Gone and the CW Strippie
It took two weeks (!) to get this one basted and has taken another week to get it on the sewing table but I'm finally getting to quilting this. The basting took so long because of my "design decision" to use a continuous length of fabric for the top border in the front and the backing. That made it a lot harder to baste than expected! The first two times I tried basting this, I had so many significant pleats on the back, there was no question that the basting had to be re-done.

I chalked it up to the fact that the fabric I had purchased had been pre-washed leaving it very stretchy when trying to secure the layers. For the third round of basting, I decided to starch the backing fabric and now have a new appreciation for those that do that with their fabrics. This step was also helped by another NC purchase: when my MIL's guild friend had helped us with our "By Annie" bags, she had also recommended using starch and dispensing it out of one of those beauty supply misters. My MIL already had her starch in one so I purchased one while down in NC and now transferred my Best Press to it.

Ironically, I already had one of these for dispensing water when ironing but it does work great with the starch too! The starching helped a lot on this round of basting -- this time there was only a small section on the upper right side that still had some pleats. I distributed the remaining excess by unpinning just that section and adjusting only the backing, forming a tuck near the top of the back. After it was whipped stitched down you could barely see it.
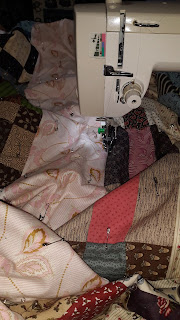
I called that done and have now moved on (albeit interrupted by the Thanksgiving holiday) to the quilting! Note to self: There's a very good reason for using a separate backing!
A New Gift Project
Earlier I noted that I had been shopping for fabrics for a project. A few weeks ago, I had a watch party with a friend of mine. We both enjoy a lot of the same popular shows and she had been telling me about "Bridgerton" which aired earlier this year and thought I'd enjoy it. We finally got together and had fun watching the whole season. She also gave me an early Christmas gift:
She knows I quilt, had seen my quilts at this summer's Art Exhibit and I had worked with her some years back when I provided my Featherweight for an event she held in her building. So sweet of her! For right now, I have it displayed in my quilt space but it will have a prime position on the tree for next year's Red and White holiday!
We've done watch parties before and when we do we plan a menu. This time around we decided on having chili for the main dish. She's a big fan of Stagg's canned chili which she gets at Costco. I made cornbread to go with it and had brought some additional fixings thinking it might need to be punched up a bit but no, it really was delicious straight out of the can! I took some home to DH and we both agree that we need to get some and add it to our camping chuck box food list.
When we heated the bowls of food in the microwave, she noted that she had to remember to be careful because sometimes the bowls are hot to the touch once heated. Bingo, Quilt Gift Alert!! I knew immediately what my next gift to her would be: Bowl Cozies!! Next to Mug Rugs they are the hot quick gift item in the quilting world these days. Of course, that made me wish I had the space for an Accuquilt Go! Big so I could use their die:
 |
Accuquilt Die #55208
|
Fortunately there are also many tutorials on the web for making them that don't use die cutters. I'm going to try the one by Vanessa the Crafty Gemini. This one works for me because I was only able to get a "tumbler cut" (9" x 14" and a new-to-me pre-cut) of one of the fabrics and that is just the width I need for her method. And what fabrics will I be using you ask?
 |
| Material obsession for all the shows! |
I've got fabric related to all of our favorite shows: "Downton Abbey", "Game of Thrones" and "Bridgerton"! We also like "Call the Midwife" but so far I haven't seen anything for that translated into fabric --- well other than the usual nursing themed prints. I already had the DA fabric in house as I had picked up a fabric bundle waayy back in 2015 (!) to use for a BOM project I wanted to do at the time. I guess that's been curing for a good while, eh?!? I will have to figure out which prints in addition to the logo print I will use and how I'll incorporate them into the bowl cozy design.
Our next watch party is going to be for "Sanditon" which I've seen and she hasn't and is pretty much along the same setting and thematic lines as "Bridgerton". Once I get these made up, I'll set a date with her for that viewing. Hmmm, maybe I should wait until March 2022 when their new season starts?
Bonnie Hunter's 2021 Quiltville Mystery Has Started
And last but not least, this year's Quiltville mystery began last week!
It's called
"Rhododendron Trail" and reflects the colors of the spring and summer flowers that Bonnie sees when she hikes to see the wild ponies near where she lives. Much like last year, since I have so many prior mysteries that still need finishing, I'm not going to make this one up --- yet! What I
will do after I download the weekly instructions is continue work on the last of the mystery tops I have in progress.

I started on Roll, Roll, Cotton Boll (Bonnie's 2010 mystery) all the way back in November, 2018. In the time between, it's been leader/endered with more than a few other projects and I have Parts 1, 2 and 4 completed. I have the pieces for Part 5 cut but they still need to be sewn. Over the last two years I have foundation pieced more of the string squares for Part 3 (also leader/ender) but need to trim, sub-cut and re-piece them to add the resulting block to the pile of blocks I already have made for that part. Even then, I still need to make more!
The mystery instructions drop weekly and I look forward to seeing the link-ups of people posting what parts they have completed for the new mystery. I'm hoping that checking in on those will be the perfect prompt for me to give some focused attention to my own project during this mystery season. The goal is to try to get RRCB to a top by the time "Rhododendron Trail" finishes in January.
As always, so much to do and so little time!


