Tuesday, July 1, 2025

To Do Tuesday: Plans for July

Another new month already?  Guess that means it's time to join everyone and check in with this week's "To Do Tuesday" over at Carol's Quilt Schmilt!


A Recap of Unfinished Things from June 

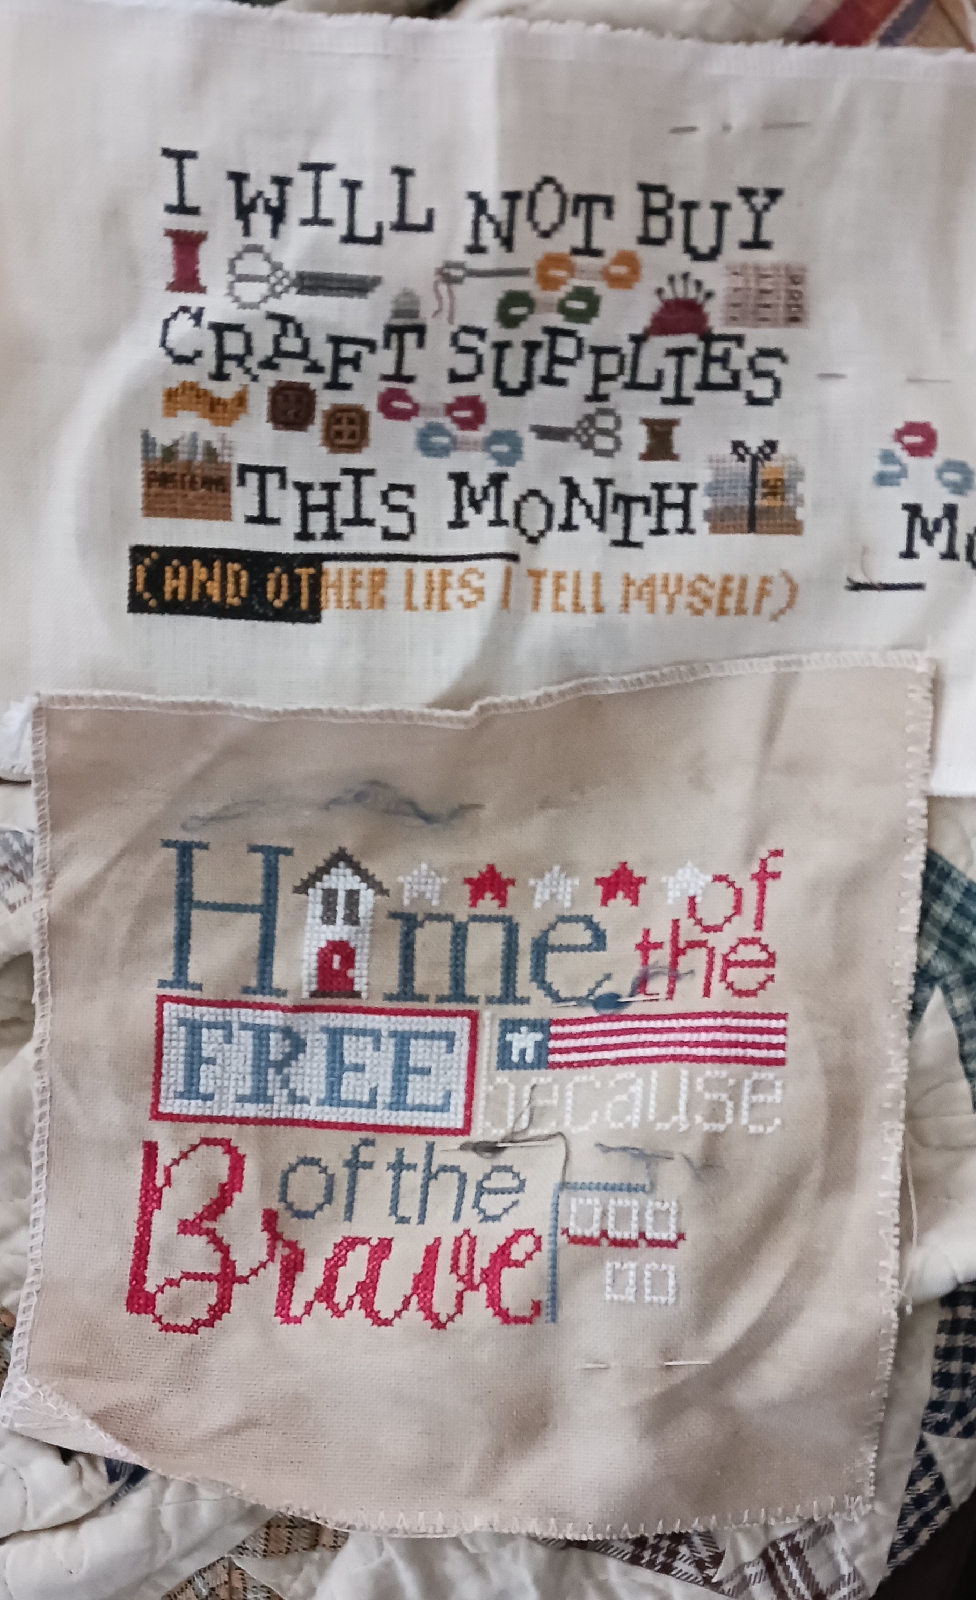
During June I had hoped to "fully finish" "United We Stand" which is a cross stitch piece and put together the parts for a quilted pillow cover made in fabrics from the MODA "Seeds of Glory" line. 


Neither got done as I spent most of the month focused on my cross stitching.  I had wanted to try making that edge finish on the little cross stitch pillow first and if successful then try it on the larger pillow cover.  

However,  after I trimmed the cross stitch in preparation to finish it,  I lost a piece of piping trim that was already prepared and which was leftover from a project from years ago.  I had hoped I'd eventually find it but still haven't so now will have to make more.  I'd still love to get both of these finished but admit I haven't made any definite plans to do so this month.   

I also had planned to finally layer and quilt a top I call "Modern Bohemia" for Rebecca's Sugar Sand Quilt Co. "Misson UFO" challenge.  


Well only two things for that got done:  I decided on the quilting plan and I reviewed the backing fabric I had purchased for it.  The good news is that the quilt is a lap quilt but the backing fabric had been purchased during a sale on 3 yard Wide-back packs at Keepsake Quilting.  I found in my notes that I had actually planned to split the backing between this project and another that also needs to be quilted so I got that done too.  

The last of the unfnished June plans were to finally start (or even finish?) blocks for a Red, White and Blue version of Edyta Sitar's Laundry Basket Quilts "Alaska" design.  The plan was to leader/ender the making of those blocks with putting the blocks together to complete the top for a wallhanging.  I had finished up the blocks for the wallhanging back in May and it has been sitting on my design wall ever since.  

The top 12" block is the smallest size I could make pieced triangle units with the Large Kaleido-Ruler.

I only got as far as making up the test blocks for the project.  I am making the Kaleidoscope blocks for the design using Marti Michell's "Small" and "Large" Kaleido-Rulers.  I've owned the Large one for years but soon realized I needed the Small one to be able to cut the parts for the pieced triangles for the size block I planned to make this in.  

That ruler didn't arrive until the second week of the month and I cut the pieces for the test blocks in the third and then didn't get around to stitching them up until the last week.  So this is a good time to start in on the plans for the month and for this week!

The Start of Christmas In July!  

For this month,  the primary focus will be on holiday projects for "Christmas in July".  I don't dare start any new ones but I can't promise that won't happen --- you know, squirrels and all of that, LOL!!!  So for "CIJ" I need to:

  • "Fully finish" my little "Christmas Log Holder"  cross stitch piece 
  • Finish stitching my "Letters To Santa" cross stitch piece
  • Quilt the two Christmas tops finished last year:  "Letters To Santa" and "Christmas Trip Around the World".  In both cases the top, backing and binding are already prepared.   
I should note here that since I also have the same done (well, not the binding) for "Bohemia",  I'm thinking that maybe I can also plan to quilt it along with them. 
I can't promise I will get this started but I can't promise I won't, LOL!!

What's Up For This Week 
  1. Since I have quilts I need to layer and baste for quilting, a big priority for this week will be to start clearing off my cutting table so that can actually happen!!   
  2.  I also need to clear my design wall so I can put the "Scrap Squares" project up and finish the layout of the squares.  That will require that the top laid out on it now becomes a leader/ender for something.
  3. I want to start making the blocks for "Alaska".  However, since this is not the priority project for the month (in fact not for the next few months as I had already planned out what I want to do during those as well),  I've decided to do this project as another self-styled Block of the Month (BOM).  It should be noted that "Bohemia" had been one of the projects I had tried to do this way in 2020, all the others of which are still UFOs.  If I can keep up on "Alaska",  maybe I can eventually put the others back into rotation and finally zero them out as well! 
  4. Most notably for this weekend, we will be headed out on another camping trip for the Fourth of July weekend.  As has been my habit whenever we go camping,  I'll be taking a hand work project with me for the long drive there and back and for some "around the campfire" stitching.  For our last few trips, I have been taking and trying to finish my "Open Your Heart" project which is camping themed.  I actually got half of a page of it done during and after our last trip for the Memorial Day holiday so am looking forward to finishing that page on this trip.

Other Plans For the Month
  1. As noted earlier, I have a wallhanging top that needs to be put together.  I will leader/ender it with either the "CIJ" projects and/or the "Alaska" blocks so I can clear it off the design wall to make space for laying out the "Scrap Squares" project. 
  2. If time and projects permit this month, I will also try to continue the two cross stitch projects left over from "May-nia" and "Red, White and June":  "NY Skyline" and "Right To Vote".

"Skyline" will probably get priority there since it is the easier of the two to work on and when finished is destined for a decorating spot I've long wanted to fill.  

So that's more than enough to keep me busy this month as well as a few things identified specifically for this week.  Let's see how I do!  Go see what others have planned for the week ahead by heading over to Carol's at "Quilt Schmilt" to see what's popping up in quilt studios around the world!

Monday, June 30, 2025

Slow Sunday Stitching: The Last Week of Red, White & June

 As I say good-bye to "Red, White & June",  I'll check in one last time this month over at Kathy's Quilts for "Slow Sunday Stitching"!

Some Are Almost Finished

After a focus on them this past week, I'm thisclose to finishing the stitching on "Home of the Brave" and "Craft Supplies and Other Lies I Tell Myself".

I will admit that stitching on these two have been the most fun of all the stitching I've done over the last two months.  In each case, it was seeing the design revealed as I went along combined with the ease of stitching them out.  I also had less issues stitching on the fabrics as well as following the patterns for these than I did with the other two projects I worked on.  Well, with the exception of the error in positioning I did when starting "Craft Lies"!  Yeah, I still have some ripping to do from that, LOL!

I will continue to focus on these to get them done even as I've already pulled the project bag out for one of the projects I'll be resuming for "Christmas in July "!  I had hoped to have had them finished because plans for "fullfully finishing" them are already in place.  "Craft Lies" is to be framed so I'll be shopping for that as soon as it's done.  For "Home" the plan is a pillow finish and I will probably just follow how the designers at Primrose Cottage did it.  It's noted in the pattern that they used prints from Minick & Simpson's "Belle Isle" line and I actually have some of that so will consult my stash to see if I can do the same.

United We Stand is Still Not "Fully Finished"

Last time, I had talked about having a scrap of piping that I could use for the edging I want to put on this project.  Well, it still hasn't turned up so now I'll definitely have to make more.  

I will try to do so over the next two months since for me the "patriotic period" is from Memorial Day to Labor Day so Red, White and Blue quilts and cross stitch will remain up in my spaces!  I'd also really still like to see if I can then do the same edge technique on a pillow I also still need to finish so I'll see what happens with all of that going forward.

Stitching Still In (Long-term) Progress

This means I also end the month with "Right To Vote" and "NY Skyline" still in progress:

The threads I needed for "NY Skyline" arrived!

I may or may not continue stitching on these over the next month.  As I said eariler,  for July I plan to work on projects for "Christmas In July".  For that I already have two cross stitch projects that need to be completed:  one to be "fully finished" and one that the stitching needs to be completed.  If anything, "NY Skyline" will probably stay in the current stitching rotation since it's the easier of the two to stitch and is the one I want finished so I can use it in a prominent display spot that's open.  

It's been another fun "Red, White & June" season to focus on patriotic (and other) stitching!  Now head over to Kathy's Quilts to see what others have been "Slow Sunday Stitching" to finish up the month!

Monday, June 23, 2025

Slow Sunday Stitching: Two Weeks of Red, White & June Stitching

Things have been progressing nicely as this month's "Red, White & June" stitching has continued.  So  I am linking up again at Kathy's Quilts along with the rest of the "Slow Sunday Stitching" cohort.

Stitching Has Gone Well Since My Last Report

So much so that cross stitching has been about all I've been doing on the crafting front.  Of course that has not been good for my quilt projects, LOL!  The very slow, fumbly start I had made resuming two projects started back in 2023 for "Red, White & June" has eased a bit and over the past two weeks,  I finally got into the groove of working on them.  So "Home of the Brave" (a Primrose Cottage design) stitched on an Evenweave fabric has progressed as shown:


After this, I repositioned the hoop so I can continue by filling in the stars and words to be stitched next to "Home".  After that all I need to do is fill in the bottom with one more word and a big house and then the stitching on this will be finished! 

For my Linen stitching project "Right To Vote",  I managed to almost finish the word "Votes",  add one more of the backstitched words and started on the word "for" in yellow.

I should be able to finish that word and then will need to move the hoop to stitch the "S" for "Votes" and the other backstitched words on the first line.  

I had talked before about how hard it is to stitch on this soft Linen as I am more used to stitching on stiffer Evenweaves and Aida.  Next time I use a Linen, if it is as soft as this one, I will starch it first to make it easier for me to work with.  

May-nia Projects Also Continue

I also continued with my two May-nia projects which helps explain why I've been cross stitch obsessed!  Those two have bounded ahead and "Craft Supplies Lies" is now here:

I had to "frog" some of the false start I made originally so I could put in the last motif on the bottom right.  All that's left after that is the line of yellow text that will be surrounded by a big black box underneath all the previous stitching.  The line of stitches under the center are the start of the top of the box.  Fingers crossed that the sitching on this too could actually be finished by the end of the month!  

My "New York Skyline" project has also hit a milestone: 


I've completed one page of this five page pattern, woo hoo!!  That said, this means this one will take a few more months complete.  

I also just realized that I don't have enough floss for this!  For some reason I had only stocked two skeins and now I can't find the second one and I see that it took almost a whole skein for this one page (I am using Classic Colorworks "Black Coffee").   So needless to say,  an order for more floss has also been put in.  

Well at least, all of this focus on stitching has been encouraging as well as enjoyable!  What didn't go as well as planned on the cross stitch front was a finish!  

"United We Stand" Finish Stalled!  

My plans had also been to "fully finish" my little "United We Stand" piece into a pillow.  

To do so, I was going to finally get a chance to do this edge finish I've wanted to try for forever.

I had noted it at the end of this quilt post I did back in 2021 on "Special Edge Finishes".

The pattern by Primrose Cottage had not included finishing instructions for their pictured pillow finish.  So as best as I could tell, their piece had about a 3/8 to 1/2 inch of open space around the stitching.  The instructions for the "Piped Scallop" edge finish called for 1/2" seam allowance so I trimmed my piece to one inch beyond the stitching figuring I could take off the extra 1/8" if I thought the larger allowance didn't work. 

The edge finish also requires having rounded not square corners.  Ironically the pillow pictured on the pattern seemed to have that too which I would bet would also make adding the pom-pom trim they used easier too.  Not a problem, I've added curned edges before.  My usual tool for this is my Creative Grids "Curved Corner Cutter Ruler".  But the smallest curve there is 1-1/2" inchces and I felt that was too big.  I tried the bottom of a two different sized thread spools -- nope still too big.  The perfect size to my eye was a bobbin!

The edging also calls for making piping.  Now despite the fact that I have read (and added in blog posts!) the name of this finish a bazillion times (okay, maybe a bit of an exaggeration) until now, I had been focused on the scalloped edge and had completely overlooked the "piped" part, LOL!  So reading the instructions in full for the first time, I was only now realizing that this called for piping.  However, I totally lucked up on this front.  

I actually have a tool for making piping purchased all the way back in 2008.  Back then I had belonged to the Empire Quilters Guild here in NYC and the tool and quilt designer Susan Cleveland had done a presentation at one of the meetings.  As a result, I had been impressed enough with the quilts she brought for her trunk show that I purchased this tool.  I will admit though that I've only used it once:  back in 2010 when I made this doll quilt for an Aunt of mine:


I had applied blue piping around the edge of that quilt instead of a traditional binding because I wanted the blue fabric for the binding edge but felt a traditional binding would be too strong on it.  The blue piping was just enough.  Ironically, when I pulled out the piping tool package, inside of it was a remnant of that same piping!  The fabric I had used had faded quite a bit but fortunately for me it was still blue enough and the piece long enough to be perfect for use in this project.  That meant I didn't even have to make more piping!

Unfortunately, at one point I did try to work on some quilt projects and that further filled my already cluttered cutting table (which I was supposed to clean off in prep of layering a quilt).  When I finally tried to go back to working on the cross stitch finish, I couldn't find my scrap of piping!  I can't figure out where it has gotten to.  I expect I might have picked it up along with some other fabric I was working with.  I've turned over a lot of piles and looked through things that had visited the table but still can't locate it.  Sigh!  

I'm really hoping it turns up but if not,  fortunately I have more of the cording that came with the tool so I can make more piping.  It also tells me that I have too much going on right now so need to focus more on just a few things!

To check out what everyone has been doing with their slow stitching projects, head back over to Kathy's Quilts to see what others have reported for this week's "Slow Sunday Stitching" share session!  

Wednesday, June 11, 2025

To Do Tuesday -- A Day Late!

I'm linking up again with Carol's Quilt Schmilt followers for the weekly "To Do Tuesday" check-in report.  

Today, I'm looking at what's on deck for the coming week to continue working on patrotic projects for "Red, White & June" as well as a project pulled out for a UFO challenge.

Finishing Red, White and Blue Cross Stitch and Quilt Projects 

Last week I managed to FFO "Patriotic Parade" which I discussed in Sunday's "Slow Sunday Stitching" post.


This week I want to finish "United We Stand" which is another patriotic themed cross stitch project.  It is to be finished as a simple pillow.  The pattern designer Primrose Cottage finished theirs with a pom-pom trim.  I don't have any of that but there is a decorative edge finish I've long wanted to try and will do so on this little project as a first stab at it.  


I had seen this technique in a back issue of Quilter's Newsletter (March 2004 issue) and have long wanted an opportunity to try it on a quilt.  Certainly trying a sample of it on this little pillow that will finish at three inches square would be easier, LOL!   The kit I had purchased for the "Parade" project may play a part in that:  since I framed "Parade" rather than finish it as a pillow,  I think I'll use the backing fabric that came in the kit and cut it into the bias strips I'd need to try this decorative edge finish.

This week I also want to try finishing up my "Seeds of Glory" pillow cover.  

Some time ago when I finished a cover for the same pillow form I will use here, I had stitched a small flange of fabric between the front, back and center band around the pillow.  

The post about that finish is here.

When I was considering how to finish this new pillow cover,  I had originally planned to try adding  traditional corded piping around the edges.  

You can watch Susan Cleveland demo this tool here.

However, once I decided that I'd try the "Piped Shell Edging" for the little  "United" cross stitch pillow,  if successful I'll try it again on this larger quilted pillow.  If I can do that then I'll be confident that if I ever want to do this on the edge of a quilt,  I'll definitely be able to do it.  I even have a quilt in mind that I could try it on in the future!       

"Alaska" Start Delayed!

The big project I had hoped to start last week was Edyta Sitar's "Alaska" in a Red, White and Blue colorway.   I was going to run a test of making the blocks for it but unfortunately I ran into quite a few snags!  My plan is to make the blocks using the Marti Michell Kaleidoscope ruler I have.  

A review of her Kaleidoscope book provided the good news that I can use the ruler I have to make the blocks but only some of them.  I have her "Large" ruler but the blocks that are made up of multiple smaller triangles would need triangle units smaller than my ruler can make unless I make larger blocks for the quilt overall.  

That in turn led to the question: how big do I want this quilt to be and for what use?  I just fell in love with the design and coloring and was so focused on aquiring the fabric that I never really questioned the size of the quilt as patterned.  It is patterned at 71-1/2" square but now I'm not sure if I want a quilt that size.  Even so, the blocks I'd need to make for that size or for a smaller quilt will still require the "Small" version of this  ruler.  Fortunately,  I was able to find a few places that still have it and have ordered one which gives me a little more time to settle the quilt size issue.  Of course, there is also the option of making an even larger queen-size quilt.  But for that I'd still have to settle the block size issue and then check my stash to confirm I have enough fabric to do that. 

Speaking of the stash:  another complication that arose was when I pulled out the storage box with the stash for this and was confronted with another issue:

In the box I had the receipts showing what I had purchased for the project.  I noted how much of the background fabric I had ordered which seemed like way more than I needed for the original design.  However,  I have far less than what's invoiced!  Did I decide to use the rest for another project ?!?  If so, for the life of me I don't remember doing so or if I did what project I might have moved it to.  Sigh!  I've only found one source for that print but do not want to commit to ordering more until I've decided on the quilt size and block issue since I might already have enough.  Then again, background fabric is always useful so I could just bite the bullet and get more anyway.  Decisons, decisions! 

I did manage to cut some scraps to make up blocks to test working with the ruler.  These are the block pieces needed for the two styles of blocks used in the design.  

The smaller block is the size I'd use for the original pattern.  The larger block is the other style of block I need to make for the project but this is the smallest size I can make of it with the ruler I have.  I am also going to try it by making the large diamonds in that block the two ways you can do them:  either pieced of two small triangles or cut as one large diamond.  So when I sew these up this week that will give me an idea of how the assembly of the blocks work.  

So it looks like this week will be the testing phase and maybe next week -- once I've made the final decision on the quilt size -- I can actually get to work on the actual blocks for the project! 

UFO:  Quilting Decided Now To Layer

The other project on my list for this week is my "Modern Bohemia UFO" for the "Mission: UFO" challenge on the Sugar and Sand Quilt Company website.  

Last week I looked at it for a couple of days and came up with what I think is a simple yet custom quilting plan.  The top has blocks that are 12, 9, 6 and 3 inches.  In many cases the same size blocks are grouped together.  

So after layering, the plan is to stabilize stitch the whole top by outlining the block sections.  This means all of the twelve inch blocks will be individually outlined but all of the three inch blocks are together in sections of three to five blocks.  Most of the six inch blocks are paired although a few are either individual or in sets of three or four that are adjacent to each other.  The nine inch blocks for the most part are individual but there are a few that are paired.  

For stitching over the blocks, all of the blocks smaller than twelve inches will be quilted with various straight line patterns.  I want to do cross-hatching across the three inch blocks and either horizontal or vertical matchstick quilting over the nine inch blocks depending on what is going on around them.  I have straight line rulers for those so the good news is that I can do that stitching free-motion as opposed to using a walking foot which would require turning the quilt to complete those sections.   

For the six inch blocks, I had purchased a "Cube" template on Etsy a while back that will do a "concentric lines in a square" stitch pattern and is perfectly sized for those blocks.  I also want to "connect" the stitch pattern between adjacent blocks.

For the twelve inch blocks I envisioned doing something that contrasts the other stitching,  preferably a cuved pattern.  I thought about a number of options including doing Adria Good's  "Big Flower" motif that I did on my "Heartland" 3 Yard Quilt last year.   However I decided to stick with a cleaner line pattern so opted for a simple "Spiral Starburst" that I saw in Natalia Bonner's "Next Steps In Machine Quilting" book.     

I also have this great backing print for this project and even better, it's 108" wide so I won't have to do any piecing of it!

"Unstoppable" by Whistler Studio for Windham Fabric

I had purchased this back in 2021 when I originally thought I would try to finish this.  I got it during a Keepsake Quilting "Black Friday" sale of their 108" “wide back” three yard packs.  Of course this quilt only being lap sized means it doesn't need all the fabric this backing pack provided.  Fortunately in 2023,  I realized that I also needed backing for my much larger "Scrap Happy" project so all of the rest of it will go to help fill out the backing for that project!     

The hardest part to do now that I've got my quilting plan will be to layer this.  Actually no, the hardest part will be cleaning off my cutting table in order to have the space to layer this, LOL!!   

There's Also Still Alot of Cross Stitch Going On

Lastly, I will continue working on all the cross stitch projects I have in progress at the moment.

Home of the Free, Right to Vote, Craft Supply Lies and NY Skyline

A lot to do but surprisingly, with a clear plan it seems doable.  But then it always does seem that way until it isn't!  

Have you checked out what others have planned over at Carol's Quilt Schmilt link up?  Who knows, maybe your next project is there waiting to inspire you!

Sunday, June 8, 2025

Slow Sunday Stitching: Red, White & June Week 1

Well, one week into "Red, White & June" and there's been a lot of activity going on!  Linking up for "Slow Sunday Stitching" at Kathy's Quilts with a report on what happened this week.

One FFO Down!

With two projects needing to be "fully finished" as part of the stitch work this month, I was hoping to get an early start on either my "United We Stand" or "Patriotic Parade" pieces.  "Parade" won the draw!

It turned out to be the easier of the two to finish.  Despite the fact that it came in a kit with finishing supplies for a little pillow...

...when I had pulled it out last week, I realized that framing it might be a better way to go instead.  For the patriotic season (from Memorial Day to Labor Day)  I have these two quilts up on display right now:

They hang together today just like they did last year.

When I hung them last year, I realized I wanted a little something extra to go under the Lone Star wallhanging.  I had purchased a seasonal sign from Dollar Tree which was okay but that I didn't love.  When I pulled out "Patriotic Parade" this year, I realized that framing it might give me just what I needed to fill that space.  So the plan was hatched to go to a local home decorating store to see if there were any frames of interest.  If I didn't find anything there, I would check at Dollar Tree and see if they might have some decorative boards or canvas I could use to double mount the piece.   Well, I did find many frames at the decorating store that I liked and one in particular hit the mark for me (and unfortunately I forgot to take a picture of it before altering it).

I liked the overall color of the frame but wanted to add little RWB touch to it.  My thought while in the store was that I could paint the small strip of space between the center and the outer frame edge in Red.  Then I could use the Blue ribbon in the finishing kit to add a ruffled edge around the stitched piece that would line the inner edge of the frame.

However, when I got the frame home and tried inserting the piece into it, things took a slightly different turn.  In trying to test out how the piece would need to be centered in the frame,  I was able to just about squeeze it with all the excess fabric left around the stitching into the frame and get the back on --- tight!   It took a bit to get it all in (with no lacing!) and then was in so tight that I really didn't want to take it back out!!  

Okay, so I moved forward with painting the thin space with Red and also decided to rub on (and off) a little bit of white piant to both brighten and further distress the outer edge.  But now how to add some Blue?  I decided to tape off the edges and over the piece and then carefully paint around the inner edge of the center of the frame.  The effect of the Blue is subtle but it's there.  

Lastly the finishing kit had also come with a cute RWB star button which I hadn't remembered until after the piece was already in the frame.  Luckily I was still able to get it sewn on even with the piece still firmly wedged into the frame.  So now it's all done and up and I'm happy with it!  

So for next week I'll try to work on the finish of  "United We Stand".

Progress on Resumed Projects

I had said that I hoped that the stitching I had done on Linen and Evenweave projects during "May-nia" last month would help when I resumed stitching on the two RWB projects I had previously started in 2023.   Results were mixed on that front.  I moved both pieces a little bit forward but it still felt awkward to get back in the swing of working on them.  In both cases I managed to get another letter of each stitched.

I got the "R" added to "Home of the Free"....

,,, and the "O" is in on "The Right to Vote"

In the case of "Vote",  I'm finding this linen harder to work on mostly because it is a softer and looser weave than the Linen in the "Craft Lies" piece I worked on last month.  One thing I find when stitching on certain Evenweave and Linens is that I prefer to hoop those in order to pull the fabric taunt to make the weave easier to see.  This is in complete contrast to when I work with Aida -- with that I can stitch "in hand" comfortably because most of those fabrics are very stiff and the holes are clearly visible.

I'm hoping that as I continue to work on these,  I'll get more comfortable and the stitching will go a little smoother going forward.   

Continued Work on the "May-nia" Pojects   

Speaking of those "May-nia" projects,  I just couldn't give up working on them so continued to stitch on them for this month as well.  Here's the progress made on those:  

"Craft Lies" is now this far!

The "New York Skyline" is a little further along too!


I'm normally more of a monogamous stitcher so it may be a challenge to continue at this pace and keep all these cross stitch balls in the air!  

I hope you'll go back to Kathy's Quilts and see what other crafters had been whipping up during their "Slow Sunday Stitching" sessions this week!