Showing posts with label Lone Star Quilts. Show all posts

Wednesday, October 30, 2024

Quilting Travelogue - Part 1: Piecing, Shop Hop and Cross Stitch

We came back from visiting my MIL in North Carolina last week right into another busy week at home!  My community garden was scheduled to host the annual Fall visit of the Fifth Grade from one of the local elementary schools.  So that meant going in the day before to set up for the visit and back in the next day for their visit.  Then on the following day, staff and volunteers from Bronx Green-up, the community garden outreach program of the New York Botanical Garden came to help us get more of our new garden bed builds built and in place.  We've gotten a lot done since the start of the season back in March!

Then and Now!

After that I needed to recoup from the hard work of the garden days, do some food shopping for the house and follow up with relatives regarding our return which all managed to kill the rest of the week.  

Over the weekend I did pull out a few of the things from the trip and ordered a few things in follow-up to projects or purchases from the trip.  After a few appointments to start off this week,  I am finally, slowly getting back to what I had been working on before I left! 

The trip itself was also busy but very productive.   Here's what I did while we were away:

Piecing

I finished up my "Rainbow Log Cabin Heart" blocks.  These had been started to participate in the Rainbow Scrap Challenge all the way back in 2021.  I had brought with me the blocks sets for the Turquoise, Orange, Red-Purple, Black and Grey blocks that had been on my design wall since the Summer:

Those done, I realized I needed one more block for the layout.  I had considered a number of options but decided to raid my MIL's scrap stash and made a Brown block:

I also came up with an idea for what to do for the alternate squares so will try to work on that now that I am back home.

My "leader/ender" project for this trip was to start my blocks for Bonnie Hunter's "Shoo Fly Shoo".  This was her annual Leader/Ender project from back in 2019 and I got a few done while making the "Heart" blocks.  

I had liked Bonnie's quilt that was made up of "oodles of blocks" but this past weekend I spied a pattern at Quilting Daily  (they are having a $5 sale until 10/31) that I might prefer to do:

I like this one because it would mean making a whole lot less of the "Shoo Fly" blocks!  After finishing up the "Scrap Vortex" top back in March (and the backing for it is one of the post-trip purchases), I really wanted to continue working down my "string scraps stash" and this would give me another opportunity to use some of them.  Additionally, I've always wanted to make one of these string pieced Lone Stars which would then use up even more strings.  So I think I see a project-pivot developing!    

I did do another bit of piecing but will talk about that when I report on the "Long-Arm Quilting" portion of the trip.

Shop Hopping

We almost completed the whole East Central Region of the All Carolina's Shop Hop.  I've still got to mail in my Hop "Passport" so I can be entered in to win some prizes.  My MIL won a fabric bundle last year after submitting hers!  

We didn't find out until right before we went down that Rocky Mount in North Carolina where my MIL lives also got hit by a tornado during the Hurricane Helene storm period.  The damage while intense wherever it did touch down was no where near what was suffered in Ashville in the Western part of the state.  I was sorry to learn that many of the quilt shops in that area, a few of which I had visited in 2022 while camping along the Blue Ridge Parkway, were greatly impacted by the storm.  

Needless to say I picked up a lot of goodies and we went to three stores I hadn't been to before.  One of them was a store recently opened by a woman I discovered when I attended the virtual Summer Quilt Camp back in July.  

My MIL and I both purchased fabrics to make up the bag patterned in this year's issue of the Hop magazine.  

My MIL plans to make hers out of the fabric designed for last year's Hop.  She already had a few pieces in her stash and found additional prints while we shopped this year.  Mine will be made out of the ones for this year which I purchased while Hopping.  However, neither of us will be making them using the fabrics the same way as patterned in the magazine!  We never got around to working on that project so I'll be keeping this packed up for our next trip back down which is tentatively scheduled for February.    

I had also made this pop-up bin to pack in the bag with my Juki sewing machine prior to us leaving on this trip.

When I visit my MIL,  I set up a little sewing station and wanted to have a handy trash can to use when I come.  I also had brought down my Featherweight machine with me because there was talk of us doing a "Sit-'N-Stitch" session with some other quilters.  I had purchased two of the pop up frames so I could also make one while there to put in my Featherweight travel bag.  

When my MIL saw the first one she immediately wanted to also make one and ordered a frame.  I had one red and black Fat Quarter for the second bin and the plan was to find three more plus fabric for the lining while on the Shop Hop.  However, I only found the lining and two more fabrics I liked for the exterior.  Ultimately, I decided that one of them wouldn't be used to make the can.  Instead I purchased enough yardage of that print as well as another one to go with a panel I already have in my stash.  

And hopefully one day this will become another holiday quilt!

It all worked out since we weren't able to do the quilting get together after all.  I brought the extra frame back home and have since ordered yet another a print that I will use for the whole exterior along with the lining purchased on the Hop.  Since this was another of the projects we wound up not having time to work on, it too will travel back down for the next trip.

Edited To Add:  That didn't happen but the new bucket did eventually get made and the details about that are here.  

Cross Stitch   

While away, I also got some cross stitching done.  I had taken a few projects with me both to work on while there and during the drive down and back:

Before and a finished After!

These two also traveled down with me....

One was finished and one moved forward!

In my last post, I mentioned that I had finished my latest "snarky" cross stitch piece and hoped to "fully finish" it when I returned.  The good news is I found a great backing print for it on the Shop Hop!

So I am hoping in the days to come to "fully finish" it and get it hung up!

In the next post I'll discuss the quilting part of the trip and a big project that I moved off of my quilty "To Do" list! 

Saturday, June 29, 2024

Finished or Not Friday: A New Tote and a Wall Hanging UFO Finish

I had to do some late Friday finishing so am a little late joining in with Quilty Girl Alycia for some "Finished or Not Friday" review! 

First off, a new project:  I made another tool tote for travel sewing:  I present my Catch-All Cutie II:

In 2021, I made my first “Catch-All Cutie” for my entry in a blogging challenge on the topic of “Zippered Accessories”.  

I love this pattern and its instructions are straightforward although not intuitive – it's best to just follow them verbatim step by step and in the end is actually very easy to make.  I added a twist to it in the form of a little container with a stuffed pincushion top to hold clips and pins which was inspired by a similar gift made and given to me by my MIL.  

This little tote is ingenious and indispensable when I travel with a sewing machine. I had made the original bag out of a "sewing themed" line of fabrics from a bundle that I had in stash.  With Red, Yellow and Aqua accents, it went well enough with the Red tote bag I had made for my Singer Featherweight sewing machine.  I made a point of putting Aqua and Yellow tools in it to coordinate.  It holds all the basic working tools you need when sewing while away.  Even better, when I fold down the sides, the inside pockets hold all the tools neatly and are easy to grab and put back as you sew.  Did I mention I love this bag?!?

So when when I purchased a new Juki machine last year and wanted to take it down to my MIL's, I also purchased a bag to transport it in.  I wound up getting an aqua colored one and admit I was thrilled my little “Cutie” coordinated with it too.  

However, eventually I found that I didn't like that if I alternated between which machine I carried, I had to make sure I moved the “Cutie” to that bag before traveling.  I have always held to the practice that with the exception of my house keys and ID, if I needed a specific thing/tool/item in more than one bag, I prefer to have multiples of that item and stock each bag I use them in with their own supply.  It only took about three trips (especially one where I started out with the plan to take the Featherweight but then switched and decided to take the Juki) to realize that I'd really like another “Cutie” – this time designed specifically for the Featherweight's tote.  

So I looked around for fabric to do just that.  I would have loved to get more of the Robert Kaufman Singer-themed fabric but that line had gone out of stock years ago.  I had a few scraps left though and knew just where in a new bag I could incorporate them if I could find other fabrics to coordinate with it.  

I lucked up on that when I saw prints from the “She Who Sews” line by J. Wecker Frisch in an Etsy shop one day.  There were Black and White and Red and White sewing themed prints with an “old-timey” look which was perfect for my needs.  I checked the fabric requirements in the pattern and saw that I only needed about a half yard of each to make the bag.  Sweet!  

Eventually I also caught both red and black Lori Holt zippers that were long enough for use on the exterior and interior on sale at Sentimental Stitches.  Later, the same vendor offered a beautiful pair of small black embroidery scissors with gold sunflower motifs on the handles.  The product description said how they reminded one of a Featherweight machine!  I agreed and even though they were on the pricey side, I ordered them anyway to add to the tools for the new bag.  

With an upcoming trip that I planned to take my Featherweight along with me, I got this new bag underway appropriately enough on “National Sewing Machine Day”.  Once again the instructions were straightforward although I had overlooked one important thing when I made the bag the first time:  the instructions do say that using directional fabrics is not recommended!  That had not been a factor for the fabrics used in the first bag but of course both of the fabrics I had purchased this time as well as my Singer scraps were just that, LOL!  

To add to the complications,  I wanted to feature certain motifs from the cover fabric on the sides of the bag.  Had I purchased a yard of each fabric it would have made it easier to finagle.  Fortunately, I was able to figure out how to make it all work by adding an additional seam at the bottom of the bag and get it made up for the trip.  Here it is in action:

I also ordered more tools to coordinate with this bag and they came in on Friday so now it is fully outfitted and ready for the next trip! 


Now for the UFO:  Americana Lone Star

As often happens, I decided to make this one to fill a need:     


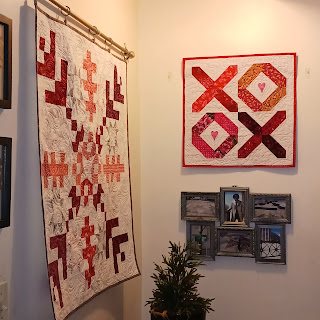
I like to hang Red, White and Blue quilts during the summer or as I call it "the Patriotic Season" from Memorial Day until Labor Day which also includes July 4th.  The wall at the top of our entry stairs is one of my prime display spaces and I had finished the "Hometown USA" wall hanging seen above for it back in 2022.  In the past when I have hung quilts in this spot, I have also made companion wall hangings for the smaller space on the wall next to it like these: 

Pioneer Sampler and Honoring the Journeys

When I put up "Hometown" in 2022,  I had decided it was time to make a companion.  I started by looking through one of American Patchwork and Quilting magazine's compilations for "Patriotic Patterns".  Well it didn't take long to find one I had downloaded years ago and had always wanted to make.  


This was a goodie in that I was more than happy to follow the pattern cues for colors and was pretty sure I had fabrics in my RWB stash to execute it.  Even better, making a Lone Star quilt had always been on my quilt "Bucket List" and even though I have "fabric funded" a few projects, I hadn't made one yet.  

It did not take long to compile a project stash but a read of the pattern presented a new problem:  the pattern was designed to make a wall hanging that finished at 43 inches square but for my space I needed one of about 25 inches.  I figured out that if I made it using smaller blocks (6 inch Leymoyne Star corner blocks rather than the patterned 10 inch), it should fit my space.  However, I wasn't sure what size strips to use to piece the center Lone Star.  I had some estimates but not enough in my project stash to run a test.  

Fortunately at the time I was also embarking on another project that used Shot Cottons and since I had a big stash of those, I tested my block size theories using that stash.  The good news there is that not only did I get that done but I used the test block in the backing for that other project which at the moment is still awaiting quilting:


Strip size settled (1-1/2”), and after strip piecing the first star points I then realized I had to replace the diamonds cut out of the stripe fabric I wanted to use in the star point tips with "fussy cuts".  This was the only way to have the stripe run pointing into the tip the way I wanted.  For the Lemoyne Star corner blocks, I used my trusty Rapid Fire Lemoyne Star ruler and Deb Tucker's techniques to make the 6 inch finished blocks needed.  


Once the top was finished it sat for the usual reason:  how do I want to quilt this?  Then it continued to sit until now for the other usual reason: the season passed and other projects became a priority.  So much for an “I can make this up quick” project!  This year however, when the RWB quilts went out on display again, I decided I really wanted to get this done.  Even better, looking at the top with fresh eyes, I also immediately came up with a very simple quilting plan.

Right before we were due to go on a camping trip for my DH's vacation two weeks ago, I figured I would try to get this layered so I could quilt it as soon as we got back.  To that end, before leaving on our trip, I had hoped to try a new basting technique:  

My MIL had seen some videos on glue basting, tried one of them and liked the results.  While I have done it for bindings, I've never tried it for a whole quilt.  Before we left, I had set up to try to get it done but found that the containers of glue I had on hand wouldn't dispense!  I picked up some new ones and once back did get the basting done.  My opinion:  the method does work but just like when using it for basting a binding, it is important to use a light hand with the glue:  you want thin lines or small dots not glops and slathers!  

I will also note that like so many I've seen described, my center Lone Star block was not exactly “flat” and bubbled a bit in spots.  The condition was helped a bit by giving it a good press.  I also decided to "double batt" it when I layered it.  I was hoping to further minimize how much of the puffiness I would have to try to “quilt out” later.

And yes, these are Franken-batts!

I also had to change machines:  I started quilting this on my vintage Singer 401 because that was what was in the sewing table and I had recently worked on another project that needed its zigzag capabilities.  However, while it started out okay, I started getting a lot thread breakage and I have found that after awhile the walking foot on that machine starts to jam up.  So change of personnel:  I swapped my Juki into the table and got it done!  I was even able to use the new add-on guide unit for the walking foot for that machine.  Good thing I had finally caved and purchased it about a month ago.

So now it's done!


Bound with more of the outer border fabric and up on the wall!

So now the side display space is filled with a permanent entry for when I decorate for this season each year!   Hmm, I had to take down the other frame I normally hang there but me thinks I need to find a little seasonal sign to add under it.  If I don't find one, that need might wind up generating a new cross stitch project, LOL!

That will be it for finishes this month but as always there's a lot on the table for July so hopefully there will be more then.  Now I'm headed back over to Quilty Girl Alycia's to see what everyone else has been up to for "Finished Or Not Friday" this week.  Won't you join me there?

Thursday, June 13, 2024

In Honor of National Sewing Machine Day

 As always a lot going on in the studio this week.  I was pleased to find out that today is National Sewing Machine Day.  

We quilters all appreciate how much the sewing machine contributes to our quilty crafting.  In my last post I had talked about wanting to switch over to my Juki machine but as of right now my Singer 401 is still in my sewing cabinet and the project it had been hard at work on was this one:

I had hoped to have finished these but I hit a snag.  I've put the project in time out for a while and then will try to take another stab at it.

In the meantime, a new project has been started:  

These are blocks for "Apple Crisp", a design that originally appeared in the October 2010 issue of American Patchwork and Quilting magazine and is now available free on their website.  

When I started quilting, "background fabrics" for me were almost always light to dark tans because I worked with a lot of shaded fabrics and Civil War reproductions.  However in recent years as I've embraced more fabrics in the brighter modern palette, I have expanded my use of backgrounds to include more whites and white-based "low volume" prints.  

In the process, the darker tans had been languishing but when I saw this lovely project on the APQ website a few years back, I loved its Fall vibe and thought it a perfect way to cull some of the darker tans from my background stash.  Although I had pulled together the group of tans for it a good while ago, the big push to start it now has to do with an upcoming event. 


 Angela Walters is getting ready to do another of her "Free Motion Quilting Challenge Alongs " this time with the theme of "How Do I Quilt It?".  She will be covering stitching designs on Chevron, Log Cabin, Curved and Snowball blocks.  I have a top ready for the Log Cabin session and realized that this was the perfect time to get "Crisp" started since half of the blocks for it are Snowball blocks.

According to the Challenge schedule, Angela will start showing designs for stitching Snowball blocks on July 16th.  If I can stick to a schedule of stitching "Daily Blocks",  I could have the top ready for quilting by then.  I really look forward to seeing what ideas she has that I might be able to use to quilt this one up quick!

However, having made a schedule for daily stitching I did have one issue:  we are going on vacation next week.  In order to stick to the schedule, that means I'll need to take my stitching with me.  Fortunately that's not a problem as I've already put my trusty Featherweight with the travel stuff:

When I took my Juki on my last two travel trips,  I realized something:  the "Catch-All Cutie" I had made a few years ago and love to bring as part of my "sewing machine travel kit" was colored perfectly to go with the Tutto bag I had purchased for toting my Juki machine.  

Rather than having to move that tote between the two travel bags, I thought about making another one that I can leave in my Featherweight tote bag.  I saw some cute "old-timey" fabric on Etsy and knew I still had a little of the "Singer" fabric leftover from making the Featherweight tote bag:

All of this would be perfect for a new "Cutie"!  Recently I also saw that Gaye at Sentimental Stiches had a pair of scissors that I thought went perfectly with my Featherweight so purchased those too (in the lower left) to go in the new "Cutie" bag.  When we get back, I plan to order one of the Lori Holt Red Olfa Splash rotary cutters to add to it as well.  

So as of right now I've cut all the parts out (although still debating between the handle choices on the lower left) and hope I  can get it made up before we leave on Sunday.      

Because it's that time of the year, the Red, White and Blue quilts have gone up for the "Patriotic Season" (May to September) so I also hope to get back to work on these in the coming weeks:

Two years ago, I got as far as quilting the front and back panels for a cover for a pillow for my living room chair so hopefully this year I can assemble and finally finish it.  I also pieced a Lone Star wall hanging that year but could not decide how to quilt it.  

Looking at a picture of it recently,  I suddenly realized exactly how I want to do that.  When we get back, I'm going to try layering it using a glue basting method from You Tube that my MIL has tried and says works great.  If it works for me too, I can get that quilted and hung up --- hopefully by month's end! 

One of the things that had attracted me to quilting was finding out that all of the construction of a quilt  can be done completely by machine.  Having grown up in the days of Home Ec training in school, I was excited to find a new use for a sewing machine.  Over twenty years on, it is still a thrill to put the "pedal to the metal" and get a quilt out of it, LOL!!  I hope you are having an enjoyable time working with your machine today and if not, pull it out and take it for a celebratory spin!   

Tuesday, September 20, 2022

Summer Recap: July

Inside the Box, Continued 

As noted in my last recap post, I had started on a project that I was setting up to use as quilting practice for an Angela Walters free-motion quilting challenge.  I spent the end of June and the early part of July cutting the parts and then piecing the blocks for the quilt called "Inside the Box".

When it was done, I loved the look!  I've always liked the "iridescence" of  Kaffe Fassette shot cottons.  I also have some Pepper Cory shot cottons as part of my stash too.  The "peppered cottons" are a little heavier and closer in weight to traditional quilt cottons while the Kaffe "Shots" are a very light hand almost like Voile.  That led me to think about a radical (for my budget) idea:  what kind of fabric matched the Kaffe shots in having a light silky hand?  Why Liberty of London cotton of course!   

Back in April when visiting my local Joann's, I saw that they are now carrying Liberty prints!  In my May recap post, I noted that I am participating in (well, more like following) the Quiltfolk "Patchwork & Prose" BOM of which one of the hosts is Jenni Smith.  Jenni wrote the book "Quilting with Liberty Fabrics" and often uses them in her projects.   I thought it would be a cool splurge to get some and use it for the backing.  

While expensive, Liberty prints are also wider than quilting cottons (56" - 60" wide) which was perfect for this lap quilt since it meant I could suffice with just two yards.  I had an idea of what type and color print I'd like but my Joann's didn't have anything along the line of what I had in mind.  That worked out great because I happened to check Fabric.com (**See Note below) and they did have a couple of prints I liked and were having a sale on some of them the week I looked!  So I was able to pick up what I needed for about $10 cheaper per yard (still a splurge though!). 

Another thing I had done with the "Shots" was to use them to make a test star point for the Americana Lone Star wall hanging I started in June.  I figured I would continue to cut strips of the shot cottons, make up a full block and use it in the back of the quilt.  It took a while to do that but it got done.  So not only is the backing done for this project, it is also Lone Star project #2!!

Already thinking about the quilting, I decided that rather than trying to find one color of thread that will work across the whole quilt as I usually do, I want to quilt this one using the color of each block.  So I decided to also try a new notion:  Angela Walters uses Glide thread on most of her quilts and the shiny polyester seemed a good fit for the "Shots" and "Liberty" cottons.  So I laid in a stash of colors to use to quilt this project.  

The two small spools on the right are Sulky thread I already had on hand.

What I wasn't as sure about was what batting to use.  So I sat on that one until this month.  Luckily, the Quilt Muses always look out for me!  Two weeks ago Connecting Threads was having a sale on batting so I decided to splurge again:  I've long wanted to try out Hobbs Cotton and Wool batting so ordered some to try with this project and which came in at the end of last week.

**10/30/22 Edited To Add:  As of 10/20/22 Fabric.com has gone out of business.

"Seeds of Glory" Pillow Cover

As noted in my June Recap post, I had two spots I felt needed something to complete the RWB summer decorating.  The second spot was our living room chair.  I continued to use the Blue and White "Indigo Weave" quilt on the chair in the living room --- a carry over from the Blue &White Christmas and subsequent Winter decorating schemes I had used. 

I love my "Indigo Weave" quilt but for a proper patriotic display, it could use an injection of red in that spot to fit the Summer season!  I had made a round pillow cover back when I had one of my CW quilts on the same chair.  

For that I used an APQ pattern called" Fussy Cut Flowers Pillow"

So I decided to make another cover for that pillow.  I wanted to find a fabric that would add red but also bridge the blue in the quilt I already had.  I looked around for something that might work and discovered Stacy West's “Seeds of Glory” line for Riley Blake Fabrics.  The line featured a hexie cheater print which thrilled me when I saw it!   Hexies have been another obsession for me ever since I was hired to teach a class on making them back in 2020 (right before the “official” start of the pandemic).  

The cheater-style print presented a perfect opportunity to make an easy cover since using this as the top wouldn't require any piecing.  Quilting it by stitching along the printed “seam” lines would be easy too!  However, I also had to think about the pillow's backing.  When I had looked around for this fabric, I  decided to also pick up a mini charm pack of the same line and make a simple back of pieced squares.  I figured that would allow me to use either side of the pillow as a front!    The only additional thing I'd need was fabric to go around the circumference of the 2” inch thick pillow between the front and the back.  I eventually found the perfect stripe that worked for that in my CW stash.   

That stripe fabric has really been a work horse having been used in a couple of my CW quilts:

Underground Railroad Quilt and one of three Civil War Mini Quilts

I did get the backing pieced but got stalled thinking about exactly how to attach the band and install the zipper and whether I'd want or needed to add piping or a flange around the pillow edge as had been done on the CW pillow.  So with other pressing things to work on, I let this sit.  So unfortunately, like with the wall hanging in June, this too did not actually get to be displayed for the summer!   

So much for July!  The next post will wrap up the Summer doings with a report on things I worked on in August.