Showing posts with label Design Wall. Show all posts

Tuesday, July 29, 2025

To Do Tuesday: End of the Month Plans

As July draws to a close, my design wall is full and yet there's still a few more things to try to get done as this month ends!  So with that I'll join in with the others over at Carol's Quilt Schmilt for some "To Do Tuesday" planning for the rest of the week!

Alaska and Other Kaleidoscope Block Designs - Month 1

I'm posting an update on yet another project undertaken this month!  Despite a lot of focus on "Christmas in July" cross stitching and then participating in a Blog Hop, I also managed to squeeze in a little time to finally get this long desired project underway!  

My original plan was to focus on starting work on the Red, White & Blue version of Edyta Sitar's "Alaska" design during "Red, White & June".  However since I didn't get that done,  I've decided that now I will do this project as another of my self-styled "Block of the Months".  I will note this hasn't gone all that great in the past but you know the old saying:  "If at first you don't succeed, try, try again"!  

I'm pleased to say the blocks (on the upper right) for the first month are all done!  I am using Marti Michell's Kaleido-rulers to cut the pieces for the blocks.  As I've pulled out all the information I had gathered for this project, I am also now taking a look at other Kaleidoscope designs.  

In her book "Kaleidoscope ABCs", Marti explores many different designs for Kaleidoscope blocks.  

Since the blocks I made this month are the simple ones with just plain triangles, I picked another design using the same type of block to try making.  Those are the small scrappy Kaleidoscope blocks under the "Alaska" blocks.  I'm doing them as inspired by this design in Marti's book:

I've said it before and I'll say it again:  I am ALWAYS looking for blocks or designs that will use up scraps!  I had decided to make these 5 inch finished as the strips needed for cutting the triangles is 3 inches and I already have a lot of scraps of that size in my Scrap Users box.

Initially, I thought I could then have the option of teaming the blocks with my other overflowing box of scraps:  Charm Squares (5" cut) which would give me more design options.   Unfortunately I had to check myself when I remembered that a five inch finished block means unfinished it's 5-1/2" so actually won't work with the Charm Squares after all.  

No matter, I'd still love the quilt of just the scrappy blocks.  Since I also have a big box of scraps sitting in my space that I need to process,  now I know to also try cutting some 5-1/2" squares that I can try teaming with these blocks.  So this will be another ongoing scrap project.       

A Long Overdue Flimsie Is Now Also Done

While piecing the "Alaska" blocks (as well as the project I made for the Blog Hop),  I was also able to finally put together the top for my "Gathering A Garden" quilt project that has been laid out on my design wall since May --- that's it on the left in the picture at the start of the post.  I used piecing the rows of blocks together for that top as a "leader/ender" for the Kaleidoscope blocks and the Blog Hop project piecing.  I am glad to finally move forward on this project.  I had worked up this design all the way back in 2010 and now can finally get around to completing it.

Plans for the rest of the week:

1.  Recently I spoke to my MIL and found out that the QOV kit to make for donation that I took when I joined the guild back in February is due back to the guild in August!  Uh oh!  

This is another project I had thought I'd work on during "Red, White & June" but didn't so now it's crunch time!  Fortunately it looks to be pretty easy so I'm hoping I can get it made up over the next two or three days so I can get it in the mail ASAP! 

2.  Before we went camping over the July 4th weekend,  I made up another of the Fat Quarter Gypsy - Sew Organized Design "Stacking Pop-up" buckets to use in our tent as a small garbage bag holder.  It's the second one of these types of bucket that I have made, the first one was for my Juki machine's travel kit.  

I have another set of fabrics to make one for my Featherweight's travel kit.  They are pretty easy to make so I think I'll try to get that done this week too. 

3.  Lastly, I need to cut out the next set of "Alaska" blocks as I really want to try to stay on track with this project.

That's it for me!  Once again trying to see if a short list means I can actually get what I plan done!  If you want to see what is populating other crafters "To Do" lists this week, head on over to Carol's Quilt Schmilt for the "To Do Tuesday" linkup and check out all of the fun things that will be going on in crafting spaces this week! 

Tuesday, January 23, 2024

To Do Tuesday: From Cross Stitch Back To Quilting

Checking in for another "To Do Tuesday" with the crafters who gather over at Quilt Schmilt!

Diverted by Cross Stitch Finishes

So I mentioned on last week's list that I had finished stitching a Valentine's cross stitch project and purchased the finishing supplies.  Well now that project and another cross stitch piece for Thanksgiving are "fully finished" as the cross stitchers say!

"My Heart Is Yours" and "Give Thanks"

So while the good news is that these two are now done (and way early for their respective holidays for a change), the bad news is that meant I didn't work on anything else.  Well, during the day that is.  In the evenings I've continued with my next cross stitch project: the "Year of the Dragon" piece.

Now that the project slate is a little clearer, maybe it will allow me to focus on some quilt projects!

Now Back To Quilting

So first off, I will be finally getting back to the blocks and finishing one of the tops for the two raffle quilts I need to get done by April.

I still have to stitch down the edges of the applique motifs for the blocks already prepared.  I had debated about adding flowers to more of the baskets but looking at the layout, I may try to make a few motifs to go in the half rectangles on some of the row ends instead.  

Since I have to stitch down the motifs for this one, I'll also finish stitching down the motifs for the applique blocks for the second dark quilt as well.  However, putting together that second top will have to wait until this one is done. 

From the UFO list, I was also supposed to work on my Fig Tree BOM project using various lines of their fabrics.  Funny thing though: when I pulled out the fabrics I had purchased on the Shop Hop back in October and looked through them to catalog what lines they were from, I realized I had made a mistake!

Unfortunately, these are not all Fig Tree!

The fabrics on the left are definitely Fig Tree and all but one is from the "Strawberries and Rhubarb" line.  The ones on the right are from another designer entirely:  "30's Playtime" by Chloe's Closet which I believe is a "basics" 30's reproduction line from MODA.  They had all been sitting in the same area in the shop so I guess this means I don't know the Fig Tree "look" as well as I thought, LOL!  Fortunately, I do have a stash of 30's reproductions that these will fit in nicely with anyway.

I did take one of the new Fig Tree prints and put it with two others already in stash to use in the next block.

I already had the deep burgundy print picked out for the trunk of the tree block and I've been using the "Fig Tree Cream" solid on the left as a background in all the blocks, interspersing it with other light prints depending on the block design.  Joanna Figureoa did this with the book's cover quilt which seemed to make the blocks "float" in the layout.  I'm hoping to achieve the same effect with mine.

That's Not to Say New Stuff Doesn't Come In....   

Another reason I got so off track this past week is that the "squirrels" have been coming in hot and heavy!  I have two new things I hope to begin working on, the first of which can be stitched as a leader/ender as I put the raffle quilt top together:

1.  Alycia of the Quilty Girl Alycia blog and who hosts "Finished Or Not Friday" has a new mystery quilt being released.  It starts off with Log Cabin blocks which have been an obsession of mine for the last couple of years.  Alycia's designs these to encourage people to make Quilts of Valor tops which is something I still want to do in my community so I just had to join in.

The strips for the first blocks are already prepped.  Well, the lights came out of the box where I put scraps for making LC blocks so they were already cut to size.  I had to mine the red strips from the stash of fabrics I have leftover from making red and white quilts for the holidays in 2022.  

2.  Pat Sloan's Breakfast Club is one of her current mystery sew alongs.  I've always wanted to make a quilty wall hanging for the kitchen.  When she started it, I liked the first block and saw I had a place to display this one with one caveat:  I'll be making mine a mini!  This will be an applique sampler and since I had really liked the fabric line she was using and found a good deal on it, I scooped it up.

I will also have to pull bits from my stash for some of the food motifs.  This is a "block a week" sew along so I hope I can both space out the work and keep up.  At least for right now, this is another one where I can stitch down the motifs along with the raffle quilt blocks.  

But Wait There's More!

Added to all of that there is also a lot of fun stuff I'm following.  While I was tempted to join in, I think I'll just watch these from the side lines.  Are you checking any of these out?    

Project Quilting - Season 15:  Challenge 1 has already been completed and the winners chosen.  Challenge #2 was just announced yesterday.  Will you be joining in?

Stay At Home Round Robin (SAHRR):  I've followed this one for a few years now and hope to do it one day.  I even have an orphan block I could have used but it's applique so I wasn't confident about being able to interpret pieced rounds with it.  I know I should have just dove in but with so many other things on my plate I think it's better to just watch and learn again this time.  The first Round has been announced on this one so go check it out if you think you might want to participate!

It sounds like a lot but with some focus it should be doable.  Or is that "famous last words"?!?  In any event, I'll head back over to Quilt Schmilt and see what everyone else is up to this week!

Friday, January 19, 2024

Finished Or Not Friday: My Travels Down The "Old Tobacco Road" Are Now Complete!

It's that time of the week when we all gather at Quilty Girl Alycia's to see what everyone has worked on this week:

New Year, new button!!

Today, I am posting my second Bonnie Hunter Quiltville mystery finish in as many months.  I had hoped to get it done before the end of the most recent mystery season but as always, better late than never!  BTW, hopefully you have checked out the reveal of Bonnie Hunter's latest mystery, "Indigo Way" before she removes it from her blog.

With all the recent bad weather it's hard to get good full shots while staying inside.

This is "Old Tobacco Road" Bonnie's 2008 mystery.  If you like this one, it is still up on her website on her "Free Patterns" tab.  I had liked this design from the beginning but it took me until 2018 to get myself together enough to start on it.  This is also another mystery quilt that is true to Bonnie's esthetic where all the blocks for it were made from scraps.  

When I originally set out to make this, it started as a "travel kit".  The year I starting pulling fabric together for it, I thought I would be traveling to help a friend during an illness.  Fortunately my friend was able to get through her treatments without needing the extra help.  I still wound up starting this while traveling -- this time in October of 2019 while visiting my MIL and her husband who was ailing at the time.

From fabric picks to travel kit!

It is safe to say that in times of stress, quilting is a haven!  Later, I continued work on this as my mystery season project during Bonnie's debut of the "Frolic" mystery that year.  For that mystery, they had to make Pinwheels and Flying Geese and combine them into blocks so I was able to do the same for this one!

After "Folic" was revealed, I started laying out the blocks on my design wall to start putting together this top.  That was in February of 2020.  

Well, we all know what happened after that!  I did finish piecing together the center in the early days of March but after that it languished in favor of working on all the great pandemic projects and quilt alongs that were offered to keep us occupied during the quarantine.  

So it wasn't until January of 2021 that I finally put the borders on it with some debate about whether to just end the front with the Flying Geese border.  I saw many OTR's finished that way that looked really good.  However then I saw a pretty fabric I liked and that swayed my decision to go with the additional outer fabric border just as Bonnie had.   

Second border or not?  I chose Yes!

Another year went by before I worked up the backing.  That was because this project was pulled as my UFO Challenge number in March 2022 and I was also piecing another scrappy backing at the time (for another Bonnie quilt actually). 

And some leftover Flying Geese were just enough to help fill out the back.

Well, then it "simmered" for yet another year after which I was determined to get try to get it done during 2023's "Indigo Way" mystery season.  However, I was also working on finishing up "Roll, Roll, Cotton Boll", another Bonnie project that was just as old and since it still needed piecing, took priority.  I even ran out of basting pins so had to wait until "Boll" was finished being quilted in order to layer this one!   

Once "Boll" was done, I spent the next two weeks quilting this and then thought that last week, I'd get this bound and completed.  Except, I pulled out the project box only to realize that in all this time, I had not made any plans for the binding!  Fortunately I keep a journal while making my projects so in those notes, I saw that the yardage I had purchased for the front outer border and part of the backing had been split and put with another project to use for its backing as well.  At first I was reluctant to use that fabric since the other project is on my UFO Challenge list for this year so I might need that backing at some point.  

I then thought I had enough excess backing around the edges of this that I could instead finish the edges by turning the backing to the front.  I have done it before but I guess I needed to have taken some notes on that because it did not go well this time.  Needless to say, the backing from the other project then got immediately sacrificed in favor of cutting binding strips so this could get done now, LOL!!  The good news is I only took about a half yard from it so there still should be plenty to finish the backing for the other project when the time comes.

So lessons learned:  when you have a long-term project, take good notes and have a checklist of your supplies from the start!  Now that this is finally in the can, I can hop back over to Alycia's and check out what everyone else has finished up during this cold and stormy week!

Wednesday, April 5, 2023

Work(s) In Progress Wednesday

Raffle Quilts:  The blocks for the pastel version are done and the layout is in process.

I need to play around with the layout and balance the color placement.  I also think I will make a few flower applique motifs to add to some of the baskets.  

Now I can also start back on making the basket blocks for the (original) butterfly version.

APQ Scrap Happy:  As of yesterday, the blocks have all been sewn into columns


The wall is so full, I had to overlap the last two columns in order to fit them all on my design wall.

They are now down off the wall and sitting on a chair waiting to be stitched to each other.  Going forward, I will sew these looong columns together as a leader/ender.  With all the seams to pin, it may take awhile though! 

Accuquilt and AQS Log Cabin QAL:   Today, Accuquilt and AQS are starting a quilt along  for Accuquilt's Scrappy Log Cabin pattern (the introduction is on their blog here and Part 1 of the QAL is here).  This is great news for me as I had started one back in 2021 for the Rainbow Scrap Challenge.   So for once, I am ahead of the game!

I figure this is a good time to play some catch-up.  They discussed die cutting the fabric today, but my strips are already cut and I have a few blocks made already.  I figure when the "Scrap Happy" columns are done, this will take its place as the primary leader/ender.  

As usual, so much to do, so little time......

Tuesday, December 13, 2022

Still Working on Christmas Sewing Deadlines

I've been working steadily to try to get close to finishing projects for Christmas decorating.   As November came to an end, that meant finally getting the borders on the Fat Quarter Shop Jelly Snowflake top.   

This is a free mystery quilt first offered by them in 2020.

As noted when I started this one, because I needed a smaller quilt, my blocks are made from 2" cut strips rather than Jelly Roll (2-1/2" cut) strips. Once I adjusted all the pattern cutting measurements, the block construction was easy to do.  The center block is patterned as a plain background square but if you look at some of the quilts and tops made from this pattern (including the one I saw at the VA Quilt Museum), many of them have interesting pieced centers so of course I wanted in on that too!  It took me a while to come up with something simple that I liked but eventually I did.  

Top done, I then took some of the scrappy leftover bits and pieced them into blocks or strips, added in the extra color option and test blocks, made a label area and filled around all of it with what I had left of the background fabric to create my third scrappy backing this year!  

I also needed to get back to one of my other holiday quilt projects called "Christmas Ribbons".  I adapted Sally Schneider's  “Painless Borders” design so I could cut out most of it using my Accuquilt dies. 


 As you can see, I needed to make four different pieced blocks for it.  I started making my Log Cabin die version of the "Tree" blocks for the center of the top back in September.  

Then before making the other blocks, I wanted to cut and lay out the side setting triangles.  Because the fabric I'm using for those is somewhat directional, I needed to cut across both the horizontal and along the lengthwise grain to get the birds to "stand" the way I wanted around the quilt.

Once that was done, I made the the pieced "Ribbon" blocks that create the border around the top, finishing those up two weeks ago.  After that I made the remaining Sawtooth Star blocks using the same red fabrics I used to make the tree "branches".  I finished making those last week.  I didn't get to do much sewing over the weekend (and spent what little time I did working on string blocks) so yesterday and today was the final push on this and now the top is finally done!  

I will admit that as each layer of the design was added, I got more and more excited about the project!  However, at one point, I stepped back and realized it was looking different than the pattern I was working from.  Granted I had made some changes to the blocks as designed but it took awhile to realize what was different:  the tree blocks in the original pattern were pieced with a sashing around them which made them "float" when placed next to the Star blocks.  For some reason, I completely overlooked that when I redesigned the Tree blocks to make it more Go! die friendly.

For a minute I thought I was going to have to re-do all the tree blocks!  Needless to say, this late in the game I really didn't want to do that.  However, the longer I looked at it I thought yes, the blocks could use a little breathing room but that also hadn't bothered me in all the time I spent working up the adaptation in EQ8.  I went back and forth a few times and in the end decided that I didn't hate it so will leave it as is.  That settled, the good news is that I already have the backing, binding and batting too.

The two on the left are for the backing and are my favorite for winter quilt backs: flannels!  I'm going to do this backing like I did for last year's "Indigo Weave" quilt except this time the plaid WOF center will have the solid red on each side.  

I have two extra star blocks that I will piece into one of the side strips.  I will cut a strip of the background fabric used in the top and piece it in between the two stars and use that area for writing in the label.

If I am going to be able to start putting out the quilts for the season, I have to get it in gear!  A big part of that is to also think about how I will quilt all of these projects.


This little flimsie finished back in September also still needs to be quilted!

As noted last week, I had watched Holly Ann of String and Story present her  Quilt Plan Challenge workshops.  

This was just what I needed!  I got some good tips from the workshops and will use them to get me in the right frame of mind to work on the quilting.  Some of the motifs she used on her own quilts gave me some specific ideas on how to approach my own projects so I am for once excited to do this.  

I still have two more projects planned but we'll see if I am able to get them knocked out.  After all, Christmas is almost here!!

Thursday, November 17, 2022

Shop Hop Tops!

It took longer than expected (as usual) but I finally finished up the tops for a few quilts using fabrics purchased on the recent Shop Hop:

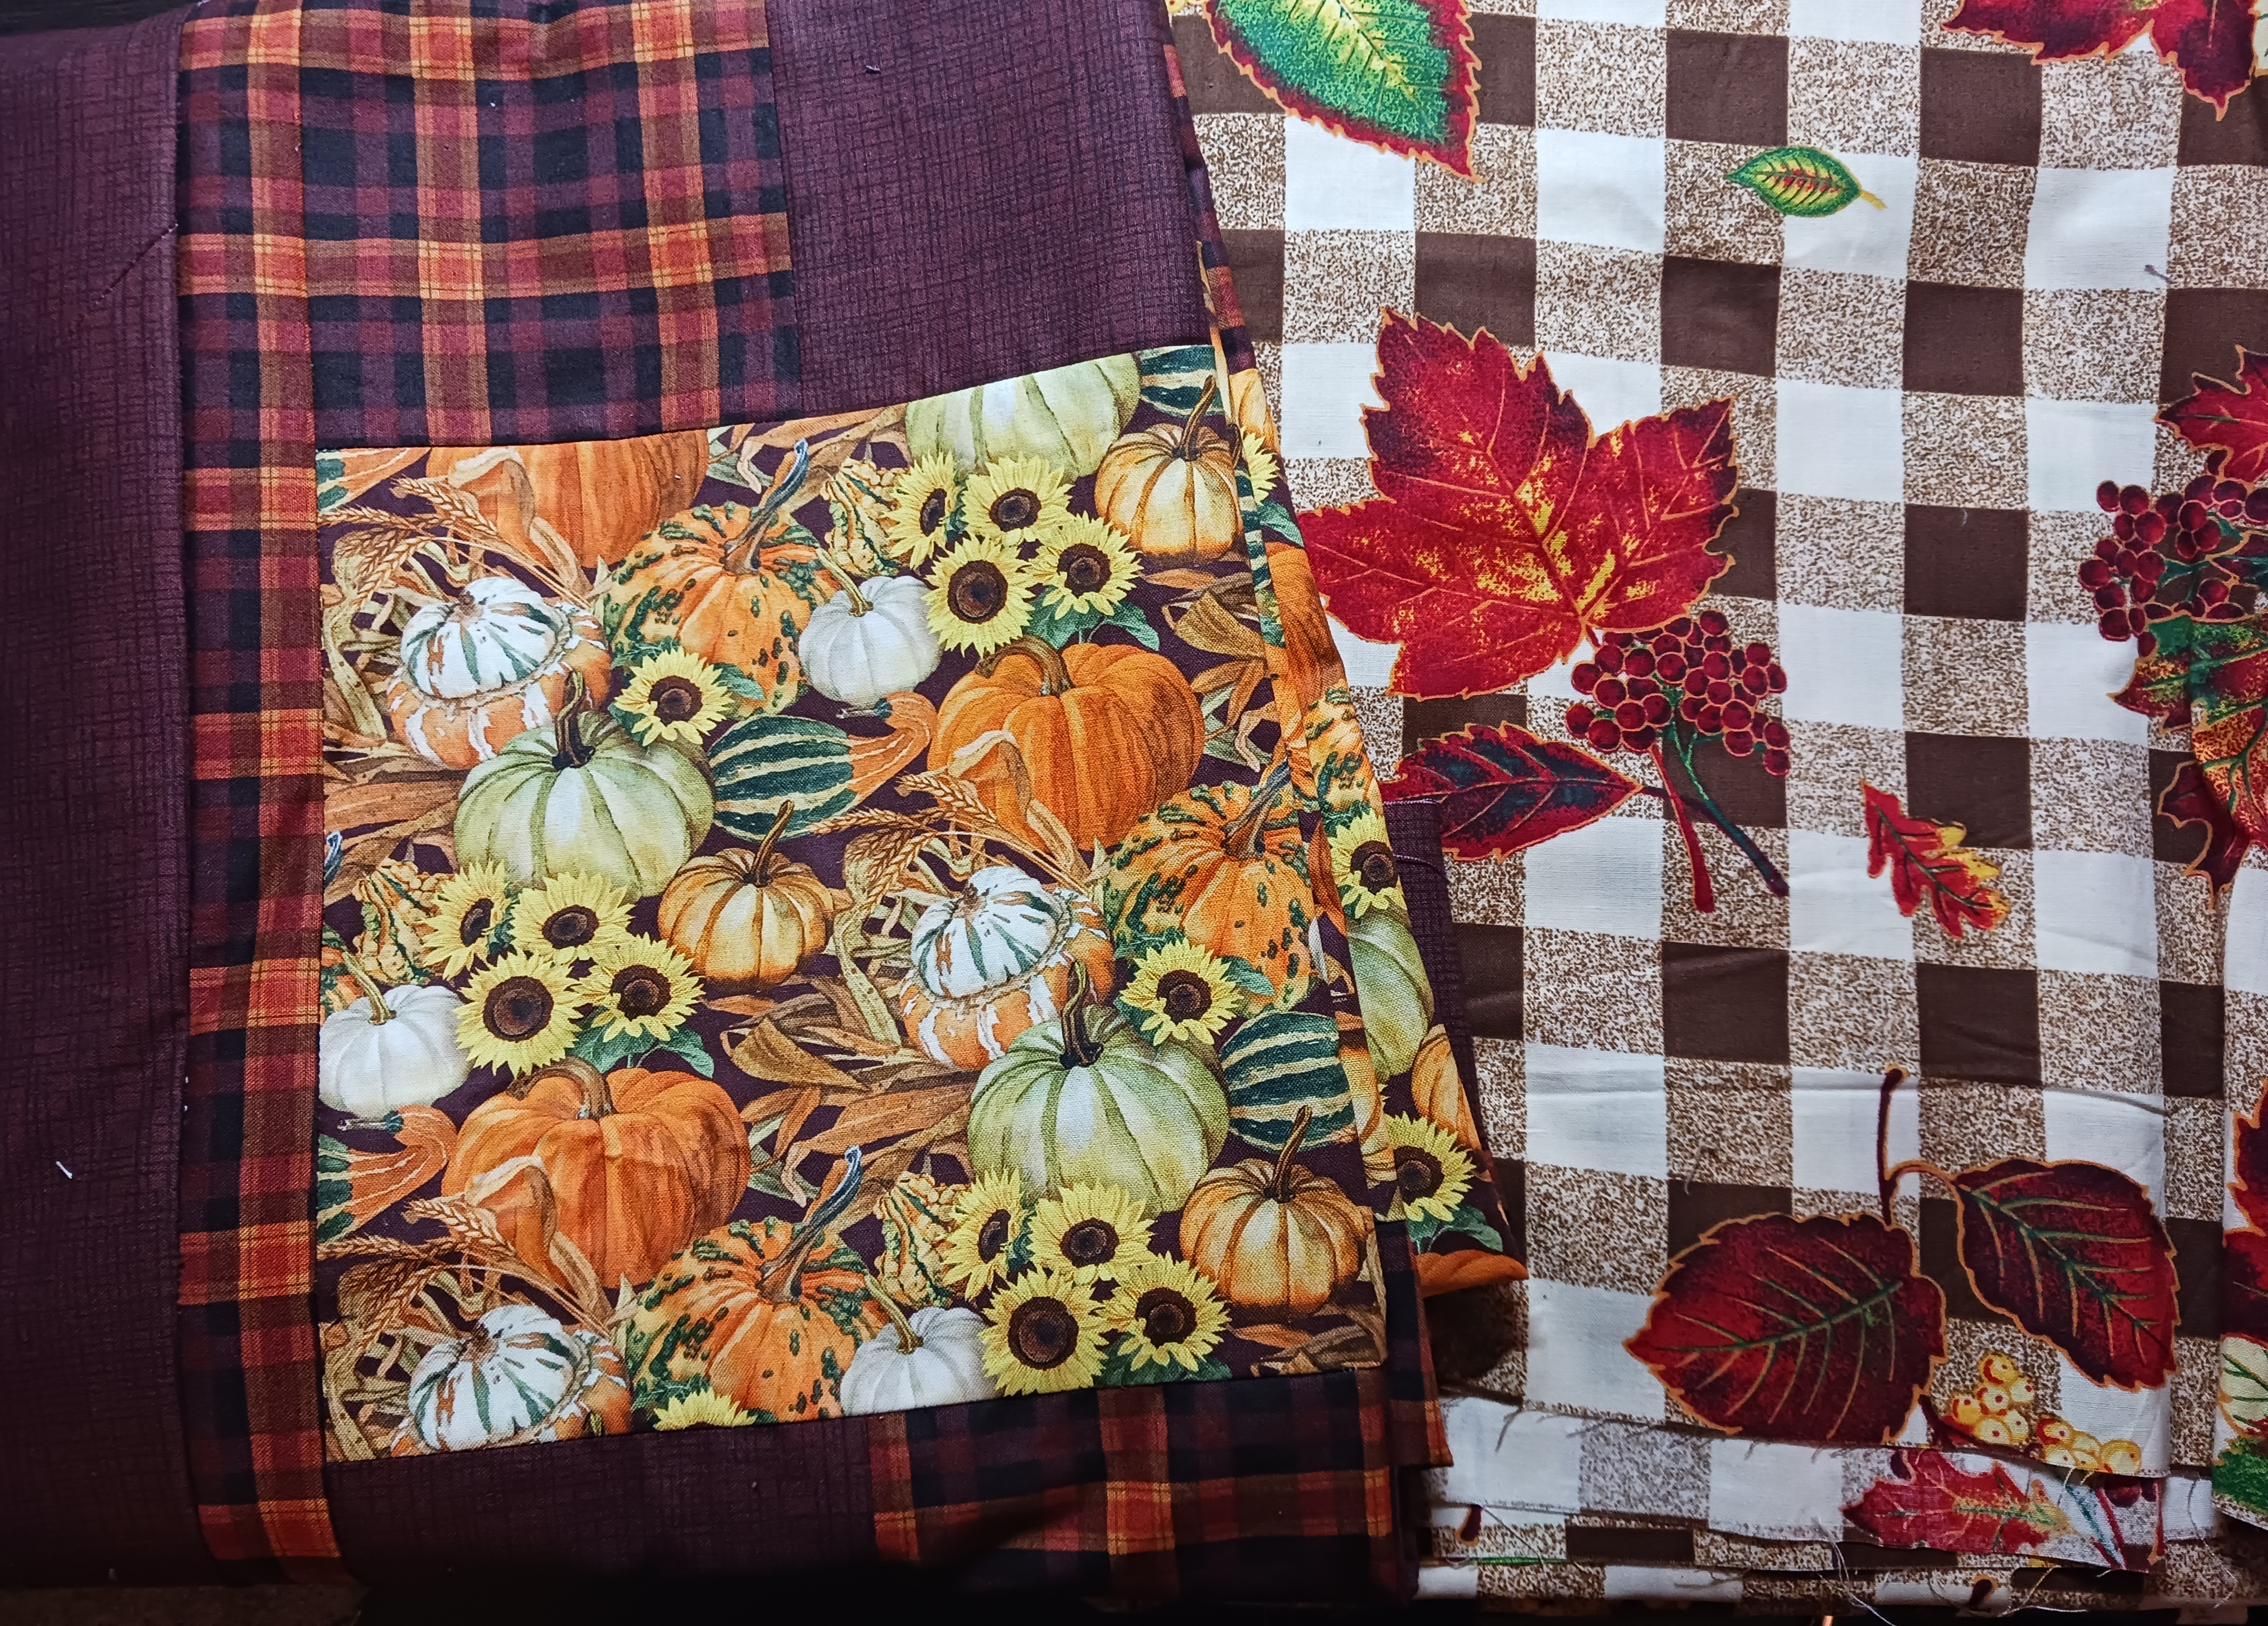
Fall 3 Yard Quilt

Like many, I've loved the concept behind Donna Robertson's 3 Yard Quilt designs.  I also like watching their videos and seeing what fabrics they combine and how they use them in the quilt designs.  So one of my favorite stops in the All Carolinas Shop Hop over the last two years is the Quilt Lizzy store in Wake Forest, NC.  I've been able to score some really nice kits there and just like when you buy kits from Donna's Fabric Cafe, you also can pick a pattern for free to make it up in!

Prior to our trip, I had seen a pretty Fall quilt in one of the older Fabric Cafe videos and wondered if I might find a kit for one on the Hop.  Luckily that did happen so among the other goodies I found on the Hop, I scored one!  

Kit is bottom left

Most of the 3 Yard Quilt designs are pretty simple so I hoped I'd get it made up quick.  Of course, leave it to me to complicate that plan by wanting to also make the other two "easy" quilts from the Hop right along with it!  Still haven't quite learned my lesson about how taking on multiple projects adds more time to the making of each project.  I admit though, I also find it fun to "leader/ender" projects so that each sewing session feels like I am "cheating" by getting something done on multiple projects in one sitting at the machine.  Eventually though, I did get it done!

Fabrics are from the "Autumn Afternoon" line by Lynnea Washburn for Northcott

This is Fabric Cafe's "Checkmate" design (the link is to the printed pattern but it is also available as a digital).  I've seen it used many times in the Fabric Cafe videos (like hereherehere and here) although it was not one that I was particularly drawn to before.  However, I thought that for this fabric combination it was a perfect choice --- at least of all the patterns that were available from the store display.  This is a good one if you have a pretty "I don't want to cut it up" feature print.

What's also good news is that I already have the backing for it ready too!  While staying at my MIL's (our annual vacation mini quilt retreat) she asked me to go through her scraps and a bunch of fabrics she had picked up at fabric swaps at her guild meetings.  The plaid print was in that last bunch and it was perfect for this quilt!  There was also more than enough left for use in a future quilt.  

Edited To Add:  You can see the finished quilt in this post.

Dragons - The Ancients

As I said in my Shop Hop post, my DH and I had seen a quilt made up using Jason Yenter's "Dragons" fabric line and pattern for In the Beginning Fabrics.  We saw the gorgeous red version in person and having watched the first season of HBO's "House of the Dragons" loved the idea of having a dragon quilt to snuggle under when the next season comes out.  

The original "Dragons" line came out in red and blue colorways but the store we had shopped at didn't have any more of those fabrics.  So when I searched around, I discovered that there was also a green colorway called "Dragons - The Ancients" that had a different set of panel prints as well.  I truly lucked up when on another stop on the Hop, I found one of the green center panels in the sale section at the Keepsake Quilting/Pineapple Fabrics Outlet store.  With that in hand, the hunt was on to find out if the other fabrics from that colorway were still available.

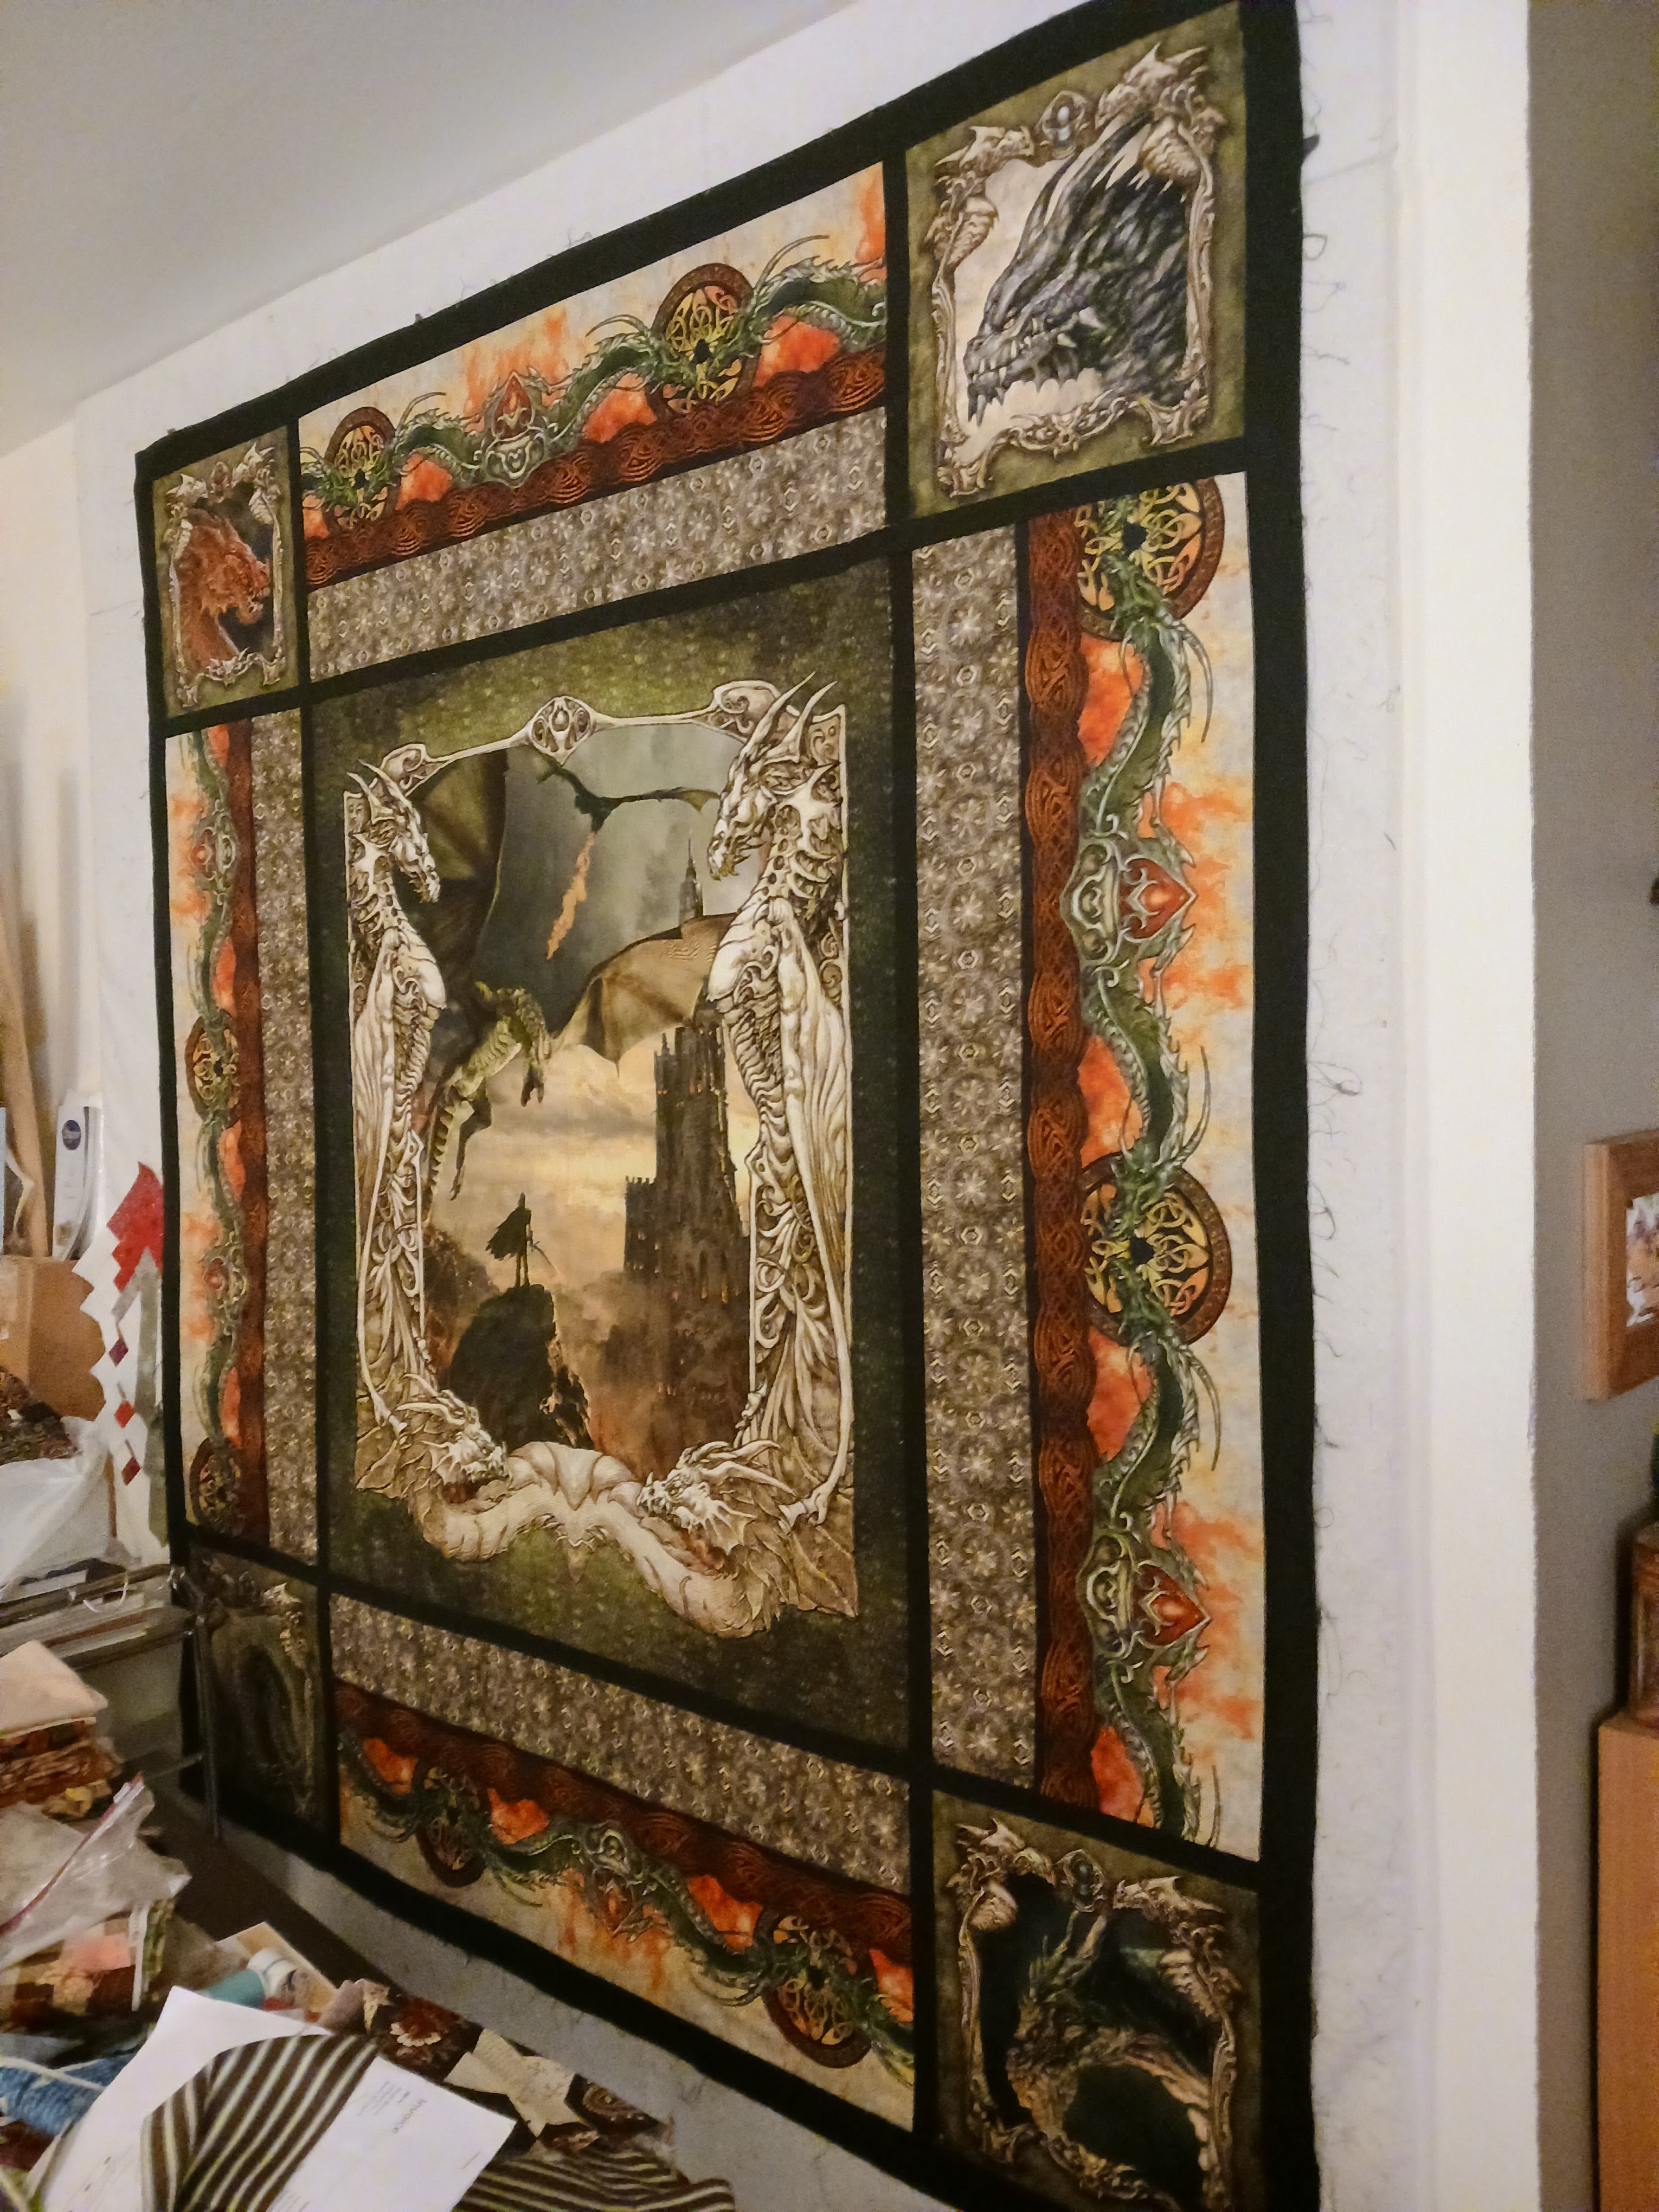
I did find the fabrics but I also found a free pattern at eQuilter that used them.  Their quilt design was smaller and much simpler than the one we saw which also meant a smaller commitment to the amount of fabric needed and the effort to make the quilt.  Since the simpler design still made a great looking quilt, I was more than happy to settle for a cheaper, easier quilt!  So an Etsy shopping spree followed to get the supplies I needed.  However, I will say that despite how much easier it was, it still took me longer to get it made up than I expected!  That said, here's my finished top:

Once the top was done, I began to think about what I'd back it with.  Ironically, what immediately occurred to me was to recreate the general outlines of the front on the back.  I had purchased some additional  fabrics from the line with the intention of making bowl cozies for us and a friend who is also a fan of the show.  Those fabrics helped inspire the backing idea and so it was back to Etsy for more of the line!  

Backing fabrics on the left, finished top and binding on the right!

The backing fabrics just came in yesterday and right now I'm thinking of making the backing in a sort of "quilt-as-you-go (or is it "quilting in sections"?) manner in order to make sure that the front and back sections line up perfectly.  Work on that will commence when I'm ready to actually quilt this thing which may not happen until early next year.

Fat Quarter Shop Jelly Snowflake

This year my Christmas decorating scheme is Red and White and I've been lining up projects for that.  One that I came upon was the FQS's Jelly Snowflake free pattern series.  I saw this when I looked at the patterns they offered for Jelly Roll Day back in September.  When I looked at their blog post on the "Snowflake" sew along (which originally ran in 2020), it was amazing how varied were the color schemes used by each designer they had invited to participate.  Of course, I was particularly drawn to a red and gray version made by one of the FQS staff but I am already making a R&W quilt in that color scheme.  I was also pleased to get to see a blue and white version in person while returning from our trip and stopping in at the Virginia Quilt Museum.

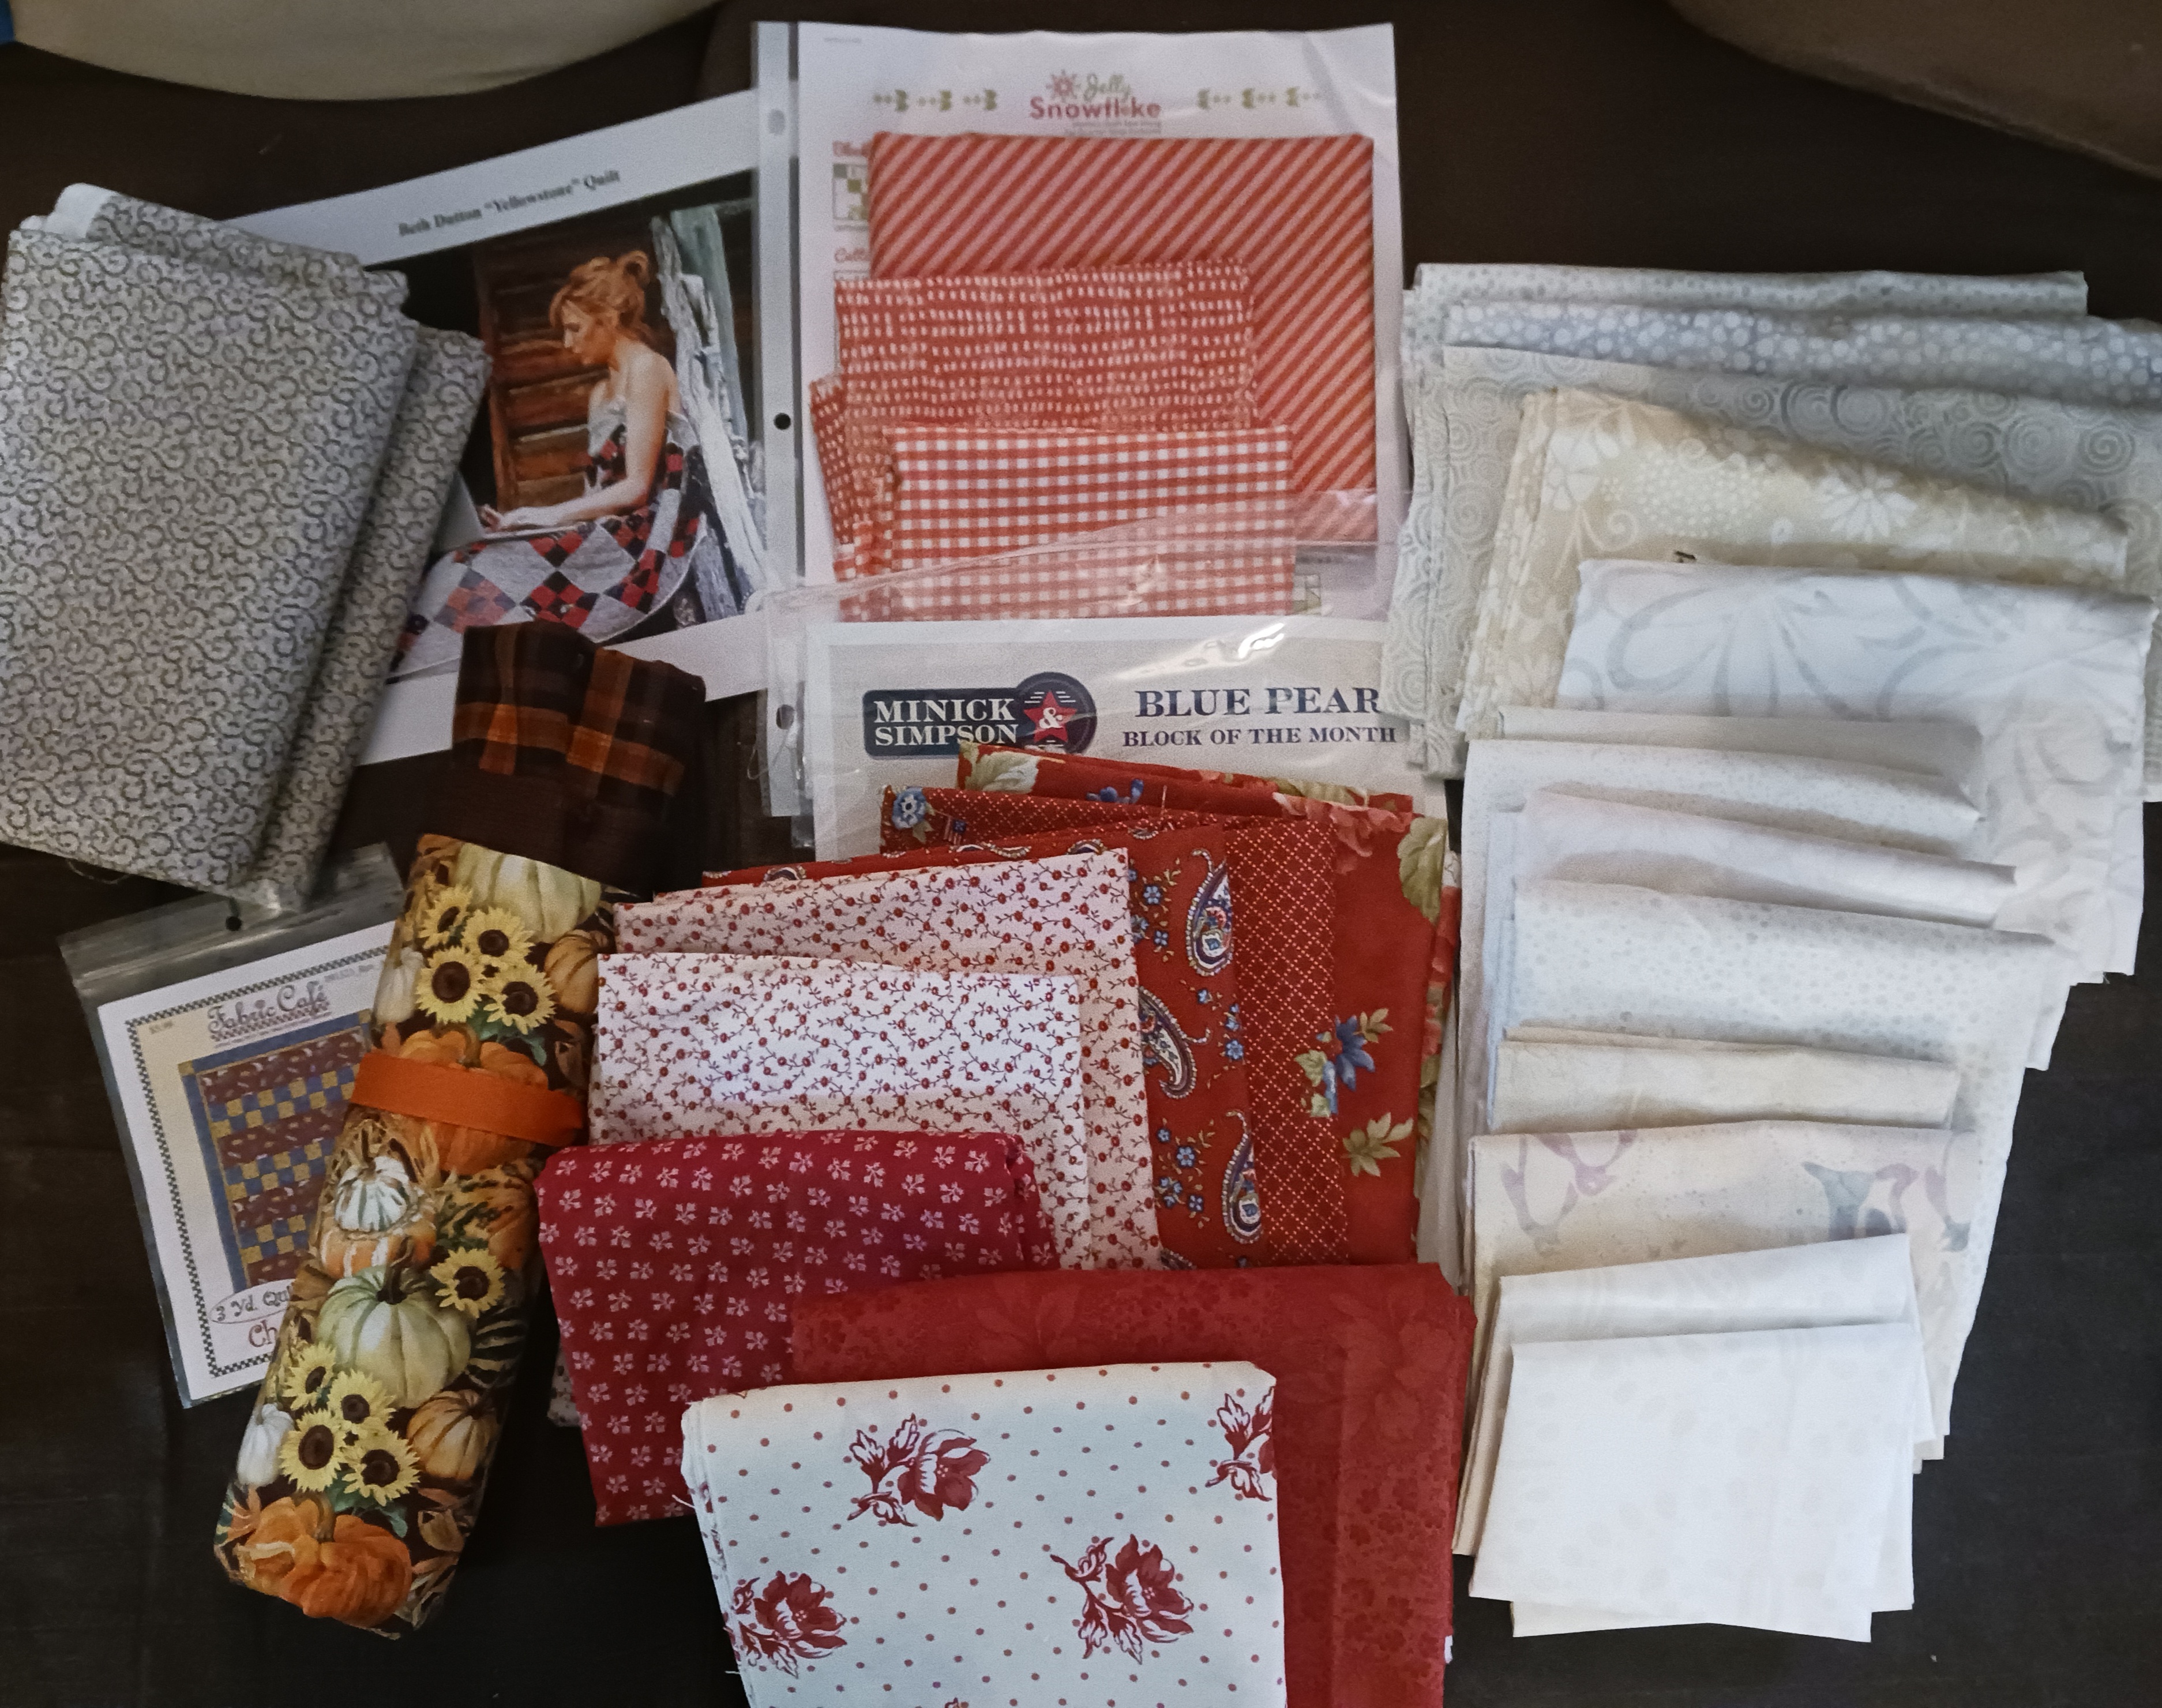
However, there was also one made by Nicol Sphor in red, grey and pink and I decided to definitely go that route.  When I went looking for pinks in my stash, I instead found a "Strawberry Red" gingham print that I really liked and thought maybe that could be another "twist" on pink for the design.  I managed to pick up another print in that color scheme before the Hop and put finding others on my list of things to look for during the Hop.  I came back with some great choices (which you can see in the picture at the top of the post), so many that I wound up with six prints to choose from when I only needed four.  

I had picked out four dark red and the grey prints (three here when I needed only two) to use from my stash.  I also decided to purchase more of a red-on-white micro dots print I had that I felt really worked for adding a subtle amount of red into the background.  I made my version of the FQS design with 2" cut strips (1-1/2" finished) instead of jelly roll strips because I need my quilt to be smaller than patterned to use as a wall hanging in a specific spot.  

Ultimately, I made up the blocks in all of the fabric prints I had gathered and then laid them out with the other blocks to determine what would be used in the final layout.  After much deliberation and switching around of the blocks, I think this is going to be it:

It's not completely sewn together yet and I still may decide to do some piecing in that center square.  I also need to decide on a backing for this.  With all the reds I've purchased for this year's decorating scheme, I may just take the extra blocks I made and piece them together with some scrappy red squares and call it a day.  

Edited To Add:  You can see the finished wall hanging in this post.

Shop Hop Bags

Well, the Shop Hop bags started back in October are still not done!  Once again, seemed like a simple project but it has been complicated by poor instructions.  I had picked up the page full of edits to the original instructions but even the clarifications are still a little confusing.  I've already had to change one of the side pockets from fabric to mesh so I won't lose seeing all the motifs from the panel print used to create the pieces for the bag.  I do hope to get this one done before the end of the year but at this point, I'm not hopeful!

All of this was yet another diversion from the sewing I had planned to do this month but once these are all out of the way (and off my mind), maybe I can go back to focusing on what I should be working on!

Thursday, September 29, 2022

Ending the Month on a High Note.......

 Scrap Happy Progress

During the past week, I have continued with the American Patchwork & Quilting Magazine quilt along......

This week we had to continue making the larger "B" blocks.


For two of the new blocks, I did try just making the larger "B" blocks as one big unit rather than making four smaller "A" units first.  As I had suspected, it takes about the same amount of time as making the smaller blocks first and then combining those although the pressing is much easier.  

Next week is scheduled as a "catch up" week and I sure need that!  I figured out that I need to try to make two blocks a day for the rest of this week and the next to even come close to what is called for in the design.  Of course, that assumes I plan to make a bed sized quilt as in the pattern.  We'll see as I continue making these blocks if I choose to do that or make it a different size instead.  

Christmas Quilts Progress

Temecula Quilt Co. 12 Days Mini Quilts

All the tops are done!


The backs and binding fabrics are also picked out.  Now to think about how I want to quilt them.

Painless Borders Christmas Ribbons (aka Trees and Stars) 

With the mini quilt tops done and down off the design wall, the tree blocks could now go up.  Next step is to start making the border blocks but since I already had a new project cut out (more on that later in the post), that jumped into the leader/ender queue before I could get started on those.   

Garden Art Show Rained Out!!  

Well actually, Sunday morning dawned cloudy with it expected to be overcast all day and a possible chance of rain during the time of the event.  The garden's Steering Committee made a decision early that morning to cancel the show and reschedule it for this coming Sunday.  Since my DH and I were already on the schedule to volunteer for the opening shift that day, it's a win-win for us! 

As they say, I was "all packed up with no where to go!" but on the plus side, I'm already prepped for this weekend!  On the downside, there are forecasts of possible rain for this weekend as well due to Hurricane Ian.  So we'll see if the show does go on!

Adding Some Fall Quilts to the Mix  

I'm never one to resist starting a new project!  With September now coming to a close, I am of course turning to Fall decorating.  I already have some Fall colored quilts and a few more that I want to make or finish (a pumpkin applique couch pillow, in that last case).  

However there are also some new things of interest around and one of those is Pat Sloan's "Thankful" wall hanging from her latest book "Holiday Hoopla".  I loved the idea of making Pat's wall hanging to hang at the top of our entry staircase and I checked to see if I already had enough fall fabrics in stash to start this one up.  Good news, it turns out I did!

More good news is that it only took a few dies and now the fabrics are all cut and ready for leader/ender sewing!

I look forward to the warm glow of the colors of the season filling my sewing space for the next few months!  So I'm all ready for the start of October, are you?