APQ Scrap Happy QAL
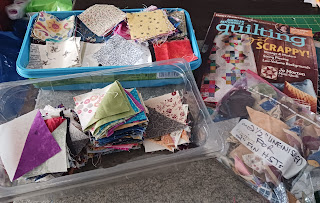
It's Week #3 of the QAL and after spending the weekend prepping HSTs....
....I was ready this week to start on making the "A blocks" for the quilt.
After that, the next step will be making "B Blocks" which will just be sewing four "A Blocks" together.
In the Facebook group for this QAL, someone said that they found it easier to just make the "B Blocks" by sewing the six long rows of squares together first and then sewing the rows together to create the block. I'll see how it goes when I make my first "B Block" the way it's patterned and then consider if I want to do that too.
Christmas Quilting: Temecula 12 Days and starting the next Holiday Project
I was also able to finish up all the Temecula blocks.
Now I need to figure out what sashing fabrics to use in each quilt.
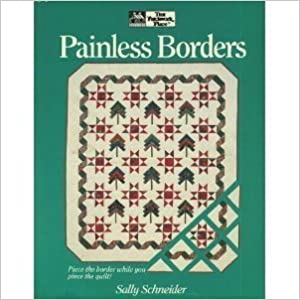
With that done, I was ready to start on the second of the Christmas projects. I'm always thrilled to find older books with techniques that I haven't seen before. I'm not sure where but at some point, I saw a quilt made with the “Painless Borders” technique by Sally Schneider who had written three books on the subject.
Essentially the technique uses pieced blocks set into an on-point setting and the design within the blocks create the look of a pieced border. So rather than piecing a center and then adding a border, you just piece one or more blocks for the center, piece "border" blocks of a different design, lay them all out in an on-point setting, add side setting triangles and the top is complete!
I was particularly interested in it because I believe the first quilt I saw was made with nine inch blocks and that interested me as a potential GO! die cutting project to use with my 9 inch Cube set. The quilt I decided to make first is the cover quilt from her first book.
I was particularly drawn to it because it had tree blocks whose "branches" I hoped I could cut with my Log Cabin die (which I always love to have an opportunity to use). Additionally as a “Christmas themed” quilt, I could incorporate it into this year's “Red & White quilts for holiday decorating” project plan.
Initially, I really wanted to do the outer setting triangles using a red Toile print but they are pretty expensive and very directional. That complicated the triangle cutting and it was hard to find a print that flowed well once all chopped up. I eventually found a cute Cardinal print that has led me to make this in a Red, White and Gray color scheme. It took me a bit of time to collect a bunch of reds in fat quarters or half yards as I could get them (I was surprised to find I had almost none in stash!) and a smaller selection of grays.
A review of the pattern and the size quilt needed meant I actually couldn't do this one with my Cube since I will be making 8 inch blocks. Fortunately, I do have the dies to make the size blocks I need. I also had to do a little EQ8 drafting. In order to use the Log Cabin die to cut the tree parts, I needed to make the tree blocks a little different from the way they are pieced in the book. Once I had everything in place, it was time to make a test block!
It worked! So over the next few weeks I will continue to cut and piece these blocks first. I then plan to piece the border blocks and lay the whole thing out on my design wall as I do it.
While the trees will all definitely be scrappy, I'm not sure right now if I want the alternate star blocks to be scrappy within each block, scrappy with each Star block made up of a different fabric or possibly to make all the Star blocks in the same fabric. That last option would then likely require an additional stash injection so I hope I don't have to go that way!
A Cross Stitch Update....
Since I had the die cutter out, I also decided to finally do something I've long procrastinated about. Back in February, I had shown the very first cross stitch project I finished:
I already know where I want to hang it and had purchased a few "snap in" hoops on Etsy awhile back and will use one of them as a frame for it.
Although they look like wood, the outer decorative rings are actually made of a silicon-like plastic that stretches around the inserts. In order to "fully finish" the piece (as the Cross Stitchers say), I needed to cut my completed stitched piece into a circle large enough to allow me to pull it around the edges of the frame insert. I figured I needed about an 8 inch circle. Well lo and behold, look what had been on my Accuquilt Wishlist for a few years now:
I was able to purchase the die a couple of months back during one of Accuquilt's sale days. I still have the 6 inch circle die on my wishlist but that can wait for when I have a true need for it (or for a really big sale)! So I die cut the piece and some batting to back it on the die board.
And laced the back with #8 Perle cotton to make it easier to pull the frame around the edge.
 |
 |
| Could be neater but it's done! |
It's been a good week for crafting! I hope you have been able to get in your studio and move some things along too!


1 comment:
Looks like you have lots to keep you busy, with all these projects!
Post a Comment