Showing posts with label Bathroom Quilt Series. Show all posts

Monday, January 18, 2016

Another Hand Work Finish?

This little embroidery piece has been sitting around since I finished it in February of last year.


I came up with the idea to do it back in 2012 when President Obama was running for re-election.  At that time there was much talk about the historical precedence of his presidency and how he was inspired by Lincoln.  It was also interesting to reflect on the significance of his presidency in tandem with the commemorations of the 150th anniversary of the Civil War that were going on at the time.

I got Bonnie Browning's "Designs on Freedom" book when AQS was offering it as a gift with purchase.  The book has patriotic line drawings perfect for rendering in embroidery or applique.  The prior year I had downloaded a free Obama drawing they had offered that is not in the original book (and they offered it again on President's Day this year which you can get here).

I combined the Obama drawing with two others from the book:  one of Lincoln (on page 15 ) and the elements from "Give Me Liberty" (on page 25 but also available for free on the AQS website).  My plan was to add it to a quilt that I made back in 2002 called "Spontaneity" that was displayed in my downstairs bathroom which is decorated in a Red/White & Blue theme.


Testing, testing.....


 At this point, I thought two things:  wash the quilt since when it was originally made that first border was much whiter!  Second was that the embroidery needed a border -- maybe some trim?  Something that reminded me of turn of the century political banners.  I did eventually find a trim I liked:


I also did wash the quilt.  Yeah, about that....


 Yes, the reds ran and it didn't help that they were all next to the white border!  The little squares on this quilt were fabric swatches that I had received back when I belonged to a subscription fabric service.  I never expected to wash this wall hanging so never gave any thought to the color fastness of the swatches. Even after that, I thought I might be able to fix it by hitting those spots with a bleach pen.  So I went ahead and trimmed and turned the edges of the embroidery so I could add the trim and put it on the quilt.


Edited to Add:  Always love an opportunity to use another gadget!  I actually trimmed the edges of the embroidery with the Creative Grids Corner Cutter using the edge with the 3" radius. 


Surprisingly this is the same tool and edge I used to trim the corners of my (much larger) "Re-piecing the Past" sampler lap quilt.     

I whipstitched the trimmed out piece to the little quilt and hung it up.  I was pretty happy to finally have it done and in place. 

However, my DH was not!  While he liked the embroidery and the original little quilt he was not as jazzed about them together.  He also thought that hanging it in the same room as my "Sweet Land of Liberty" quilt took away from the larger quilt.
Sorry, hard to get a shot of both in this small room!
I do respect his opinion as he has offered good visual insight on my quilt projects before -- not to mention he has to also use this bathroom!!  So I'm probably going to take the embroidery off and try to figure out another way/place to display it.  Still counting it as a finish though!!

Tuesday, June 24, 2014

Catching Up On June - Part 2: Two more 2nd Quarter Finishes

As noted in the previous post, this month the 2nd Quarter Finish-A-Long will come to a close so I am pluggin' along trying to get some of the things remaining from my list completed.

I finished this on the last day of May:


It's the companion project to my "Sweet Land of Liberty" quilt (my BQF entry posted here) and they hang in the same room.  The eagle and the star are in wools, the rest of the fabrics are cottons and all of it came from scraps or stash.


"Let Freedom Ring" was a project from the Summer 2013 Primitive Quilts & Projects Magazine.  The original design had embroidery on it, something I was hoping to get back into with this project.  But pressed for time,  I took a shortcut and stitched the words on my sewing machine with a triple straight stitch.  I also eliminated the branch embroidery in favor of adding quilted feather designs using what I had hoped would be a "slightly" contrasting thread, an idea I got from this post on the Ivory Spring blog.  The thread I finally settled on using stitched out much darker than I expected reminding me once again that I really should test my quilting threads on a practice piece before doing the actual quilting.  But once the quilting was done, I was statisfied that this little piece would hang high enough to mute the impact of the stitching a bit and more importantly to me (at least for this project) it was done!

So far this month I've also finished the second of the three journal covers I wanted to make this quarter (the first was posted here). 


It was fun to pull all the bits that went into this one.  The label on the spine was stitched onto some ribbon I had on hand using the monogramming function on my machine and the roses were all that was left from a pack I had bought six years ago to add to the label of one of my other quilts. The front block was one of the class projects from the online Hand Applique course I took back in 2010 from Quilt University (which is sadly no longer in business).


The back is a block I also hand appliqued.  The pattern for it was from this book:


When I make these covers they are a "scrap quilt challenge project" for me and I try to pull as much of the fabrics for them from my scrap bits. The ribbon over the join between the two backgrounds was also in stash and was couched with one of the decorative stitches on my machine.


Once again, it pays to pay attention when setting up a block for applique.  While I am satisfied with the result (these binders sit on shelf most of the time), I was a little disappointed that I didn't render some of the elements of the flower block accurately because I relied on memory and what the pieces looked like when cut with seam allowance rather than taking my cue from the actual picture of the block as I went from step to step.  Another lesson for the future (particularly if I ever decide to do competition quilts!) but in the end I'm more than happy to be able to log another finish.


Even the inside lining and flap fabrics were from project leftovers and the binding was a fat eighth from stash (and is now all gone).  Another thing I've got to watch is that I was afraid to crowd the applique but was then a little too generous with the dimensions and seam allowance of the cover so it is a little big for the binder.  On the last binder I actually made it a little too small and had to scramble to get it to fit that binder.  The good news, is that I have one more that I hope to get done before month's end so will have another opportunity to perfect my method for making these. 

This project also gave me some free motion practice doing echo quilting, a technique I haven't employed before.  I got to use the echo quilting foot that came with my machine and used the guidelines to control the spacing. 

Picture courtesy Janome.com


My thanks to Amy at Amy's Freemotion Quilting Adventures because I didn't know that was what that foot was for until I read it on her blog!  I thought it was just for stitching over bulky seams.  So that's all the finished stuff to date but there will be some more "in progress" posts and hopefully at least one more finish post as the week moves on.

Thursday, May 22, 2014

Bloggers Quilt Festival Entry - Spring 2014

http://amyscreativeside.com/2014/05/16/bloggers-quilt-festival-spring-2014/

I wasn't sure I'd finish this project in time to make the festival but luckily I made it!  The festival is being hosted by the wonderful woman who pioneered this festival six years ago,  Martingale author Amy Ellis.  This will be the fourth time I've had something ready to actually enter in the festival but I always make sure to view the entries because you get to see so many great projects and find great new blogs to follow and inspire you.

My entry this time is my "Sweet Land of Liberty" wall hanging which fits in the Small Quilts category.


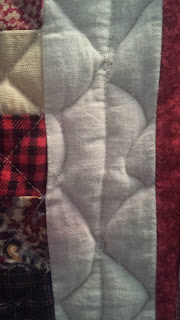
This is the full on finished shot but here's another one so you can see the quilting detail:


The Basics:   
 My quilt finished at 34" x 39" to fit the space I want to hang it in and to best utilize the fussy cut print I used for the center.  It is based on the "Liberty Hall" pattern from the Summer 2008 "Easy Quilts" magazine issue and was designed by Jill Reid (who I was sorry to hear just passed away recently).  I recently saw this same pattern featured in the new "Best of Fons & Porter - Patriotic Quilts" book published by Leisure Arts.  The quilt was designed to be 54" x 63" so I had to adjust my block, header and letter sizes accordingly.  All the fabric used is from stash.  It is layered with wool batting (I used leftovers from another project) to help make the center motifs "pouf" up:


You can stop here if you like and if so follow this link back to the Small Quilts page of the Festival so you can check out the rest of the projects being displayed and thank you for visiting!  However, if you are interested in a little "process" blogging, feel free to continue on!    

*  *  *  *  *  *  *  *  *  *  *  *

The Process Details:  

Every quilt has a story and made a journey to its completion and this one is no exception.  The journey for this quilt started back in 2002 when I first started quilting.  Right off the bat I liked red, white and blue quilts so part of my very first fabric order was a "Lady Liberty Half Yard Sampler" from a Quilts & Other Comforts catalog.  There were the obligatory red, white and blue prints in the sampler but also this one (which I've since learned was from the "Peace & Plenty- Quilts For A Cure" line):


 At the time, I didn't know what I might use the print for but much later I saw the "Liberty Hall" pattern in "Easy Quilts" magazine.


The original quilt used a printed panel for the center but I just knew my "Liberty" print would make a great substitution.  When we moved a few years ago, I realized I now also had a good spot for this wall hanging and decided last June that it was finally time to make it.  Over time, I had collected many R/W/B fabrics.  One in particular was the Brown and Red Stripe with Stars print used in the header of the quilt which as soon as I saw it, thought it was perfect for this project since it would allow me to eliminate the appliqued stars in the header in the pattern.  I was able to pull everything else I needed also from stash.  

When it came time to add the letters in the header, I wanted something different and decided to fussy cut them from the cream stripes in this Anna Griffin fabric leftover from another project from four years ago:

 
with this result:


Unfortunately, once I got the top and backing done and layered, it sat around for a long while since I had a lot of  older UFOs that I was also trying to eliminate.  Having gotten many done in the last six months, I was finally ready to vanquish this one as well.  I had recently purchased some straight and curved rulers for quilting (based on this review) which I used on another recent project and thought I would use a lot on this project as well.  But I actually only used the curved ruler to free motion quilt the spines of the feathers and only used the straight ruler to help guide the walking foot when I was stitching over the plain fabric squares and rectangles (when I quilted over the nine-patches I just eyeballed it from corner to corner).  The hardest quilting was the close stippling done around the center "panel" motifs (as seen in the picture in "the Basics" section).  It was a lot of stops and starts since the backgrounds around all the elements weren't always connected.  

I added the red border between the header and the body of the quilt and around the center "panel" because I felt they needed the extra separation after I began laying out the blocks on my design wall.  But because I had already worked out all the adjusted measurements, I couldn't add in a traditional skinny border since it would throw everything off.  So what you see is just a thin strip of fabric folded in half (wrong sides together) and stitched between the seams.  The curved corners in the center "panel" was from a circle, faced and cut into quarters and also inserted into the seam. What you see finishes to a little less than 1/4" so as not to cover up too much of the print details.

In the end, it should also be noted that the center print inspired the name change for the quilt from what it was called in the pattern.  All the "bountiful" motifs in the print reminded me of the second verse of the song "My Country 'Tis of Thee".  I was disappointed that I wasn't able to use all the motifs from the print in the front of the quilt but I was able to incorporate the ones I couldn't use into the label area on the back of the quilt.

 
 I am also very happy to have finished this since it was also on my 2nd Quarter Finish-A-Long list.
 

If you've stayed with me this long, I thank you very much for looking back with me on the journey of this quilt.  I hope you enjoyed the visit and hope you enjoy all the rest of the Quilt Festival entries!! 

http://amyscreativeside.com/2014/05/16/bloggers-quilt-festival-spring-2014/