Showing posts with label Embroidery Projects. Show all posts

Friday, May 16, 2025

For Finished or Not Friday: One Quick Finish and One UFO

Happy Friday and welcome in for another edition of "Finished Or Not Friday"!


As always we are hosted by the lovely Alycia at Alycia Quilts, well known for her work making, quilting and showcasing quilts awarded to veterans through the Quilts of Valor program.

This week I have two finishes to show:  one that was quick and one that has been a year in the making!  Okay, maybe it's actually just been sitting around for a year but that's all water under the bridge once it gets to the "finished" stage, LOL!!

The Quick Finish:  A Mug Rug Gift

I have a friend that I have made a number of things for, most of which she had used to decorate her work cubicle at her office.  Since the pandemic, her job has retained the policy of remote work so she only has to report into the office once a week.  As such she was recently attemping to spruce up her home work space.  She mentioned she planned to pull out all the things I had made for her and put them into service there.  Of course that led to a discussion of the very first piece I made her:  a mug rug replicating a Kaffe Fassette design:


I made this because she attended her first (and only) quilt show with me back in 2013.  She is not a quilter but fell in love with Fassette's quilt "Girder" that was hanging in the show with all the other quilts from his "Shots and Stripes" book.  Unfortunately, that rug was taken from her desk some years back!  

While I did make her a "keyboard" themed one a few years later (which is pictured later in this post),  she asked me if I might happen to have an extra mug rug laying around that she might add to her setup.  I didn't but then was inspired to make one for her (in secret) when she showed me another new addition to her desk setup:


As soon as I saw this lamp I was like: "Oh, I've got to do this!"  First of all, I have never made a "stained glass quilt" although I've always wanted to try one.  What better way to take a first stab at a technique than a small project like a mug rug?  In addition, I had recently purchased these:


I had this set of Creative Grids "Crazier Eight" templates on my Amazon wishlist for a few years.  It just so happened that about two weeks before our conversation, a Warehouse "Used But Good" set came up for half the normal price.  The  prices on Creative Grids products are tightly controlled so are almost never on sale.  Needless to say as a "Gadget Fanatic",  I couldn't pass that deal up!   Now I could also immediately see trying out the templates by using them to make the stained glass piece.  So I dug through my batik stash for yellows and other fabrics that ombered to that color and came up with this:


As the name implies, there are eight templates to make a block but I split the piecing in some of the templates in order to be able to use a few more fabrics and make the stained glass effect come through a little more.  The "leading" print also came from stash.  

I also wanted to give a nod to the butterfly featured rather prominently on the front of the lamp and I knew just how to do that:

I have an old compact Bernina Deco embroidery machine that I purchased used off of eBay a while back and love when I get an opportunity to make things with it.  The great thing about the purchase was that it came with a full set of embroidery threads in a rainbow assortment of colors and so far for everything I've made with it, I've had the color threads needed.   

To give you an idea of how old this machine is, I am unable to download designs to it so have to purchase dedicated "design cards" for it.  It did come with one of those blank card readers but my laptop (which at the time of purchase was running Windows 10, that's how long ago this was) didn't support it.  So now I regularly troll eBay for low priced design cards that have images I am interested in using.  I also lucked up and was able to start the collection of ones I have when I was able to pick up a whole bunch of them at a guild destash sale from someone who had a newer machine so no longer needed them.  

The butterfly design I used came from this card:

First I ran a test of it using what I had that was close to the prescribed colors.  That allowed me to test the size adjustment I made to the design to fit the template section I wanted to stitch it on and see how it stitched out.  For the final design, I chose threads closer in color to the butterfly on the lamp.  Then I layered and quilted it and this was the finished piece:

After she received it, she sent me a picture of her set up!

You can also see the keyboard mug rug here as well!


The UFO Finish: "Roaring Waves"

My other finish is that I finally quilted a top I made up in March of last year.  After making two blue and white quilts back in 2022 for winter decorating,  last year I decided I wanted to make a few more to use for decorating into Spring.  It started with this fabric bundle purchased on the Annie's Attic (then Annie's Catalog) site during one of their fat quarter bundle sales (and is still available now here):

After purchasing it, I happened to see this "color option" design on the American Patchwork and Quilting website:

I could immediately see almost all of the bundle fabrics plugged into the bargello-style design.  I raided my batik stash and a few project stashes to come up with this array....

...that eventually became this top!

I even layered and basted it that year.  And so it has sat until I could figure out how to quilt it.  I was definitely considering going along with the "waves" theme and did try to sketch out something along those lines:


But it wasn't until viewing Angela Hoffman quilting on the #3501 episode of the "Fons & Porter Love of Quilting" TV show that I found something I really liked.

However, I wasn't totally confident about being able to free-hand quilt the waves evenly.  Then I remembered I had a wave ruler:

However I didn't want that deep a wave and the spacing wasn't right.  Doing a little research, I found out that Handiquilter actually has a few different wave rulers and it turned out that they had another one that was perfect for what I wanted to do.  The peaks and valleys of it lined up perfectly with the piecing on this quilt.

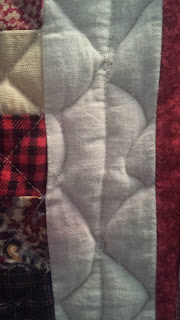
It took me about a week to complete the quilting:


And now it's done! 

Front

Back

It's a square quilt and will be used as a wallhanging.  As usual the lesson here is that sometimes a quilt takes a while but it is always satisfying in the end to get it done!

There are many more finishes and progress reports over at Alycia Quilts for this week's "Finished Or Not Friday" so go check them all out!

Sunday, April 30, 2023

And So Ends April....

Boy this year is moving fast!  I only wish my projects were moving at the same speed!!  

The Raffle Quilts Go Away Again

Once again the late start on the raffle quilts meant I didn't get them done.  Two weeks out from the opening day, I was still waffling about whether I could really make a push to finish them.  Unfortunately, our community garden was hit hard when we lost two of our Steering Committee members in March.  One, our events coordinator, suddenly passed away.  Then our Vice President (and local government liaison) was diagnosed with a serious form of cancer and had to undergo surgery and chemotherapy.  The remainder of the Steering Committee reached out to our garden members for help in coordinating and finalizing the day's events and picking up the supplies for the day's activities.  

My DH and I volunteered since we usually worked with the Event Coordinator to set up the event on the day so had some idea of how she usually approached it and what needed to be done.  My husband had also already put in for the day off from work the day before the event.  That allowed us to further help by going to pick up all the supplies needed.  Once that all came forward, the plan to try finishing the quilts had to be packed away again!

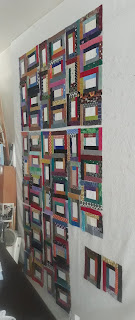
The good news is that I did get to move them that much further forward.  All of the basket blocks for both are done and the border print strips for both are cut and ready for layout.  I was still debating on whether to add more applique to the pastel version (I've put flowers in three baskets but should I do four?).  I was also waiting to get the light version off the design wall so I could figure out which of the butterflies in the border print fabric of the dark version I would cut out and applique for the remaining three border cornerstones (I already have one prepped and made two applique squares for the center).

What this really means is that I must, must, must get this started early next year (perhaps right after the New Year) in order to get them done on time.  So there is still hope for this project.

Made Another Sash

In addition to helping coordinate the event, I also volunteered to make the Grand Marshal sash again.  We found out at the last minute that the scheduled speaker wasn't going to be able to attend after all but was sending someone from their office to officiate.  That freed me to make this year's sash a little less elaborate than last years


I scaled back some of the ideas I had planned to use for it (so ditched the canning jar blocks) but was still was able to have some fun with my little Bernina Deco embroidery machine and Accuquilt Classic letter dies.  Pictures from the event can be seen on page 5 in the latest edition of our community paper on the Issuu.com website here.

Progress on the Accuquilt QAL

The week of the garden opening, I was also supposed to finish up my Rainbow Log Cabin blocks for the Accuquilt and AQS quilt along.  Needless to say that didn't happen until after the opening day!   Then I had time to finish up the blocks and sew them together for the center of the top.

Up to that point, I had not given any thought to what I was going to use for the borders for this top.  I wanted to carry on the rainbow theme but didn't have anything in stash so a shopping trip was then in order.  I found a pretty bold and busy print that picked up all of the colors used in the blocks.  

Both the pattern and Erica Bottger of Accuquilt put their borders right up against the blocks.  With my dark print, I felt it "choked" the center that way so added an additional light inner border pieced together from the unused 12-1/2" light strips I had die cut.  The blocks in the top finish at 11" although the BOB* die itself cuts enough strips for a 12" finished block.  Now I have to think about how to quilt this and (fingers crossed) bring it to a finish this year.  

*BOB = "Block on Board" meaning all the pieces for the block are cut with the one die.

April APQ UFO review

Once again, I wasn't able to make time to work on the American Patchwork and Quilting UFO pick for the month.  The number pulled was "4" and on my list that is my "Make It Scrappy" project:

This one was started back in 2019 when I made a wall hanging version of a MODA Bake Shop design as a gift for my MIL.  When I made the letters for hers,  I also made letters for a lap quilt version for me.  I had finished all the letters and put the center of the top together but I still have to put borders on it.  

Well, that didn't happen this month but some good did come from thinking about working on this!  I had pulled out the storage bag for it at the start of the month so now needed to take a picture of what I have for it for this report.  Lo and behold, I also found a piece of this print bundled up with it:

It was the fabric I had used as the background for the word "Scrappy" in both quilts.  Well, it just so happens that I had recently bundled another cut of this same print with fabrics for my next string quilt project.  I had been lamenting that I was just short of what I needed of that print for that project.  I thought I was going to have to find another print to use because I didn't think I could get more of it.  So I guess it does pay to pull out that UFO project even if you don't get to actually work on it!!  

I have a note in my planner that in July there is a "World UFO Day".  Yes, there is a day for everything although quilters will be celebrating that one differently than most people, LOL!!.   Maybe I can make a plan to try and catch up on all of the ones I haven't gotten to this year when that day/month comes.

Fabrics are in for the next Angela Walters FMQ Challenge

Angela Walters has another of her Free-motion quilting challenges starting in May.  It's called "Floral Frames" and this time she will be doing stitch patterns that can be used in borders.   

Since about 2019, Angela has designed panels for demonstrating the designs she will show how to stitch out.  This allows quilters to literally stich along with her without having to be in an "in-person" class.  I liked the colors of this year's panel (Blue, White and Lime!) so decided to splurge on getting the panel this time since I will be able to display it with my other Blue & White quilts when it's done.  

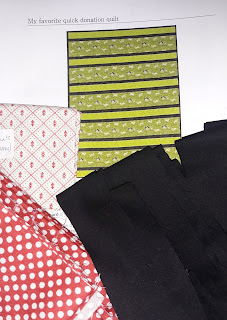
I purchased the panel, coordinating threads, border and backing fabrics.

I'm also hoping to stitch up the quilt top I made last year in order to do her "Fillers" challenge.  

If you've been curious about Angela's challenges, in her last weekly chat she reviewed the history of the challenges she has offered, all of which are still on You Tube.  Additionally she is offering a discount on the purchase of the prior year panels if you are interested in getting any of them to try out her challenges.   

Cross Stitch Update

My plan for the month was to get my "Maybe Wine" cross stitch project done.  After re-starting it by ripping out work previously done on the top flower,  I felt I made good enough progress on the re-do to finish it up.  Unfortunately, all the changes in plans for the garden opening left me too pooped to stitch most days.  

I started the month here....
...and ended it here.

Luckily for me, there is a special cross stitch event starting tomorrow so continuing work on it is already on the agenda for May!

So that's it for April!  The month didn't "Shower" me with finishes but hopefully some finishes will "Bloom" in May!!

Saturday, April 30, 2022

April Recap and As Usual A Lot of Changes In Plans.....

Can you believe that April is now over?!?  This year is going by just too fast.  For a month in which I thought I had clear plans, things just tumbled and jumbled until where I came out in the end was not where I planned to be in the beginning!  

The Raffle Quilts Were A Bust

So I knew it was a long shot when the month started but I had hoped that it might still be possible to get the raffle quilts for my community garden's opening day made up.  Nope!  I continued to have an issue with the basket blocks coming up a wee bit short of the patterned size.  And of course since I was now rushing to try to get this done, I also did things like this:

So before too long, an Executive Decision was made to "Abort Mission!"  Since I had not promised the quilts, there was no loss in not having them ready.  Additionally, there is a whole garden season ahead of us and we hold at least one other big event each year.  If I can eventually get them made up, I could still offer them for raffle at a later date.  At the very least, I am now well ahead of the game for next year, Lol!

Added to that, the wide-back fabric I had pre-ordered to fill out around the panel I had purchased for the back of the light version of the quilt still has not come in!  Had I gotten to that point, that would have been yet another complication to my plans anyway.  

On a plus note, while shopping for border fabric for the leader/ender project I worked on while trying to make up the basket blocks (more on that later), I found a lovely panel depicting realistic images of butterflies to add into the back of the black version of the quilt:

The original plan was to make the black butterfly version with just a solid black backing and the light version was to have the "Be Kind" panel and the "still missing in action" wide-back print.  Now that both quilts will have pretty panels in their backs, I think I will buy more of the Kona white to complete the light backing so they are truly "fraternal twin quilts".  

Additionally, I decided to purchase two of the butterfly panels so I can use the second one to make a quilt for myself with the leftover pieces that Jenny Doan has us put aside when cutting the fabrics for the basket blocks.  Score!      

So despite the disappointment in not getting that project done, I did still get to do something special for the Opening Day ceremony.  Back in March our Garden's President had asked if I could make a sash for the Grand Marshal for this year's event.  I wasn't thrilled with the idea since I had by that time already come up with the raffle quilt plan and had never made a sash before.  However, she sent me a link to a site that sold sashes and it didn't look like all that hard a task.  I rolled around ideas in my mind for a good while and what eventually resulted was this:


Finally a chance to use some of the "food fabrics" I have been collecting for years and the little Bernina Deco embroidery machine I purchased a while back!  I used fabrics from my stash that each represented things we grow in our garden.  The letters were die cut using black Kona from my solids stash (separate from what I purchased for the raffle quilts) and the Accuquilt "Classic Alphabet" die.  

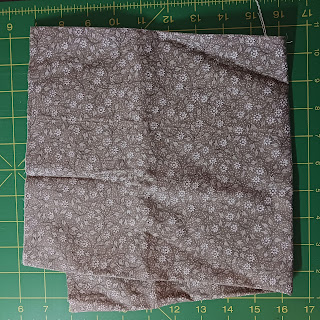
I decided to use some burlap that I had on hand as the sash base and chose a tan print from my "backgrounds" stash to use as the lining fabric.  I used pieces of the lining print "wrong side up" under the burlap and positioned where the embroidery was to be placed in order to minimize the additional stabilizer I would add showing through the burlap.  I then applied iron-on tear-away stabilizer to the back (right side) of the lining pieces to further stabilize the embroidery as it was stitched.  After the embroidery was done, I used more of the tan print (right side up this time!) to line the whole sash, attaching it using the "pillow turn" method and edge stitching around it to finish it off.  

The two ends of the sash were secured together with a safety pin to make it easy to adjust the fit.  I decorated the pin with a fabric covered button with a shank placed on it.  We don't grow blueberries but that was the only print in my stash where the images centered perfectly on the button!   Our local councilman was the Grand Marshal and the sash was gifted to him at the end of the event.  And yes, I did put a label on it too!

Details about our Opening Day event can be seen on page 3 of our community paper which can be viewed on the issuu.com website.

Leader/Ender Work

While trying to sew up the basket blocks, I decided to also begin sewing together the layout for the "String Bean" blocks I had finished up at the end of March.  So those went from this:


....to this.


The top still wasn't quite wide enough for my taste so as noted earlier, I went looking around for something to add on as borders.  I was pretty sure that with the red sashing squares I also needed something red for the borders and found it.


The center is longer than it is wide so visually I found that it worked better to do the side borders wider than the top and bottom borders.  That complicated things slightly as I had already pieced together the scrappy corner squares as a nine patch with a red center.  I had to re-do them into a 4x3 patch rectangle so moved the red squares to the outer corners so it all remained balanced.  

While debating about the borders and still in "pieced back" mode from March, I wondered if I might do something along those lines again for this project.  Then I remembered this easy quilt design by Mary Johnson (who blogs at Making Scrap Quilts From Stash) which I had picked up from her free pattern site Mary Quilts years ago:  


So I made it a point to purchase extra of the border fabric to use as the "focus" print (the wider strips) and more of the solid black from my solids stash for the accents.  Still needing something else for the "tone on tone" strips in the design, some of the prints I had purchased for my "Scrappy Figs" project came to mind.  When the border fabric came I realized that I really liked one of the "Figs & Shirting" prints in that position.  I found a shop that still had some so now that everything is in house, first thing for May is to get this backing made up!

More Harry Potter Work

The other project plan for April was to finally get to the "Realigned" quilt stitching practice.  However once I did not start on it in the first few days of April, I lost the momentum to do it and so it too now moves on to May.  I decided that what I could steal some moments to work on were the other two paper-pieced blocks needed for my son's Harry Potter quilt.

I made the dragon in March while we visited my MIL.

These three were the only blocks I had originally planned to piece into the center using blocks from Maaike Bakker's book.  Of course now, I'm thinking that maybe a few more might make it all a little more balanced (there's that word again!).  This time though, I wanted blocks a little more specific to the HP lore.  Well, where do you go when you want to find PP patterns that are story specific?  None other than Fandom In Stitches of course! 


After going through all the offers for HP lore blocks I settled on blocks for the "Sorting Hat" and "Hogwarts  Castle".  There is a castle block in the Bakker book but it is pieced in kind of a fan shape and I wanted one that was smaller and squared.  So I guess this project will also continue on into May.  

Now that the garden is open for the season, DH and I have already volunteered for shifts (we did our first on the day after the Opening Day).  Our anniversary was also in April and he was on vacation this past week so more diversions from quilting happened.  We have been doing a little "in person" RV and tow vehicle research.  I don't think it will happen this year but with any luck, I may be an "On the Road Quilter" by next year, finger crossed!  

I hope your April stayed more on track than mine did and we both have a very productive May!

Sunday, December 20, 2020

Slow Sunday Stitching and Ornament Talk Today

Good news!  I did go get my return-from-a-trip COVID test on Friday and it was negative!  Woo Hoo!  Freed from Quarantine!  And good too:  we currently have a city council special election going on in my district to fill a recently vacated seat.  I was able to leave the testing place and go right to the polling location to cast my early vote (the official election day is this coming Tuesday).  That accomplished, I also took care of some errands in the neighborhood and then yesterday ran errands that needed the car. 

 As the last week of the holiday package peak season begins, my DH had to go in to work today (UPS) so will have the car which means today I can settle in for some more stitching at home.  In my last post, I noted I was working on this:

Now I have these all done:

The last one I took with me to the COVID testing place and started the stitching on it while waiting for the results of the rapid test.  I am truly surprised at how easy these are to make up by hand and am really enjoying working on them!  Today I am going to work on this one:

This set of Rachel Pellman felt ornament kits (also available as patterns if you already have a felt stash) are all part of the Blue and White Christmas decorating I had planned to do this year.  However right now I'm not sure if that decorating will even happen!  While out yesterday I went searching for a small tree for us but didn't find any in the places I went to.  With our kids grown (but not out of the house) we usually buy a little three or four foot tree that can be put on a table we have at the top of the entry stair case landing.  This was the tree from a few years ago:

I had put the other ornaments I've made from the stocking and mittens Pellman kits on that tree.  It should be noted that those were all done completely by machine, utilizing decorative stitch patterns.  However, the blue mugs I'm doing this year are all being done by hand.  I've completed all the ones from the earlier stocking set but still have three more from the mitten set to finish up.  I plan to do them by hand this time while finishing up the mugs.

Another project I had taken on the trip with me but didn't get to work on while there were for some fabric "Cathedral Windows Ornaments".  They are offered as a pattern or kit by Shabby Fabrics and demonstrated in Jen's videos here and here.

I made one during the return quarantine and have fabric sets ready for two more.  The fabrics for these came from the blue and white fabric stash for my AQS "Twilight Flurries" BOM project.  The only hand stitching on these though is to whipstitch the opening closed after you stuff them!  

Unfortunately, I only realized when I had to pick a ribbon for the hanging loop that I really didn't have anything right for the color or the season.  Good thing one of my errands yesterday was a Joann's run and they had holiday ribbons on sale so now I can replace that blue twill tape! 

Speaking of felt ornaments, Aurifil did a post on them Friday and offered links to some great patterns.  I really want to try this one!

Doubt I'll get to it today but since I'll still be tree shopping this week, there's still time to try it out!.  

There's more hand work fun to see over at Kathy's for her weekly "Slow Sunday Stitching" link up.  Go see what inspiration you can discover there!

Monday, January 18, 2016

Another Hand Work Finish?

This little embroidery piece has been sitting around since I finished it in February of last year.


I came up with the idea to do it back in 2012 when President Obama was running for re-election.  At that time there was much talk about the historical precedence of his presidency and how he was inspired by Lincoln.  It was also interesting to reflect on the significance of his presidency in tandem with the commemorations of the 150th anniversary of the Civil War that were going on at the time.

I got Bonnie Browning's "Designs on Freedom" book when AQS was offering it as a gift with purchase.  The book has patriotic line drawings perfect for rendering in embroidery or applique.  The prior year I had downloaded a free Obama drawing they had offered that is not in the original book (and they offered it again on President's Day this year which you can get here).

I combined the Obama drawing with two others from the book:  one of Lincoln (on page 15 ) and the elements from "Give Me Liberty" (on page 25 but also available for free on the AQS website).  My plan was to add it to a quilt that I made back in 2002 called "Spontaneity" that was displayed in my downstairs bathroom which is decorated in a Red/White & Blue theme.


Testing, testing.....


 At this point, I thought two things:  wash the quilt since when it was originally made that first border was much whiter!  Second was that the embroidery needed a border -- maybe some trim?  Something that reminded me of turn of the century political banners.  I did eventually find a trim I liked:


I also did wash the quilt.  Yeah, about that....


 Yes, the reds ran and it didn't help that they were all next to the white border!  The little squares on this quilt were fabric swatches that I had received back when I belonged to a subscription fabric service.  I never expected to wash this wall hanging so never gave any thought to the color fastness of the swatches. Even after that, I thought I might be able to fix it by hitting those spots with a bleach pen.  So I went ahead and trimmed and turned the edges of the embroidery so I could add the trim and put it on the quilt.


Edited to Add:  Always love an opportunity to use another gadget!  I actually trimmed the edges of the embroidery with the Creative Grids Corner Cutter using the edge with the 3" radius. 


Surprisingly this is the same tool and edge I used to trim the corners of my (much larger) "Re-piecing the Past" sampler lap quilt.     

I whipstitched the trimmed out piece to the little quilt and hung it up.  I was pretty happy to finally have it done and in place. 

However, my DH was not!  While he liked the embroidery and the original little quilt he was not as jazzed about them together.  He also thought that hanging it in the same room as my "Sweet Land of Liberty" quilt took away from the larger quilt.
Sorry, hard to get a shot of both in this small room!
I do respect his opinion as he has offered good visual insight on my quilt projects before -- not to mention he has to also use this bathroom!!  So I'm probably going to take the embroidery off and try to figure out another way/place to display it.  Still counting it as a finish though!!