So once again, I will be embarking on a special holiday crafting celebration: a personal Quilt-A-Thon from the day after Christmas leading up to New Years! Most of the projects slated for this period consist of things I want to "clean up" before the New Year starts. I spent a good part of the day thinking and re-organizing which of those should be on that list. It was the usual: pulling out projects and fabrics and seeing where they were and what I wanted to work on.
Quiltville Mystery Quilts
Of course, one thing I already knew was that for the first day I would be continuing the work on the Quiltville mystery quilts. I had finished the quilting and prepped the binding for "Roll, Roll, Cotton Boll" on Christmas Eve. Now after spending Christmas Day chillaxing, it was time to get it on the quilt!
As usual, it took longer than expected (did I mention this is a big heavy quilt?!?) but it is now done!
I am a big fan of attaching my binding by machine whenever possible -- which is most of the time. When you get this close to the finish on a quilt, a machine attached binding makes that end come that much faster. It was stitched onto the front, glue basted to the back and stitched down from the front in the ditch. I did pretty good this time and only had a few small spots that didn't get stitched down so I had to go back in and hand tack them. I'll post on the full reveal at the end of the week after I get a few good pictures of it.
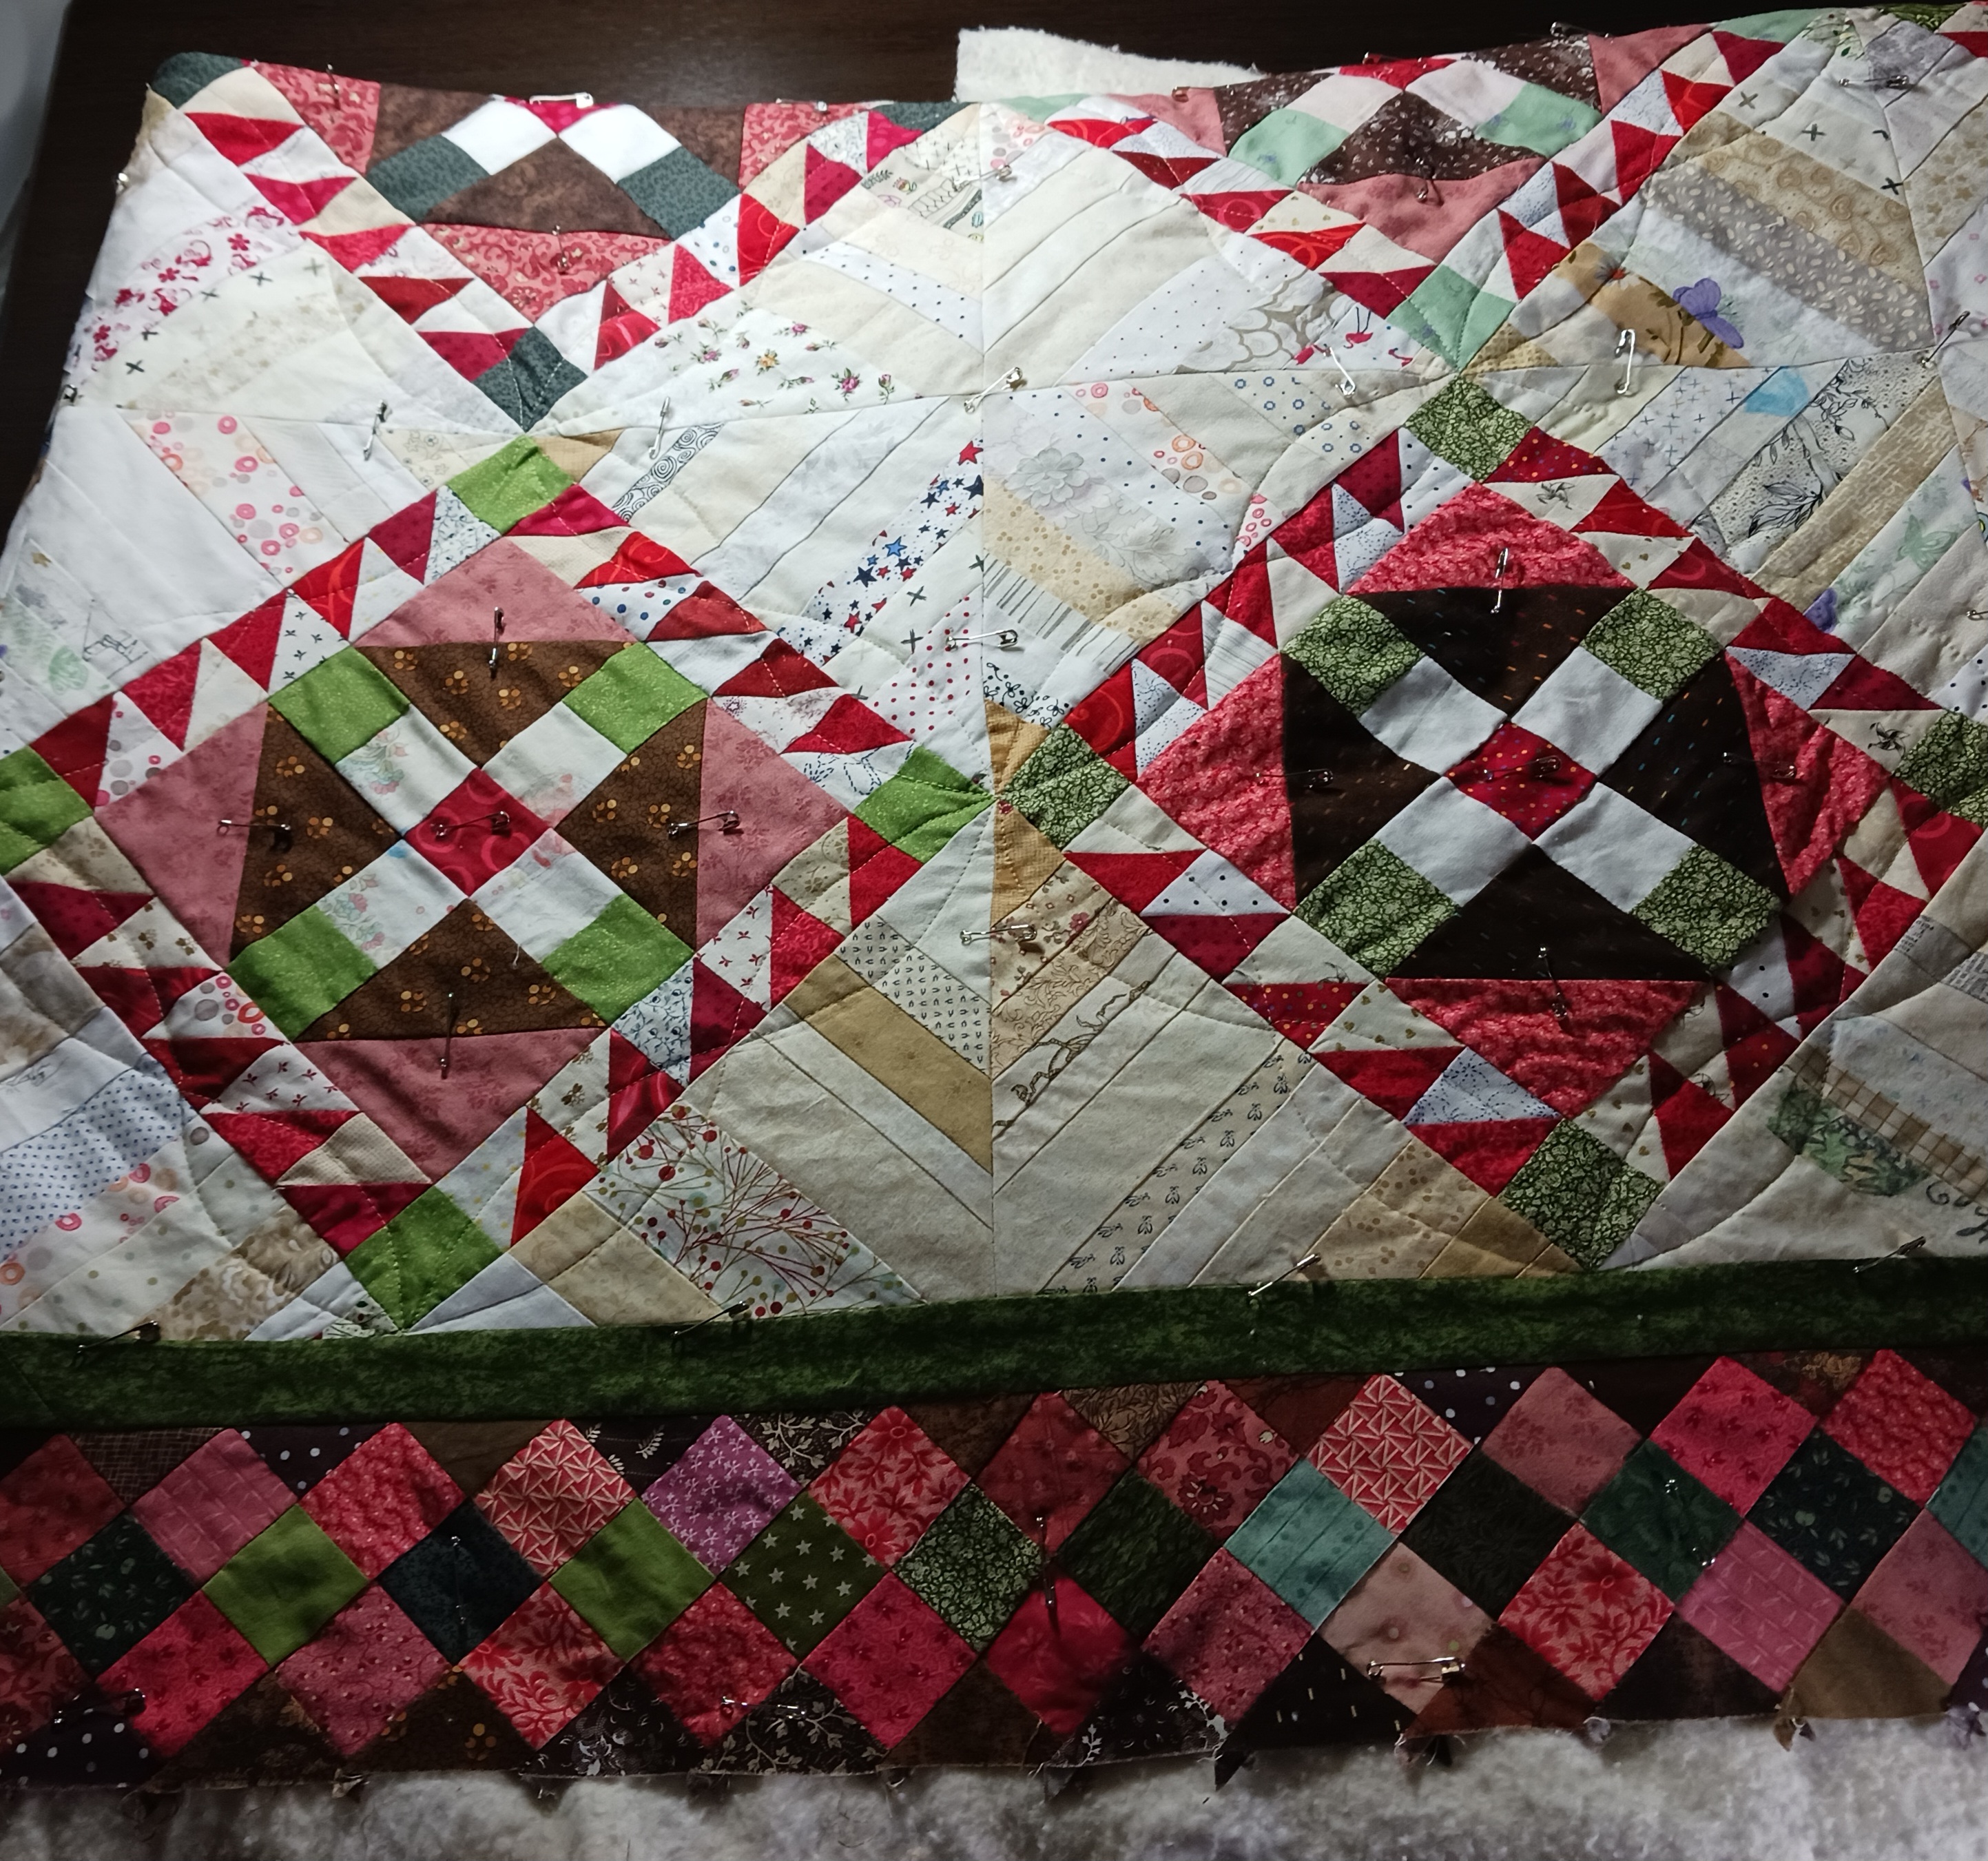
Mystery Quilt#2 is "Tobacco Road". Now that the "Boll" is "fully finished" (as the cross stitchers say), I'm finally, really ready to focus on getting the finishing of this one in gear. So that starts with the basting:
 |
| Center is done, still a lot more to do to get the sides done. |
I'll get the rest finished tomorrow. As I am pinning, I'm re-thinking the stitch pattern I thought I would use. So now I'll have to preview this one before I can start on the stitching. While I hope I can get a lot done on it this week, I'm prepared for the possibility of it not getting it completely finished before the New Year rings in. However, at least it's started so I'm sure to get it done before the mystery season ends in January.
Crossing Over To Cross Stitch
Lastly, I will end the day as I usually have lately with cross stitch. The Thanksgiving piece I've been working on is almost done.
 |
| Last progress on this can be seen here. |
On to Day 2!


