Showing posts with label Quilters Newsletter Magazine. Show all posts

Saturday, April 17, 2021

A to Z Quilt Challenge: O = Orphan Blocks

 For the month of April, I have taken up Frédérique's Quilting Patchwork and Applique challenge to blog daily (except Sundays) on a quilt topic related to a letter of the alphabet.  

* * * * * * * * * *

Do you keep test blocks, extra project blocks and interesting pieced cut-offs from your projects?  

Quilters call these "Orphan Blocks".   If you shop for vintage quilts, sometimes there may also be sets of blocks that were never put into quilts.  Those spare bits and bobs are not useless!  They can be put together to make new quilts, project sections or added into pieced backings.

Back in 2005, my first journal cover was made up of orphan blocks.  Those Flying Geese were my first attempt at piecing that unit after seeing Billie Lauder demonstrate some shortcut techniques when she appeared on a "Simply Quilts" episode.  The heart block was a test of the "Invisible Machine Applique" technique I learned for the second quilt I made.   The Bow Tie block was to test a "3-D center" technique I wanted to try.  The HSTs were extras from a (since abandoned) mystery quilt project.  The rest were fashioned from the scraps of projects I had made or was working on at the time.  

My absolute favorite orphan block quilt was one I got to see in person back in 2011.  Victoria Findlay Wolfe made a quilt she called the "Kitchen Sink Quilt".  

Edited to add:

From her book:  "Playing With Purpose".  See the whole quilt at the "KSQ" link above.

OMG, it is gorgeous and not what you'd think of when talking about leftover blocks!  If you Google "Kitchen Sink Quilt" you will also find any number of links to other quilter's orphan block projects.

So how do you work with orphan blocks?  Well, You Tube has your answer to that!  Once again, do a search of that platform and you will find instruction on using your spare blocks from people like Pat Sloan, Becky Jorgensen and her Patchwork Posse group or this "Learn How To Quilt Encyclopedia" video.  

Kat who organizes the Covered In Love charity quilt drives, even had one of her "Orphan Block Wranglers" make up quilts of orphan blocks for use for her hospice quilt donation mission.  So consider putting your blocks together into a quilt that will serve a good cause.  Maybe you can use your blocks to go into a pieced back like Quilting Daily editor Lori Baker talked about in this reprint of an article from a 2016 issue of Quilters Newsletter magazine (which sadly was its last year of publication😓).  

So don't throw or give away those extra blocks and pieced cuts.  Find a way to incorporate them into a new project.  One day I plan to fill my design wall with my "box of blocks" and I look forward to seeing the project that will emerge from it! 

Do you have orphan blocks?  Have you ever put them together to create a new project?

Tuesday, April 13, 2021

A to Z Quilt Challenge: K = Kits

 For the month of April, I have taken up Frédérique's Quilting Patchwork and Applique challenge to blog daily (except Sundays) on a quilt topic related to a letter of the alphabet.  

* * * * * * * * * *

As a quilter, one of the big topics in this craft is always fabric.  Last week, I got to talk about Fat Quarters and this week, let's talk about Quilt Kits!  

I usually accumulate my fabric stash by choosing a project first and then buying fabric.  So for me, a kit represents a quick and easy way to gather fabrics for a desired project.  This way someone else can do the work of expertly coordinating the prints and colors!

However, quilt kits are not the invention of our contemporary quilting generation, they have been around since the 1920's.  In a May 2004 Quilters Newsletter article on the subject, author Arlene Burgess explained how even back in the early twentieth century, magazines featured ads and patterns for quilt kits.  There were even pre-cut kits back then!  The kits that were offered were usually for applique designs and sometimes block kits were offered in exchange for a subscription.  I guess that is the original "Block of the Month"! 

Many early kits were designed and sold by women who operated "cottage industries" out of their homes.  Eventually the larger craft and needlework companies began offering them too.  In the same article, quilt historian Merikay Waldvogel said that according to a 2003 industry survey at least 30% of quilters had purchased a quilt kit.    

I have made a few quilts from kits....

Dino Sports, All Spruced Up and Valor

In the case of all the kits I've purchased, they were sold to highlight a specific (and usually newly released) fabric line.  Needless to say, I also still have more than a few kits to make up....

It has also been said that a kit will often be cheaper than sourcing the fabrics for a specific design yourself.  Purchase minimums can make buying the fabrics "off the bolt" for a project more expensive than getting a kit.  I will say that most kits are usually generous in the amount of fabric you get in them.  Often there is enough leftovers to either start a second project or make a table runner or mini quilt with them and a little additional fabric.  

The downside of kits are a lot like those with Block of the Months --- the assumption that having everything on hand means you will make it up faster.  In my experience, that may not necessarily happen so buyer aspirations beware!  I will also say that kits can be expensive.  I try to seek out kit sales which make them an even better deal.  Craftsy (at least under the old management) and Connecting Threads often have good deals on sale kits.   

Wondering if a quilt kit is for you?  Well, take the advice of QNM Editor Bonnie Lehman from a 1975 "The Needle's Eye" column:

"Here are some questions to ask yourself before buying (a kit):  How much would it cost me to make this same quilt design if I shopped for the materials and cut them myself?  What else will I need to finish this quilt besides the materials in this kit?  Are these other materials, if any, available? Is the time I will save using this kit worth the difference in its cost and the cost of the raw materials in it?"

She offers other good cautionary advice once you have your kit:

"It is not unusual to buy a kit...and find that you may be short (or long) a piece or two of fabric...However, this need not be a problem for you, as a consumer, if you open the kit as soon as you get it and check the contents.  If you are missing any ingredients, the time to find out is before you start putting the kit together.  Return it to the store, or write the company from which you bought it.  They will either replace the entire kit or supply you with the missing pieces...It is very hard to match fabrics in old kits.  So it is wise to make sure you have all you need to finish the project as soon as you buy the kit."

Ahh, the more things change, the more they stay the same!  Have you ever purchased a quilt kit?   

Linking up with Frédérique and the other Challengers at Quilting Patchwork and Applique.  Bonne journée!

Tuesday, April 6, 2021

A to Z Quilt Challenge: E = Edges on Quilts

For the month of April, I have taken up Frédérique's Quilting Patchwork and Applique challenge to blog daily (except Sundays) on a quilt topic related to a letter of the alphabet.  

* * * * * * * * * * 

I always say that there are so many ways to have fun and be creative when making our quilts and the fun is not limited to the front of it!  In addition to how you create the top, you can also creatively piece your backings and make specialty quilt labels.  You can also make interesting choices in the color and pattern of the fabric you use for the binding to go around the Edge of your quilt.  

However, there is also an opportunity to play around with the actual edges of your quilts to add another unique spin to a finished project.  

How about adding clamshells to the edge of your quilt instead of binding?

Vintage Treasures Clamshells

I saw this edge done on an antique quilt and unfortunately did not write down the name and source of the quilt when I discovered it.  At the time, I was working on this quilt which had a "vintage vibe" to it so saw the clamshell edge as a way to make this big box BOM project my own.

How about a Scalloped edge?

Charming Log Cabin Scallops


This very easy quilt was patterned with this edge design.  I was going to use the Quilt In A Day ruler to make the edge but found that by marking this household "quilt tool", it gave me the spacing I needed better, Lol!  

Fun with Prairie Points

Feathered Star Wall hanging with Prairie Points

Star Table Topper with Prairie Points

In instances like this, I use the technique where you make the points from one strip of fabric that is folded wrong sides together to create the points.  You can see how I did it for the topper in this post.

Flange Bindings

Alex's Baskets Quilt


Valentines Day Pillows


Two great things about this binding technique: both the binding and the flange are created in one strip piece set and it is completely applied by machine!  For an easy how to, check out Jenny Doan's video here.

*********************
Edited January 2025 to Add:

I just learned that Accuquilt now has a die with premeasured strips to create this kind of binding!  Check it out here.  
********************** 

I was recently looking through some of my Quilter's Newsletter back issues and came across this tutorial (March 2004 issue):

Hmmm, I think I might try that in the future! 

Have you tried adding any special edges to your quilts?   What other interesting edge techniques have you come across?  

Wednesday, September 30, 2020

September Wrap up: The End of National Sewing Month and Mini Madness

September was National Sewing Month and for me it was a month for a bunch of mini quilt finishes!


"Lidia"

First up is a project in my continuing obsession with Edyta Sitar's Laundry Basket Quilts designs!  I learned about her mini log cabin quilt design when I saw one of her "Quilting Window" videos on You Tube.  She also offers it as a stand alone pattern and in her book "Little Handfuls of Scraps".   

I started piecing the blocks for it at the end of  July and the fabric for the block "logs" came straight out of the crumb bins.  The blocks were only two inches finished and the logs started out at 3/4".  I probably needed to block the quilt top when I finished it so the borders are a little wonky.  It didn't help that in order for it to fit the space I want to hang it, I had to make my borders smaller than patterned.  I fussy cut them from the stripe fabric pictured.  Making it with larger borders might have helped me square it up a bit more.  

What was cool was that I found a quilting motif for it in an unusual place. 


 A couple of weeks ago, I read a post by Rebecca on her Cheeky Cognoscenti blog about how she had received a bunch of old Quilters Newsletter Magazine issues from a guild member cleaning out her studio.  She had even found a solution to a piecing problem she was having in one of them.  I commented that I still love my QNM issues even though the magazine ceased publication back in 2016.  I have an almost complete collection of them and often find new things of interest or education when I thumb through them.  

It just so happens that the same week I finished the top for this project, I had received an old QNM back issue that I didn't have and found for sale on eBay.  It was a case of perfect timing since the issue from July 1976 (!) had the perfect quilt design for this little mini quilt!  Even better, all the gentle curves in the design meant it could be executed with a walking foot.  The only issue was how to mark it?  I took the "Golden Threads" paper template route although I used regular wrapping tissue paper to make my templates.


This project was another fun little Laundry Basket Quilts diversion and I look forward to getting it hung up and displayed. 


"Gertie"

 Next up is my micro-mini version of one of Carrie Nelson's Schnibble quilt designs. 


The original quilt is lap-sized and made from charm squares.  Mine is another mini pieced from the crumb bin starting at the end of  July.  This time I used 1" starting strips and scrap triangles (save those cut offs!).  Working so small, it was a bit of a challenge to sew together and I had to press the seams of the triangle squares and all the rows open.  That allowed it all to lay flatter given the tight confines of the seam allowances after the blocks and rows were stitched together. 

Ironically it was only after I had finished the top that I happened to read a blog post by Janet of the Rogue Quilter blog who is a phenomenal mini quilt maker.  Back in 2016 she made a mini quilt by using 1/2" finished gridded fusible interfacing.  If I had thought of that, it would have saved me a ton of effort!  And wouldn't you know it, I already have some here.  Hmmm, guess that means I have to do another one of these, you know for scientific testing purposes, you understand!  

This one was also quilted with a walking foot, this time using the freezer paper template techniques from Mary Mashuta's "Foolproof Walking Foot Quilting Designs" book.  I used the same technique last year on a baby quilt I made for a relative. 


The "binding" on this one was the backing turned to the front using a tool:  


"All In A Days Work"

Back in June, I had set up some hand work projects to work on while recovering from surgery.  I had started a wool piece that's been a "Hussy" (HSY = Haven't Started Yet) project for years.  

Well now it is finished:   The original penny rug pattern by Wooden Spool Designs was designed to finish about 16 inches in diameter.  For my project, I reduced that to 9 inches so it could be used as the header for a holder for my shopping list pads.  

Back in 2015 (which lets you know just how long this HSY has been hanging around!), I saw a similar penny rug design by Bonnie Sullivan called "Sunflower and Chickens".  I loved her idea to have some of the eggs on the tongues have "yolks" and decided to do that with mine as well.  And don't you just love when a plan comes together:  I had the absolutely perfect fabric in my stash to back it with:

I had always planned to make this penny rug design to hang in my kitchen because I have a few other chicken themed pieces in there and have long wanted to add more.  I have an old dry erase board for the grocery lists that has seen better days and I've been trying for a while to figure out a way to replace it.  Now I have it!  I'm thrilled to get this one done and put to use!


"The Purple Pineapple Mug Rug"

Ok, last but not least:  my best friend from high school is a grandma and faced with taking on the duties of homeschooling her kindergarten grandson.  He and her daughter live with her and her daughter works two jobs.  My friend works from home so it was easier for her to take on that task. 

 As have so many other parents during the pandemic, she is forced to learn how to manage her grandson's school days while juggling her own work.  It's an adjustment for everyone, particularly since it's the first structured school experience for her grandson.  From what she tells me, what they study in Kindergarten these days is way more advanced than it was in our day! 

Since she's working so hard to meet the challenges of teaching from home, I wanted to send her a little "pick me up".  I saw these at our local supermarket and just knew she'd love it!

Well, as a quilter if you send a mug, 'ya gotta send a mug rug right?  In a recent Skype chat with another friend of ours, she mentioned she liked purple so I rummaged through the stash and pulled as many purple fabrics as I could.  But what to make?  I've made a few mug rugs featuring inspirational panels from a June Tailor kit I have and still had some left so I started there.  

The kit has patterns to use with the panels but none would allow me to use as many fabrics as I wanted to, Lol!!  So I went looking for another design that could accommodate the panel AND a generous fabric pull.  As I was reading blogs,  I read about someone making a Pineapple quilt and I thought, that just might be the ticket!  Particularly since I knew I had this:  

Very early in my quilting journey, I wanted to make a Pineapple quilt.  Back then, most were patterned to be made by paper piecing the blocks.  I did start one using that method and quickly found that to be very tedious and that project is still a UFO (but will have its day in the sun again one day).

BTW, This pattern is in the June 2000 issue of QNM.

Eventually, I found out about the Pineapple Rule by the Possibilities/Great American Quilt Factory ladies Lynda Milligan and Nancy Smith.  The sales pitch was that you could make Pineapple blocks without having to paper piece them.  When I got the ruler, I immediately made a test block.  That "orphan block" eventually became a journal cover.

Unfortunately, I haven't used that tool since -- that is until now!  Their method uses 1-1/2" strips.  Normally the block would start with a 2-1/2" square but the June Tailor panel I was using is 4-1/2" square.  No matter, that just meant less rounds of strips to sew to get to the 12" finished size!  

I kept this one simple: I only had four light fabrics so used one in each of those rounds.  I placed the medium and dark fabrics scrappy throughout the block.  Then it was a simple pillow turn finish (no binding!)  and some simple stitch in the ditch and stitching down the center of the logs and it was ready to be mailed out!


I  still have two AQS BOM blocks to finish up for September and I had another BOM project I had hoped to work on.  I guess they will instead be early October projects!

Saturday, August 31, 2019

Three Cheers For the Red, White & Blue! --- Part 6 and The Finale!

As August comes to a close, so does my Summer of Red, White and Blue Projects!  This is the third RWB project to make it to the "Finshed Or Not Fridays" Link Up, now hosted by Alycia over at her Alycia Quilts/Quilty Girl blog.


After spending so much time on my last project, the "Star Spangled Runner", it was a relief to get a quicker one completed.  I had hoped to get this done to post yesterday but I still had some quilting to do on it today along with all the finishing stuff.  So the "Salute To Stars" Table Mat made it just under the wire for the end of August!


Like the runner, this is another free pattern from American Patchwork and Quilting magazine.  As the pattern notes, it is easy to make the original design larger or smaller by adding or subtracting blocks.  The free pattern is actually the "color option" of a larger lap quilt that appeared in the magazine.  I made mine with even fewer blocks in order to fit the 18" square table I want to use it on:


I also recently saw a pattern  made up of the same basic blocks but in a larger size and laying them out in a way that creates a long runner.  A very versatile design indeed!

I opted to make a slight change to the design.  The original quilt used Flying Geese blocks to create an outer border around the center of the top.  I opted to go for a 3-D substitute and use a Continuous Band of Nesting Prairie Points instead!   I've only used this technique once before as the "binding" finish for a Feathered Star wall hanging way back in 2003 in my early quilting days.


I learned about the technique from a pamphlet --- one of those "Free with Subscription" gifts I got back when I started my Quilters Newsletter subscription.  I still miss that magazine!!


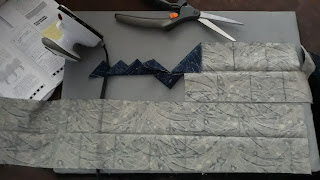
Even though Flying Geese are my absolute favorite block, I liked the idea of being able to make the triangles float above the striped outer border.  They are easy to make too -- only requiring a strip for each set of points, some marking and cutting (with scissors for a change!), folding and pressing.


There are a number of videos around the web showing how to do the technique.  I also found a PDF from the Utah State University Cooperative Extension (!!) showing how to do two-color and piped variations.  The two sides of the finished band get folded together and the band gets sewn in between the turned under edges of the top and backing.  In my case, I sandwiched it between the center of the top and an outer under-border.  

I had to "Frankenstein" some batting scraps for this and then decided to quilt it with some simple, straight forward grid quilting.  It was easy to do since I just had to follow the lines or edges of the piecing and the striped border print and it could all be done with a walking foot.

When it came time to finish the quilt edges, I was going to bind it with a traditional binding but then this week, Bernina's "We All Sew" blog put out a bunch of tutorials on various binding techniques.  One of them was for an "invisible faced binding", a technique I've seen but haven't tried before.  In addition, the way they did it, it provided a convenient label area and hanging sleeves (in the form of triangle corners) as part of the process so I was definitely in for that!


This was one of those RARE times, I was willing to hand sew down a binding!  If I want to hang this up in the future, I only sewed down the center edge of the triangles --- I left them open at each corner so I could slide in a dowel rod for support to hang it.  Of course, this won't be completely done until I write in the label information on the triangles!

I've been playing in my RWB stash all summer so all of the fabrics for this have been sitting on my cutting table while I worked on each project.  Needless to say repeats abound in the fabrics I used for all of my last few projects.  I had cut the squares for the star fabrics from the some of the same fabrics used for my last QOV top and the blue Prairie Point fabric and the striped print underneath it were also used for the corner squares and borders on it too.


And speaking of QOVs, now that my RWB Summer is done, it's time to focus on the other things I was supposed to be working on this summer --- namely, getting them quilted!  Well, I have that and another small (not RWB) desk mat to finish for a gift.  I admit I also have a new project that I want to embark on this weekend.  Thank goodness it's a long weekend!!

But before all of that, I'm heading back over to Alycia's to finish checking out what others are working on or celebrating finishing this week.  Link up and show us what you got (that we will want to make too)!!

Sunday, November 11, 2018

It's Finally Time To Change Things Up!

One of the things I've been doing "in the background" as I gear up to get back to the machine, is to finally swap out for the season all the quilts decorating the house.  For me, Fall felt like it descended rather abruptly everywhere and one of the things I've been enjoying on the web is seeing how everyone decorates with their quilts and quilt projects for the change in seasons or planning for the new quilts they will make to display for the Halloween, Thanksgiving and Christmas holidays.

From 1992 to 1997, the dearly departed Quilters Newsletter magazine ran a series called "At Home With Quilts".


Every time they sent out an email asking readers what topics they'd like to see covered in the magazine, I always asked for that one to come back!  It safe to say this is a topic of interest to me....


... and I admit that making quilts for different places in my home is one of my "Quilting Prime Directives".  Examples of a few of my favorite Quilty Decorators in the blogosphere are:  Lori DeJarnatt over at Humble Quilts, Heather Mulder Petersen of Ankas Treasures, Lisa Bongean of Primitive Gatherings,  and Janet and her wonderful mini quilts over at Rogue Quilter.  However, if I visit any blog and the host talks about quilts on display, I definitely stop in for the open house!

I've been very slow this year to make the change over to Fall in my own home but figured that might be the best place to start in my attempt to get back into the groove.  Changing out quilts means looking at and through your old projects.  That usually makes me long for capturing the joy (and sometimes remembering the agony) of making them which eventually leads me back to the sewing machine!  So I finally got started on my own seasonal change over....

First up was the quilt behind the bookcase.  From this....


To this. 


This one is "Flannel Point of No Return" and was a pattern by Connie Tesene and Mary Etherington of Country Threads.  It was  patterned in the very first issue of American Patchwork and Quilting magazine.  Most people remember Marti Michel's "Storm At Sea" cover quilt from that issue.  


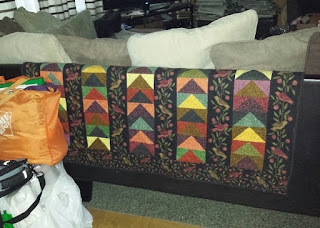
Normally I put this one on the back of the couch during the fall and winter seasons.  Made of flannel, it's particularly cozy to be wrapped up in on cold evenings.  I thought I'd change it up this year which means the one that was on the wall last year is going onto the back of the couch this year.


"Flying for Cover" is another quilt from my "flannel series" (I do love me some flannel!) and was one of the quilts that finally got its label when I did the Quilt Alliance's Label finishing challenge last year.  I'm still not sure if I like the placement switch up --- "Point" has less contrast with the wall than it did when it was on the back of the couch and vice versa for "Flying".  I'll let them set awhile and see if I want to change them back.  Now, the quilt that had been on the back of the couch....


...goes over to take up residence on the living room chair.   Repiecing the Past, my Civil War sampler scrap quilt, booted out its sister quilt Civil War Legacy.....


...which now gets relegated to the bottom of the quilt storage table since I have no place to display her at the moment. 


The last swap out in the living room will be the quilts displayed above our computer equipment cabinet.  So away goes Spring Basket Blues....


...to be replaced by Tucker.  So far these are the only two mini quilts I've made for this spot --- hmmm, going to have to add something to the "To Do" list to correct that.....


There was also a quick swap to make at the entry staircase:  it's just a "flip"  from the Underground Railroad sampler....


....to the Pioneer sampler on the flip side.  


It's simple to change out things when the quilts are sandwiched back to back!  I've got a bigger "decorating with quilts" project but I'll report on that when I get it done.