Showing posts with label TV/Movie Quilts. Show all posts

Friday, February 21, 2025

Finished Or Not Friday: A Whole Lot of Longarming Going On!

I'm pleased to join in this week at Quilty Girl Alycia's for Finished Or Not Friday!  

Some of these projects have been a long time coming so be warned in advance that this will be a very long post!

This past Sunday my DH and I returned from our annual winter trip to visit my MIL in North Carolina.  As always, since my MIL is also a quilter, these trips also function as a bit of a mini quilt retreat.  Even more so this year as my MIL has a new friend from her guild and also has a new "neighbor" who is a former co-worker of hers from here in NY who retired to my MIL's town last year.  I had taught both my MIL and her co-worker to quilt close to twenty years ago now and the woman still has the quilting bug big time!   So needless to say a few quilt shop excursions and a "sew together" session for the four of us happened during our week long stay.

The machines on break while we ate!

My MIL purchased a longarm during the 2023 All Carolinas Shop Hop so each time I visit it is also another chance for me to learn more about using it.  She has a Handi Quilter Moxie on an 8 ft frame with a Pro Stitcher tablet.  

This picture is from around the time she purchased it.

Each visit since she purchased it has presented a different "learning experience" (aka a need to solve problems, LOL!) for both of us.  This time, the big lessons were on achieving proper balanced tension and learning how to adjust both the bobbin and top tension.  

A very handy video on that topic can be seen on You Tube here.  At another point, a call to Handi Quilter's Customer Relations about the thread popping out of the upper tension disks resulted in a very simple solution:  check to see if you need to clean out accumulated lint between the disks!  The good news was that my reward for learning the lessons is that I managed to quilt three quilts!! 

A New Project For A Gift  

The first of those was not one of the aforementioned "old projects" but a new one that was a birthday gift for a friend of mine.  As I had noted in a "To Do Tuesday" post last month,  I owed this friend a memory quilt that we have collaborated on the planning of for a couple of years now and for which I have compiled a stash of fabric.  The problem has been that I consider this a very personal and important project so of course have been furiously procrastinating on getting it perfectly designed before starting it!  

However, my friend and her husband had visited us over the holidays and she offered an out of just making her any quilt since that is what she ultimately wants.  Now, it should be noted that I have made this friend a number of things but they have been smaller projects like a wall hanging to commemorate her cat that passed away, a jewelry roll, a desk mat and two mug rugs (seen here and here).  I had made her husband a quilt back in 2017 because we shared two interests and despite the many things I've made her, I think she was a little jealous of that.  

Since the request made over the holidays released me from the obligation of specifically making a memory quilt, clearly that tempted the Quilt Muses to provide an opening!  Two weeks before we were due to leave on our trip, I happened on the absolutely perfect line of fabric and even better it was on sale!

Image from Annie's Catalog now Annie's Attic

The Annie's Catalog site (recently renamed "Annie's Attic") had sent word of a big sale on Fat Quarter Bundles that they were having.   One of them was for a bundle of flannel FQs from the Henry Glass Fabrics "I Love Sn'Gnomies" line.  My friend is a huge fan of the Gnome decorating trend!  Of course the first thing I thought when I saw a bundle of six FQs was that it was the perfect start for my current favorite fast and easy 9 FQ Disappearing Nine Patch quilt design!  It also doesn't hurt that I also love working with flannel for quilts.  Annie's also had a panel from the line so I picked that up too (the last one they had!)  to start off the backing so now I had the prospect of giving her a two sided quilt!  

Then I found an Etsy vendor with another of the prints from the line deeply discounted and they had just enough to help fill out more of the back and provide another FQ.  Another Etsy vendor carried a number of the prints from the line so I was able to order two more FQs to round out the nine I needed and some yardage to fill out the rest of the backing and for the binding and to have a little extra for stash.

Both my friend and her husband had birthdays (a day apart) coming up while we would be away so with the clock ticking, the plan was to hope everything would arrive quickly enough that I could get this easy to piece quilt done and in the mail before we had to leave.  

Well, at first that was challenged when I realized after I put in the first Etsy order that it wouldn't arrive until we got back from our trip as the vendor was away.  However as luck would have it, an alternate option turned up!  One of the fabrics I had ordered to round out the nine FQ set turned out to be very directional and was cut as a traditional FQ (18" along the lengthwise grain and 22" along the crosswise) but that didn't work for how I wanted to place it in this design.  

Not exactly to scale but how it came vs how I needed it.

This is another lesson I have learned as I have made this simple quilt design:  you have to pay attention to directional fabrics in relation to where you want to use them when the nine patch is split.  So I had to go back and order more of that particular fabric.  The vendor only had a one yard cut left and it was already in a lot of peoples carts so I snapped it up immediately even though it was way more than I needed.  When it arrived, it turned out the vendor gave me the "End of the Bolt" so a little more than a yard which was great as I was able to both cut the FQ in the orientation I needed and provide enough extra fabric to help fill out the back in place of the first print I ordered that wouldn't arrive in time.

I did get the top and back pieced the day before we left and had then hoped I'd get it quilted right after we arrived in NC so I could mail it from my MIL's and have it arrive at most just a day or two after their birthdays (I had also brought the gift I had for her husband down with me so they could be mailed back together).  Well that didn't happen either due to the aforementioned "tension lessons" I needed to learn.  However, eventually they got resolved and I got the quilt quilted!

I used a "Snowflake" design to quilt this that came in Pro-Stitcher.  

Since I didn't finish everything up until the day before their birthdays and since they live in New Jersey so are actually on the route of our drive back home, I called to ask if they would be home the day we returned and we ended up dropping their gifts off to them as we passed through the state on the way back to The Bronx.  She absolutely loved the quilt so Mission Accomplished!! 

** Now for the "Old Projects" and feel free to take a break or grab a cuppa before continuing! **

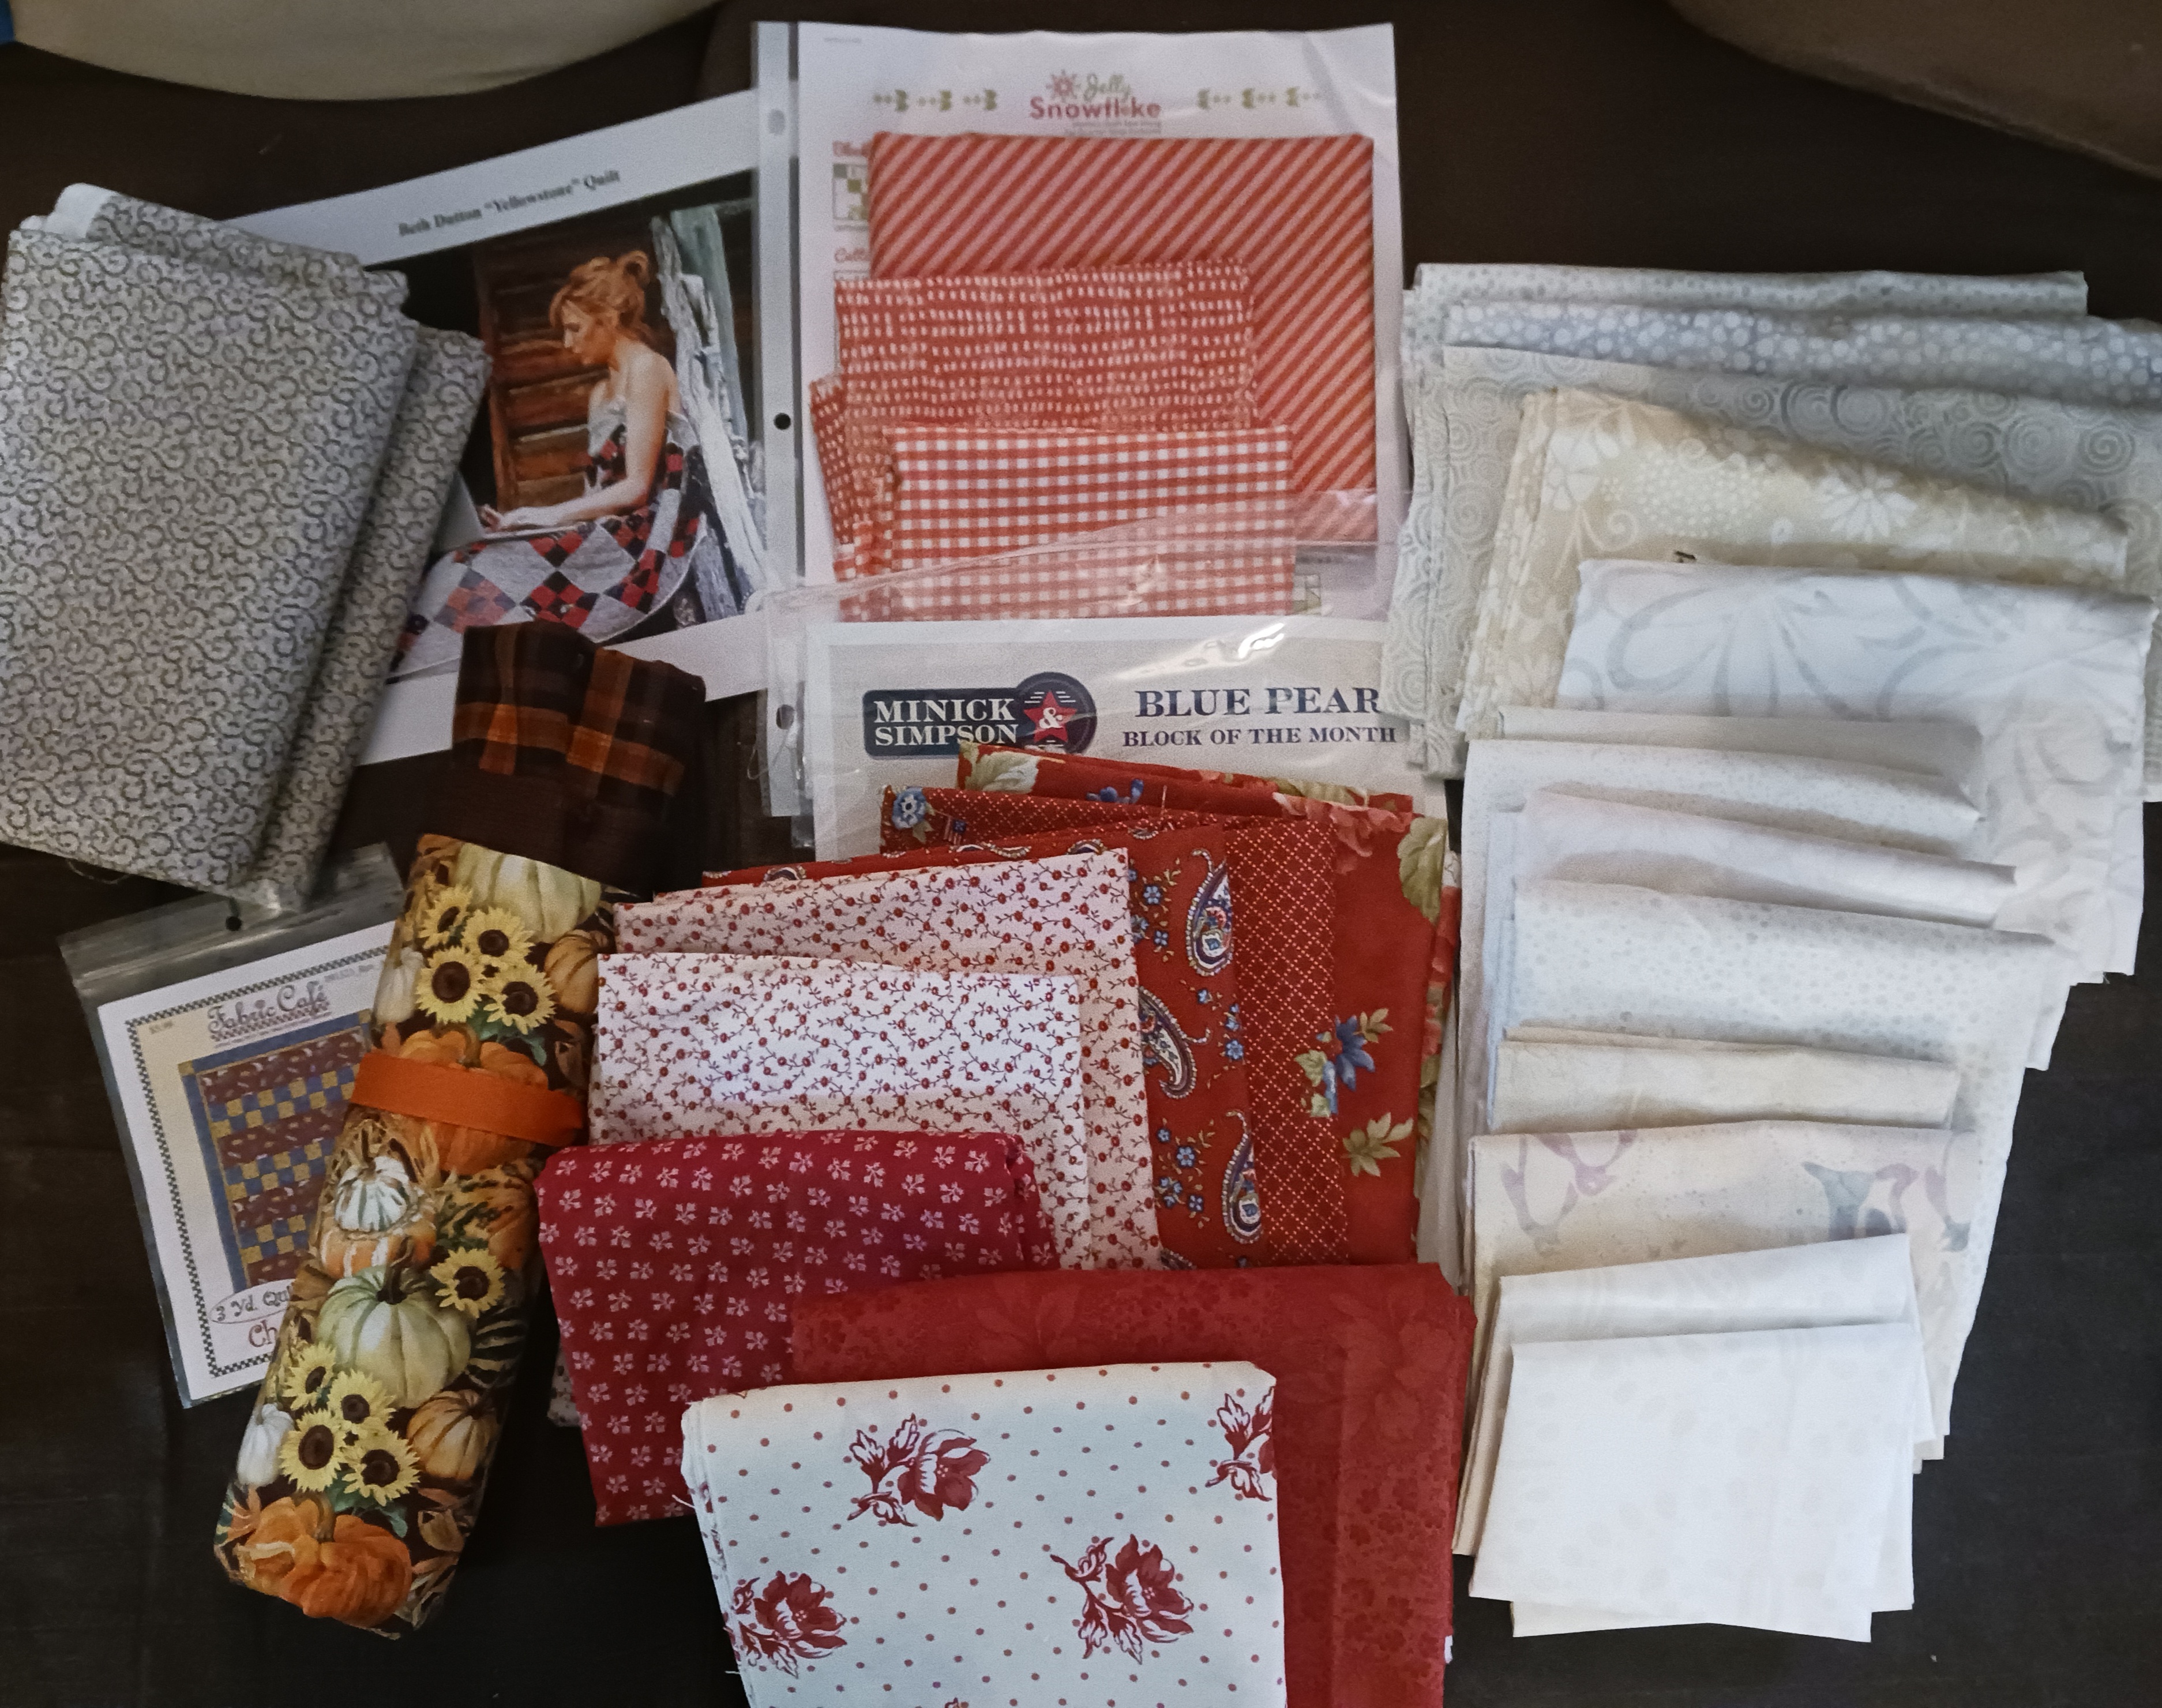
Old Project #1:  Beth's Yellowstone Quilt  

I am thrilled to say that I have finally finished my re-creation of the quilt I was immediately taken with after seeing it in the Yellowstone TV show!

If you watched the show, you will remember when Beth Dutton wrapped herself up in it while staying in the homestead cabin with Rip.  It can be seen in the Season 2 Episode 7 called "Resurrection Day" and again in the Season 3 Episode 3 called "An Acceptable Surrender" which is the image I worked from.  If you've never seen the show, you can check out the scene with the quilt  @10:32 in this "Best of Beth & Rip" video on You Tube.  

I soon learned that I wasn't the only one that loved it because there are many, many people on Etsy offering patterns and/or kits for it (just search for "Beth Dutton Yellowstone Quilt"),  people selling finished quilts like it and at least one You Tuber that had hers hanging in the background of her video!  

It's a pretty simple design that I was able to easily draft up in EQ8 to get the fabric requirements for it.  

I had a leg up once I decided to make it since I had stocked a lot of red prints early in 2022 for making a bunch of Red & White Christmas quilts.  The leftovers of that stash provided all that I needed for this one.  Next I found what would ultimately become the backing fabric for it in October that year when my DH and I went camping on the Blue Ridge Parkway in the western part of NC.  We did a portion of the All Carolinas Shop Hop while there since it was an opportunity to go to stores I wouldn't normally get to visit.  

When we visited my MIL for the second half of that trip, I found the perfect fabric for the alternate squares in the "by the pound" sale cubes at the Keepsake Quilting/Pineapple Fabrics outlet as she and I Shop Hopped in the eastern part of the state near her (and unfortunately that outlet has since closed!).  A month later,  I picked a few of the black and white fabrics out of my stash at home and purchased the rest from Etsy vendors.   

When we visited my MIL again in March of 2023 I brought my accumulated "kit" for this along and managed to cut everything out and sew the top together while there.  

On my design wall after I got back home.

At that time, my MIL hadn't seen the show but when she saw my blocks laid out she wanted to make one too, LOL!!  She has since watched the show as well and on our trip there this month and seeing my finished quilt, finally gathered together fabrics for the nine patches for hers.  She had about half of the blocks made up before we left Sunday but still needs to source the fabric she will use for the alternate squares.

 I also always envisioned binding this with a "ticking stripe" and found what I was looking for -- once again from an Etsy source -- later in the year after I had pieced the top.  I debated for a long time after that about how I wanted to quilt this so it never got to the top of the "To Do" pile during the intervening period.  When we began preparing for the trip down this year, I sorted through my projects to consider what to bring with me.  I thought it would be great if I could quilt this in the same place it was pieced and so packed it up to go.  

I wasn't loving any of the pre-programmed stitch patterns in Pro-Stitcher for this and haven't yet had a chance to try doing free-motion on this machine.  So another new longarm lesson happened when I purchased and downloaded a stitch pattern and loaded it onto the Pro-Stitcher tablet.  I found this one that I thought was perfect given the provenance of the quilt:

It loaded up and stitched out without a hitch!


The only issue I had was that I think I should have sized the pattern to stitch out smaller than I did.  I also could have lined up the pattern better by offsetting the alternate rows so it would have not left as large a gap between the row repeats.  The good news is that I can go back in and fill in those spots with a "barbed wire" motif using my DSM if it really bothers me after I wash the quilt.  But for now, once again "Mission Accomplished"!

Okay (finally) the last one:  Old Project #2: "Dominique" 3 Yard Quilt   

Cool, reporting on this is a two for one!  The quilt pictured below was made pre-blogging so I've never had a chance to share it before.  All the way back in 2008, I made this baby quilt for the then President of the Parent Association in my kids elementary school who gave birth to her third daughter at the end of 2007.  

Apologies for the picture quality these are pre-digital printed pictures.


The other old project I'm sharing today began when I re-organized my stash in the  Summer of 2023 and found a little more than a yard remnant of the yellow fabric used in the border of that baby quilt.  By that year I was a big fan of the Fabric Cafe's "3 Yard Quilt" concept so I immediately wondered if I might find a way to use this "found fabric" to make one.  That opportunity came when a pink fabric I had actually purchased to use to make a 3YQ didn't go as well as I thought with the fabrics I had coordinated it with when I ordered them.  However, when I sat it with the yellow print, I thought there was something there --- a bit busy but there was something!

I took the two fabrics and went shopping in person for something that might work.  It wasn't easy (did I mention these fabrics are a bit "busy"?)!  Eventually I found a floral print I thought I liked.  Okay, it too was really busy but again there was something appealing to me about the three together.  I think it was that each picked up a color of the other, the white background of the floral was a perfect contrast to the other two more medium value prints with bright highlights and each print had a different scale (size and density) of print.  I figured what the heck, why not try it!  

Although Donna Roberts and her daughter Fran Morgan who design the 3YQ patterns always say "any three yards of fabric can make any 3 Yard Quilt",  I am not always convinced that is true.  I do however love watching all of their videos to see what fabrics they combine together.   I will admit though that I don't always think all of their combinations make the most of the design they are applied to.  They are never bad but not always "Wow"!  

So needless to say it took me a long time to choose one of their designs for this busy looking bunch!  Eventually I settled on the "Dominique" pattern from their book "Modern Views" (and note both are also available in digital form).  It was the one design that provided separation between the placement of the floral and the yellow print and I liked that the yellow would be in the outer border like in the original quilt it was used in.  

The top and the perfectly coordinating backing!

This was another quilt top that was made while visiting my MIL and one of two 3 Yard Quilt tops made on our trip there in October 2023.  This is also another quilt where I found the backing during the All Carolina Shop Hop that year!  I brought this back down to NC twice in 2024 but never got to quilt it.  I guess three times is the charm!

Originally I had thought about trying to stitch a block sized pattern in the pink centers and do a border design surrounding them and in the borders.  Yeah right, my longarm skills are no where up to that level of pattern placement yet, LOL!  So I settled for a simple all over pattern.  

And so now another old project has been completed!

Front and back with the label area pieced in.

Now that my looong story is done, I can head back over to Alycia's and see what others have to show for their "Finished Or Not Friday" efforts this week!

Monday, March 27, 2023

Back Home From "Vacation".....

We returned on Saturday from our week long visit to see my MIL.  She had told us that North Carolina had some really warm (70+ degrees) days in the prior weeks so we prepared for that.  But it looks like we brought the cold from New York along with us as it stayed below mid-50 degrees for most of the time we were there and only warmed up on the last two days of our stay.   She had wanted my DH to help her with some yard work but he was only able to till a small section of her front yard when it finally got warm.  I harvested some mint that was growing there and showed her how to dry it and use "fill your own" tea bags to make mint tea which is something she likes.  

For me a trip to my MIL's also functions as a mini quilt retreat so for the purposes of this quilty blog, here's what I took with me and what did and didn't get done:

In order to sew away from home, you have to take a machine!

First and foremost, Fanny my Featherweight is my go-to travel sewing companion!  Now that we are back home, I'm cleaning her out (look at all that lint!!) and oiling her up before I stow her away until our next trip.

One of the primary projects I had planned to resume work on was the APQ "Scrap Happy" blocks I started last year for their quilt along.  I have been following Pat Sloan's "Daily Blocks" prompt for March but instead of working on the block she is doing, I've been trying to complete blocks for some of my WIP projects.  

For the first half of the month I finished up piecing the blocks for "Roll, Roll, Cotton Boll" (more on that later) and for the second half of the month, I was scheduled to work on finishing the APQ blocks.  The good news is that I managed to stay on track even though I was supposed to start them on the 15th but didn't get to start sewing them until we arrived in NC on the 17th.  I sewed two blocks for the first few days and our last day there and one block a day for the rest of the trip.  

My leader/ender for that project were my "Scrappity-Do" blocks from a long ago free McCall's Quilting pattern.  When we left home I already had 85 made and would like to get them up to 100.  While away, for every "Scrap Happy" block I made I also made a "Scrappity-Do" one.  

The squares for the bottom three on the right came from my MIL's scraps.

Bonus:  I also was able to cut parts for both sets of blocks from my MIL's scraps as well as bring some more of her scraps home with me to process and add to my scraps stash.

Okay, all of you Yellowstone fans will recognize this one:   

Blocks and top all cut and finished on the trip! 

This is my re-creation of the now famous quilt Beth Dutton wrapped herself up in while staying in the homestead cabin with Rip!  Haven't watched Yellowstone so don't know what the heck I'm talking about?  If you can get access to Season 2 Episode 7 you'll see it (or check out the scene @10:32 in this "Best of Beth & Rip" video).  In my project notes, I wrote down that the shot of it I worked from (as seen in the picture on the design wall) appeared in Season 3 Episode 7 but I haven't been able to confirm that.

Edited 6/23/23 To Add:  I've since confirmed that the image of the quilt I worked from is actually from Season 3 Episode 3 of the show called "An Acceptable Surrender". 

DH and I watch the show and as soon as I saw it, I wanted one!  Well, looks like I'm not the only one as there are people on Etsy offering patterns and/or kits for it and a couple of people selling finished quilts like it.  It's a pretty simple design so I drafted mine in EQ8 last year to get the fabric requirements.  

At the time, I knew that I had planned to stock red prints for all the Red & White Christmas sewing I was going to do.  I did manage to get all that I needed for this from the leftovers in that stash.  I was lucky enough to find the perfect  fabric for the alternate squares in the "by the pound" sale cubes at the Keepsake Quilting/Pineapple Fabrics outlet when we Shop Hopped in NC back in October.  I had a few suitable black and white fabrics in my stash but also purchased a bunch from two Etsy vendors who happened to have a lot of cuts from some of my favorite fabric designers (Fig Tree, Minick & Simpson, Primitive Gatherings, ect).

I've had everything bundled together since the end of last year and this is the perfect kind of "mindless sewing" project to bring when I go to my MIL's.  It took an evening to cut everything up and another three days to sew up the nine patch blocks.  The (diagonal) block rows and top went together easy-peasy on our last day there.  

My MIL hasn't seen the show but when she saw the blocks laid out on a "design bed", she wanted to make one too and is going to start gathering fabrics for her version!  I already have the backing fabric for it that was also purchased on the Shop Hop.  I have an idea for what I want to bind it with but still need to procure that.  I'll print out a couple of pictures of the top so  I can sketch out some options for quilting it.

I also brought three other projects down with us but only managed to get a little work done on one since the rest of time there was spent helping my MIL with some of her quilt projects, we made a few shopping outings, assisted at her church's weekly soup kitchen and visited an ill relative.   

In this bag were the two layered projects that I had hoped to try to quilt on the trip.  The top one is my too long simmering "Modern Twist" quilt.  It's an old Planet Patchwork mystery that I had been stumped all of this time on how to quilt but now think I know the direction I want to go with it.  Unfortunately, I didn't get to that one this trip.  The bottom one is "Christmas Ribbons", the last of the R&W Christmas projects I made up at the end of last year.  I had thought I might be able start the quilting on this but ran into a problem with the label area I had pieced into the back when I layered this before we left.  

I had pieced the label area into the left side of the backing but when I finished the layering, found that it extended past where the top would stop on the front.  Since it has two star blocks as part of it, cutting part of them off just wouldn't do!  Measuring, I realized it would fit on the right side just within the boundaries of the top.  So once at my MIL's,  I unpinned the area where the label area was pieced in and "unsewed" the section and replaced it with some more of the fabric used on the sides of the backing.  Then I had to unpin an area on the right side, cut out a section of the fabric used there and insert the label panel on that side and then re-baste both sections.  Whew!  

I had to wait a couple of days to do all of that because my MIL had a quilt laid out on the table she uses for layering and on our second day there we went to purchase batting for it.  However when she pulled out the batting the day after, we discovered a problem with it!  So while we waited to go exchange the batting, I was able to slip my project onto the table and make the correction I needed to do.  Unfortunately, there was no time in the days remaining to work on the quilting so that will be a job to take up now that we are back home.

The last project taken on the trip were all the string and pieced blocks for "Roll, Roll, Cotton Boll".  My MIL had told me her design wall was empty so my plan was to pop these babies up on the wall, work on the layout and maybe get that top sewn together.  However, when we arrived, my MIL wanted some help with some Drunkard's Path blocks she had learned to make at a recent guild workshop.  We wound up needing the design wall to work out an alternate layout for the blocks so I focused instead on the piecing projects I brought with me and the rest was history!

Now that I am back home, finishing up the last week of "Daily Blocks" with the APQ project and working on the raffle quilts for my garden will take precedence in the coming days.  I may even start laying out the "Scrap Happy" blocks on my design wall and see if I can't start piecing together that top even as I finish making the last of the blocks.  We'll see how the work for March rounds out by week's end!   

Thursday, November 17, 2022

Shop Hop Tops!

It took longer than expected (as usual) but I finally finished up the tops for a few quilts using fabrics purchased on the recent Shop Hop:

Fall 3 Yard Quilt

Like many, I've loved the concept behind Donna Robertson's 3 Yard Quilt designs.  I also like watching their videos and seeing what fabrics they combine and how they use them in the quilt designs.  So one of my favorite stops in the All Carolinas Shop Hop over the last two years is the Quilt Lizzy store in Wake Forest, NC.  I've been able to score some really nice kits there and just like when you buy kits from Donna's Fabric Cafe, you also can pick a pattern for free to make it up in!

Prior to our trip, I had seen a pretty Fall quilt in one of the older Fabric Cafe videos and wondered if I might find a kit for one on the Hop.  Luckily that did happen so among the other goodies I found on the Hop, I scored one!  

Kit is bottom left

Most of the 3 Yard Quilt designs are pretty simple so I hoped I'd get it made up quick.  Of course, leave it to me to complicate that plan by wanting to also make the other two "easy" quilts from the Hop right along with it!  Still haven't quite learned my lesson about how taking on multiple projects adds more time to the making of each project.  I admit though, I also find it fun to "leader/ender" projects so that each sewing session feels like I am "cheating" by getting something done on multiple projects in one sitting at the machine.  Eventually though, I did get it done!

Fabrics are from the "Autumn Afternoon" line by Lynnea Washburn for Northcott

This is Fabric Cafe's "Checkmate" design (the link is to the printed pattern but it is also available as a digital).  I've seen it used many times in the Fabric Cafe videos (like hereherehere and here) although it was not one that I was particularly drawn to before.  However, I thought that for this fabric combination it was a perfect choice --- at least of all the patterns that were available from the store display.  This is a good one if you have a pretty "I don't want to cut it up" feature print.

What's also good news is that I already have the backing for it ready too!  While staying at my MIL's (our annual vacation mini quilt retreat) she asked me to go through her scraps and a bunch of fabrics she had picked up at fabric swaps at her guild meetings.  The plaid print was in that last bunch and it was perfect for this quilt!  There was also more than enough left for use in a future quilt.  

Edited To Add:  You can see the finished quilt in this post.

Dragons - The Ancients

As I said in my Shop Hop post, my DH and I had seen a quilt made up using Jason Yenter's "Dragons" fabric line and pattern for In the Beginning Fabrics.  We saw the gorgeous red version in person and having watched the first season of HBO's "House of the Dragons" loved the idea of having a dragon quilt to snuggle under when the next season comes out.  

The original "Dragons" line came out in red and blue colorways but the store we had shopped at didn't have any more of those fabrics.  So when I searched around, I discovered that there was also a green colorway called "Dragons - The Ancients" that had a different set of panel prints as well.  I truly lucked up when on another stop on the Hop, I found one of the green center panels in the sale section at the Keepsake Quilting/Pineapple Fabrics Outlet store.  With that in hand, the hunt was on to find out if the other fabrics from that colorway were still available.

I did find the fabrics but I also found a free pattern at eQuilter that used them.  Their quilt design was smaller and much simpler than the one we saw which also meant a smaller commitment to the amount of fabric needed and the effort to make the quilt.  Since the simpler design still made a great looking quilt, I was more than happy to settle for a cheaper, easier quilt!  So an Etsy shopping spree followed to get the supplies I needed.  However, I will say that despite how much easier it was, it still took me longer to get it made up than I expected!  That said, here's my finished top:

Once the top was done, I began to think about what I'd back it with.  Ironically, what immediately occurred to me was to recreate the general outlines of the front on the back.  I had purchased some additional  fabrics from the line with the intention of making bowl cozies for us and a friend who is also a fan of the show.  Those fabrics helped inspire the backing idea and so it was back to Etsy for more of the line!  

Backing fabrics on the left, finished top and binding on the right!

The backing fabrics just came in yesterday and right now I'm thinking of making the backing in a sort of "quilt-as-you-go (or is it "quilting in sections"?) manner in order to make sure that the front and back sections line up perfectly.  Work on that will commence when I'm ready to actually quilt this thing which may not happen until early next year.

Fat Quarter Shop Jelly Snowflake

This year my Christmas decorating scheme is Red and White and I've been lining up projects for that.  One that I came upon was the FQS's Jelly Snowflake free pattern series.  I saw this when I looked at the patterns they offered for Jelly Roll Day back in September.  When I looked at their blog post on the "Snowflake" sew along (which originally ran in 2020), it was amazing how varied were the color schemes used by each designer they had invited to participate.  Of course, I was particularly drawn to a red and gray version made by one of the FQS staff but I am already making a R&W quilt in that color scheme.  I was also pleased to get to see a blue and white version in person while returning from our trip and stopping in at the Virginia Quilt Museum.

However, there was also one made by Nicol Sphor in red, grey and pink and I decided to definitely go that route.  When I went looking for pinks in my stash, I instead found a "Strawberry Red" gingham print that I really liked and thought maybe that could be another "twist" on pink for the design.  I managed to pick up another print in that color scheme before the Hop and put finding others on my list of things to look for during the Hop.  I came back with some great choices (which you can see in the picture at the top of the post), so many that I wound up with six prints to choose from when I only needed four.  

I had picked out four dark red and the grey prints (three here when I needed only two) to use from my stash.  I also decided to purchase more of a red-on-white micro dots print I had that I felt really worked for adding a subtle amount of red into the background.  I made my version of the FQS design with 2" cut strips (1-1/2" finished) instead of jelly roll strips because I need my quilt to be smaller than patterned to use as a wall hanging in a specific spot.  

Ultimately, I made up the blocks in all of the fabric prints I had gathered and then laid them out with the other blocks to determine what would be used in the final layout.  After much deliberation and switching around of the blocks, I think this is going to be it:

It's not completely sewn together yet and I still may decide to do some piecing in that center square.  I also need to decide on a backing for this.  With all the reds I've purchased for this year's decorating scheme, I may just take the extra blocks I made and piece them together with some scrappy red squares and call it a day.  

Edited To Add:  You can see the finished wall hanging in this post.

Shop Hop Bags

Well, the Shop Hop bags started back in October are still not done!  Once again, seemed like a simple project but it has been complicated by poor instructions.  I had picked up the page full of edits to the original instructions but even the clarifications are still a little confusing.  I've already had to change one of the side pockets from fabric to mesh so I won't lose seeing all the motifs from the panel print used to create the pieces for the bag.  I do hope to get this one done before the end of the year but at this point, I'm not hopeful!

All of this was yet another diversion from the sewing I had planned to do this month but once these are all out of the way (and off my mind), maybe I can go back to focusing on what I should be working on!

Thursday, October 27, 2022

Trip Recap: All Carolinas Shop Hop 2022

As noted in a previous post, the first part of our trip to North Carolina we spent camping on the Blue Ridge Parkway in the western part of the state.  For the second part, we traveled east to visit my husband's mother as we have done annually since she and her (now deceased) husband retired down there.  

When I visited her in 2020 after her husband died (which because of pandemic travel restrictions, I was the only one in our household able to do the required post-trip quarantine),  I had learned that there was an annual "All Carolinas Shop Hop" spotlighting quilt shops in both North and South Carolina.  We made plans to do that when my husband and I could come down together in 2021.  We had a blast making the rounds to shops last year so of course a repeat of that activity was high on the visit agenda for this year!      

I actually brought last year's book with me on this trip as I planned to work on one of the projects offered in the book that I had purchased fabric for during last year's Hop.  

Yellow = 2021, Blue = 2022
There were some changes in how the the regions were organized this year:  The Keepsake Quilting/Pineapple Fabrics Outlet was part of the Central Region whereas last year they were part of the North Region that we shopped.  The North Region shops we had visited last year were grouped as the East Central shops this year.  Since my husband and I camped in the Western part of the state, I took advantage of going to a few of the shops in that area too.  

My MIL and I (with hubby doing all the driving) went back to most of the stores we had gone to last year.  There was only one we didn't get to and two that were on our list to visit last year but were not participating this year.  One of shops not participating had been closed the day we hopped last year so I had really hoped to get there this year.  

When I had visited my MIL in 2020, we had gone to the Keepsake/Pineapple Outlet which had been newly opened that year.  We loved it but didn't put it on our 2021 Hop list because it was a challenge to get to since it is a two hour drive away and I was doing most of the driving then.  However since we had chauffeur service, it was added to our Hop list for this year and we also took the opportunity to visit another store that was along the route back home.  

Needless to say, none of the stores disappointed and there were a lot of goodies purchased!  One of the highlights from the Western spur was that I stopped in a shop called "Dreaming of the Sea".  While I didn't buy all that much, I did have a great conversation about RVs while there!  For the rest of the Hop, I focused on getting things on the list I had brought with me and managed to get all but four of the things on it.  

My list had included:

  •  A Fall themed three yard quilt bundle (Quilt Lizzy-Wake Forest was in a new location this year and I also got a great 3 yd flannel kit there last year) 
  • I was looking for Minick and Simpson red fabrics for the idea I talked about in my May Summer Recap post about augmenting their "Pear BOM" kits that I've been receiving (fabrics found at  Bernina World of Sewing, Keepsake/Pineapple and Studio Stitch with more on that project later)
  • Black embroidery floss (not pictured) to continue my travel cross stitch project (thanks to Quilt N Code)
  • Strawberry red prints to provide some stash options for a Red & White version of the Fat Quarter Shop "Jelly Snowflake" quilt I want to make as part of this year's Christmas quilting (courtesy of Cary Quilting, Quilts Like Crazy & Embroidery and 5 Little Monkeys who also posts regularly on Facebook)
  • Fabric for the alternate squares to recreate Beth Dutton's Quilt from the "Yellowstone" TV show (a Keepsake/Pineapple "fabric by the pound" score)
  • Light batiks for backgrounds which is something I normally don't see often but had found plentiful on last year's hop too (this year I scored them at Bernina WOS again but also at 5 Little Monkeys, Keepsake/Pineapple and The Broken Needle). 

Another special find was the green Jason Yenter dragon panel called "Dragons - The Ancients" also in the "by the pound" cubes at Keepsake/Pineapple.  This was really special because buying it was inspired  by seeing  the red version of the original "Dragons" quilt on display at Quilt N Code, one of the Western area stops we made.

You can find information about the red colorway of the line here

This is not the one that hung in the shop -- my husband and I were so enthralled by that quilt that we forgot to take a picture of it!  The one in the store had been made by the owners fifteen year old (!) cousin who won the "Youth Award" and "Best In Show" at the State Fair when it was entered.  I asked them if he (!) was still quilting but they said he is a senior in high school now so was busy with all that entails.  

My husband couldn't stop looking at the quilt, particularly since we've been watching the Game of Thrones prequel "House of the Dragon" that just finished its first season Sunday.  Unfortunately, the shop didn't have any more of the fabric from the line so I was only too thrilled to find the green panel at Keepsake/Pineapple later.  

I've already ordered fabrics to make a smaller, simpler (aka more likely to get made) version from a free pattern on the eQuilter website (note: when it comes up onscreen, it may show it with the wrong border print but the pattern will download pictured in the fabrics from the line).

One of the orders is already in and another with the remaining fabrics needed will arrive soon.  All in all, it was another great Hop and I'll share other things purchased as the projects I use them in come up.  More details of the trip to follow!

Edited To Add:  You can see that finished top here.

Courtesy of Pineapple Peeps on Facebook