Showing posts with label APQ Designs. Show all posts

Friday, May 16, 2025

Finished or Not Friday: One Quick Finish and One UFO

Happy Friday and welcome in for another edition of "Finished Or Not Friday"!


As always we are hosted by the lovely Alycia at Alycia Quilts, well known for her work making, quilting and showcasing quilts awarded to veterans through the Quilts of Valor program.

This week I have two finishes to show:  one that was quick and one that has been a year in the making!  Okay, maybe it's actually just been sitting around for a year but that's all water under the bridge once it gets to the "finished" stage, LOL!!

The Quick Finish:  A Mug Rug Gift

I have a friend that I have made a number of things for, most of which she had used to decorate her work cubicle at her office.  Since the pandemic, her job has retained the policy of remote work so she only has to report into the office once a week.  As such she was recently attemping to spruce up her home work space.  She mentioned she planned to pull out all the things I had made for her and put them into service there.  Of course that led to a discussion of the very first piece I made her:  a mug rug replicating a Kaffe Fassette design:


I made this because she attended her first (and only) quilt show with me back in 2013.  She is not a quilter but fell in love with Fassette's quilt "Girder" that was hanging in the show with all the other quilts from his "Shots and Stripes" book.  Unfortunately, that rug was taken from her desk some years back!  

While I did make her a "keyboard" themed one a few years later (which is pictured later in this post),  she asked me if I might happen to have an extra mug rug laying around that she might add to her setup.  I didn't but then was inspired to make one for her (in secret) when she showed me another new addition to her desk setup:


As soon as I saw this lamp I was like: "Oh, I've got to do this!"  First of all, I have never made a "stained glass quilt" although I've always wanted to try one.  What better way to take a first stab at a technique than a small project like a mug rug?  In addition, I had recently purchased these:


I had this set of Creative Grids "Crazier Eight" templates on my Amazon wishlist for a few years.  It just so happened that about two weeks before our conversation, a Warehouse "Used But Good" set came up for half the normal price.  The  prices on Creative Grids products are tightly controlled so are almost never on sale.  Needless to say as a "Gadget Fanatic",  I couldn't pass that deal up!   Now I could also immediately see trying out the templates by using them to make the stained glass piece.  So I dug through my batik stash for yellows and other fabrics that ombered to that color and came up with this:


There are five templates to make this eight inch finished block but I split the piecing in some of the templates in order to be able to use a few more fabrics and make the stained glass effect come through a little more.  The "leading" print also came from stash.  

I also wanted to give a nod to the butterfly featured rather prominently on the front of the lamp and I knew just how to do that:

I have an old compact Bernina Deco embroidery machine that I purchased used off of eBay a while back and love when I get an opportunity to make things with it.  The great thing about the purchase was that it came with a full set of embroidery threads in a rainbow assortment of colors and so far for everything I've made with it, I've had the color threads needed.   

To give you an idea of how old this machine is, I am unable to download designs to it so have to purchase dedicated "design cards" for it.  It did come with one of those blank card readers but my laptop (which at the time of purchase was running Windows 10, that's how long ago this was) didn't support it.  So now I regularly troll eBay for low priced design cards that have images I am interested in using.  I also lucked up and was able to start the collection of ones I have when I was able to pick up a whole bunch of them at a guild destash sale from someone who had a newer machine so no longer needed them.  

The butterfly design I used came from this card:

First I ran a test of it using what I had that was close to the prescribed colors.  That allowed me to test the size adjustment I made to the design to fit the template section I wanted to stitch it on and see how it stitched out.  For the final design, I chose threads closer in color to the butterfly on the lamp.  Then I layered and quilted it and this was the finished piece:

After she received it, she sent me a picture of her set up!

You can also see the keyboard mug rug here as well!

The UFO Finish: "Roaring Waves"

My other finish is that I finally quilted a top I made up in March of last year.  After making two blue and white quilts back in 2022 for winter decorating,  last year I decided I wanted to make a few more to use for decorating into Spring.  It started with this fabric bundle purchased on the Annie's Attic (then Annie's Catalog) site during one of their fat quarter bundle sales (and is still available now here):

After purchasing it, I happened to see this "color option" design on the American Patchwork and Quilting website:

I could immediately see almost all of the bundle fabrics plugged into the bargello-style design.  I raided my batik stash and a few project stashes to come up with this array....

...that eventually became this top!

I even layered and basted it that year.  And so it has sat until I could figure out how to quilt it.  I was definitely considering going along with the "waves" theme and did try to sketch out something along those lines:


But it wasn't until viewing Angela Hoffman quilting on the #3501 episode of the "Fons & Porter Love of Quilting" TV show that I found something I really liked.

However, I wasn't totally confident about being able to free-hand quilt the waves evenly.  Then I remembered I had a wave ruler:

However I didn't want that deep a wave and the spacing wasn't right.  Doing a little research, I found out that Handiquilter actually has a few different wave rulers and it turned out that they had another one that was perfect for what I wanted to do.  The peaks and valleys of it lined up perfectly with the piecing on this quilt.

It took me about a week to complete the quilting:


And now it's done! 

Front

Back

It's a square quilt and will be used as a wallhanging.  As usual the lesson here is that sometimes a quilt takes a while but it is always satisfying in the end to get it done!

There are many more finishes and progress reports over at Alycia Quilts for this week's "Finished Or Not Friday" so go check them all out!

Friday, September 27, 2024

Quilt Stitching Inspiration Finally Leads To A Finished Quilt

Whew, it's been a while since I've checked in!  It's been a busy summer and I will be posting recaps of all that has been going on quilt-wise.  However in recent weeks I have also been trying to focus on getting some finishes done.  So for starers, I'll debut the first one this week over at Alycia's Finished Or Not Friday !

In July a lot of my piecing focus went towards "Christmas in July" projects.  However, my original plan for that month was to do a lot of quilt stitching!  The impetus for that was the latest Free Motion Quilt Challenge announced by Angela Walters at the end of May and scheduled to run in July.  Titled "How Do I Quilt It",  she planned to discuss stitching patterns that could be used to fill Chevron, Snowball, Log Cabin and Curved blocks and Applique borders.  

That was just the push I needed to start a project I had long wanted to do:  "Apple Crisp" is a design I thought I first saw in an American Patchwork and Quilting "Fall Quilts" compilation (scroll down to #20 for the link to the free pattern).  Later I discovered I had the October 2010 back issue it was originally published in. 

The magazine version and my finished top!

After learning about the challenge, I spent the latter half of June working on the blocks.  I changed the size of all the blocks so I could use my Accuquilt Snowball block die to cut those particular blocks.  In order to get all the blocks done by the time of the challenge,  I even pieced some while we were away camping in Shenandoah National Park!

I finished the top in early July just in time for the part of the Challenge for the Snowball blocks.  However, for the first time watching one of Angela's challenges, I did not immediately get ideas for stitching my own project!  The issue for me was that most of  the stitch designs she showed called for detail stitching in the centers of the blocks.  I was stopped in my tracks by one of the fabric choices I had made during the piecing:

Also didn't realize until this point that I should have pieced those chain blocks differently to line up with the Snowball corners!

I didn't really want to stitch over this guy.  The designs she demo'd were great but wouldn't work for this one block and I wanted to stitch all the blocks the same.  So this time it took looking beyond what she was stitching in the blocks to find inspiration from what she used to fill other spaces around them.  It took me most of August to figure that out as I continued to work on other projects.  Eventually I combined that inspiration with some of my own ideas which led to what I used to finish this one up.

At this point, I'll also join in over at Denise's  "Put Your Foot Down" to share the stitching part of this finish....

and over at Andrée's Quilting & Learning - What A Combo!

The stitch plan started with deciding to just straight stitch through the chain blocks which would also help stabilize the center of the top.  At some point in Angela's demo I saw her do stitch patterns in the Snowball corners -- okay, I can do that.  However, I was still stumped for what to stitch in the block centers.  

I often go very literal when I work on quilt projects.  Since the name of this quilt is "Apple Crisp" why not do an "Apple Core" stitch motif?  But will I need to mark it?  Well, it just so happens that I had this in my template stash:  

This is actually a piecing template that I've had for years.  I've always wanted to make an Apple Core quilt but never got around to it.  I even considered getting the Accuquilt die for making one.  I held off on that because I felt I should at least try using this template before I spend money on another one.  I also don't really know if I'd ever make more than one of these types of quilts anyway.  

Now that I had my stitch plan, I finally layered the quilt sandwich earlier this month.  Luckily for me, it turns out that using the piecing template worked just as well as a quilting ruler since I have a non-hopping ruler foot!  I even used the template in the borders and tessellated the motif like it would be when pieced.  

It's not as even in the borders as it would be pieced since I just used the edge of the template to stitch along instead of lining it up along the seam allowance slots.   

After employing those two stitching motifs,  I felt that I needed to also stitch something in the sides of the Triple Four Patch blocks.  For that I had another ruler -- this time one that is actually for free-motion quilting and that I hadn't used up until now:

I had purchased this Handi Quilter ruler a few years after quilting "Flying For Cover" with free hand clamshells.  For that quilt, I had marked the spacing of the clamshells using Inchie Tape.   However, after quilting it, I realized that while I liked the stitch design, I wanted a way to insure that I could quilt various size arcs as evenly as possible.  This ruler is 1/4" high so is actually for use on a longarm but I had no problems using it from all sides on my high shank Juki machine.  

Doing this many different stitch patterns -- even simple ones --  is essentially considered custom quilting.  So needless to say, it all took far longer than I had expected to spend quilting this project.  

Photographed under the Crabapple tree in our community garden!

Now that it's done, I am happy to say that this is a pretty addition to my Fall decorating.

Linking up with:

Saturday, June 29, 2024

Finished or Not Friday: A New Tote and a Wall Hanging UFO Finish

I had to do some late Friday finishing so am a little late joining in with Quilty Girl Alycia for some "Finished or Not Friday" review! 

First off, a new project:  I made another tool tote for travel sewing:  I present my Catch-All Cutie II:

In 2021, I made my first “Catch-All Cutie” for my entry in a blogging challenge on the topic of “Zippered Accessories”.  

I love this pattern and its instructions are straightforward although not intuitive – it's best to just follow them verbatim step by step and in the end is actually very easy to make.  I added a twist to it in the form of a little container with a stuffed pincushion top to hold clips and pins which was inspired by a similar gift made and given to me by my MIL.  

This little tote is ingenious and indispensable when I travel with a sewing machine. I had made the original bag out of a "sewing themed" line of fabrics from a bundle that I had in stash.  With Red, Yellow and Aqua accents, it went well enough with the Red tote bag I had made for my Singer Featherweight sewing machine.  I made a point of putting Aqua and Yellow tools in it to coordinate.  It holds all the basic working tools you need when sewing while away.  Even better, when I fold down the sides, the inside pockets hold all the tools neatly and are easy to grab and put back as you sew.  Did I mention I love this bag?!?

So when when I purchased a new Juki machine last year and wanted to take it down to my MIL's, I also purchased a bag to transport it in.  I wound up getting an aqua colored one and admit I was thrilled my little “Cutie” coordinated with it too.  

However, eventually I found that I didn't like that if I alternated between which machine I carried, I had to make sure I moved the “Cutie” to that bag before traveling.  I have always held to the practice that with the exception of my house keys and ID, if I needed a specific thing/tool/item in more than one bag, I prefer to have multiples of that item and stock each bag I use them in with their own supply.  It only took about three trips (especially one where I started out with the plan to take the Featherweight but then switched and decided to take the Juki) to realize that I'd really like another “Cutie” – this time designed specifically for the Featherweight's tote.  

So I looked around for fabric to do just that.  I would have loved to get more of the Robert Kaufman Singer-themed fabric but that line had gone out of stock years ago.  I had a few scraps left though and knew just where in a new bag I could incorporate them if I could find other fabrics to coordinate with it.  

I lucked up on that when I saw prints from the “She Who Sews” line by J. Wecker Frisch in an Etsy shop one day.  There were Black and White and Red and White sewing themed prints with an “old-timey” look which was perfect for my needs.  I checked the fabric requirements in the pattern and saw that I only needed about a half yard of each to make the bag.  Sweet!  

Eventually I also caught both red and black Lori Holt zippers that were long enough for use on the exterior and interior on sale at Sentimental Stitches.  Later, the same vendor offered a beautiful pair of small black embroidery scissors with gold sunflower motifs on the handles.  The product description said how they reminded one of a Featherweight machine!  I agreed and even though they were on the pricey side, I ordered them anyway to add to the tools for the new bag.  

With an upcoming trip that I planned to take my Featherweight along with me, I got this new bag underway appropriately enough on “National Sewing Machine Day”.  Once again the instructions were straightforward although I had overlooked one important thing when I made the bag the first time:  the instructions do say that using directional fabrics is not recommended!  That had not been a factor for the fabrics used in the first bag but of course both of the fabrics I had purchased this time as well as my Singer scraps were just that, LOL!  

To add to the complications,  I wanted to feature certain motifs from the cover fabric on the sides of the bag.  Had I purchased a yard of each fabric it would have made it easier to finagle.  Fortunately, I was able to figure out how to make it all work by adding an additional seam at the bottom of the bag and get it made up for the trip.  Here it is in action:

I also ordered more tools to coordinate with this bag and they came in on Friday so now it is fully outfitted and ready for the next trip! 


Now for the UFO:  Americana Lone Star

As often happens, I decided to make this one to fill a need:     


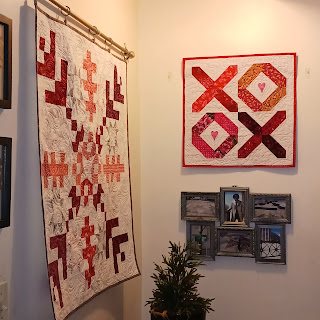
I like to hang Red, White and Blue quilts during the summer or as I call it "the Patriotic Season" from Memorial Day until Labor Day which also includes July 4th.  The wall at the top of our entry stairs is one of my prime display spaces and I had finished the "Hometown USA" wall hanging seen above for it back in 2022.  In the past when I have hung quilts in this spot, I have also made companion wall hangings for the smaller space on the wall next to it like these: 

Pioneer Sampler and Honoring the Journeys

When I put up "Hometown" in 2022,  I had decided it was time to make a companion.  I started by looking through one of American Patchwork and Quilting magazine's compilations for "Patriotic Patterns".  Well it didn't take long to find one I had downloaded years ago and had always wanted to make.  


This was a goodie in that I was more than happy to follow the pattern cues for colors and was pretty sure I had fabrics in my RWB stash to execute it.  Even better, making a Lone Star quilt had always been on my quilt "Bucket List" and even though I have "fabric funded" a few projects, I hadn't made one yet.  

It did not take long to compile a project stash but a read of the pattern presented a new problem:  the pattern was designed to make a wall hanging that finished at 43 inches square but for my space I needed one of about 25 inches.  I figured out that if I made it using smaller blocks (6 inch Leymoyne Star corner blocks rather than the patterned 10 inch), it should fit my space.  However, I wasn't sure what size strips to use to piece the center Lone Star.  I had some estimates but not enough in my project stash to run a test.  

Fortunately at the time I was also embarking on another project that used Shot Cottons and since I had a big stash of those, I tested my block size theories using that stash.  The good news there is that not only did I get that done but I used the test block in the backing for that other project which at the moment is still awaiting quilting:


Strip size settled (1-1/2”), and after strip piecing the first star points I then realized I had to replace the diamonds cut out of the stripe fabric I wanted to use in the star point tips with "fussy cuts".  This was the only way to have the stripe run pointing into the tip the way I wanted.  For the Lemoyne Star corner blocks, I used my trusty Rapid Fire Lemoyne Star ruler and Deb Tucker's techniques to make the 6 inch finished blocks needed.  


Once the top was finished it sat for the usual reason:  how do I want to quilt this?  Then it continued to sit until now for the other usual reason: the season passed and other projects became a priority.  So much for an “I can make this up quick” project!  This year however, when the RWB quilts went out on display again, I decided I really wanted to get this done.  Even better, looking at the top with fresh eyes, I also immediately came up with a very simple quilting plan.

Right before we were due to go on a camping trip for my DH's vacation two weeks ago, I figured I would try to get this layered so I could quilt it as soon as we got back.  To that end, before leaving on our trip, I had hoped to try a new basting technique:  

My MIL had seen some videos on glue basting, tried one of them and liked the results.  While I have done it for bindings, I've never tried it for a whole quilt.  Before we left, I had set up to try to get it done but found that the containers of glue I had on hand wouldn't dispense!  I picked up some new ones and once back did get the basting done.  My opinion:  the method does work but just like when using it for basting a binding, it is important to use a light hand with the glue:  you want thin lines or small dots not glops and slathers!  

I will also note that like so many I've seen described, my center Lone Star block was not exactly “flat” and bubbled a bit in spots.  The condition was helped a bit by giving it a good press.  I also decided to "double batt" it when I layered it.  I was hoping to further minimize how much of the puffiness I would have to try to “quilt out” later.

And yes, these are Franken-batts!

I also had to change machines:  I started quilting this on my vintage Singer 401 because that was what was in the sewing table and I had recently worked on another project that needed its zigzag capabilities.  However, while it started out okay, I started getting a lot thread breakage and I have found that after awhile the walking foot on that machine starts to jam up.  So change of personnel:  I swapped my Juki into the table and got it done!  I was even able to use the new add-on guide unit for the walking foot for that machine.  Good thing I had finally caved and purchased it about a month ago.

So now it's done!


Bound with more of the outer border fabric and up on the wall!

So now the side display space is filled with a permanent entry for when I decorate for this season each year!   Hmm, I had to take down the other frame I normally hang there but me thinks I need to find a little seasonal sign to add under it.  If I don't find one, that need might wind up generating a new cross stitch project, LOL!

That will be it for finishes this month but as always there's a lot on the table for July so hopefully there will be more then.  Now I'm headed back over to Quilty Girl Alycia's to see what everyone else has been up to for "Finished Or Not Friday" this week.  Won't you join me there?

Monday, April 1, 2024

March Recap: Another Month Has Just Blown By!

As my posts recapping the month of February showed, that was a busy month and March has been no different!  

Garden Activities

This year I am taking on the Event Coordinator duties for my community garden's Season Opening/Earth Day event near the end of April.  I've had to reach out to other community organizations to see if they want to participate.  In addition, our garden is replacing all of our wooden raised beds with new (and longer lasting) metal Vego beds so everyone is expected to chip in and help with demoing the old beds and setting up the new ones.  


So the garden has been front of mind this month and will continue to be so during the next one.  

Quilting

For me, with the season opening event now fast approaching that also means I am now back to crunch time on this raffle quilt project:

However, I am once again not sure I will be able to get this (and its companion!) ready in time for this year's opening day event now that I have the event organizing duties also on my plate.    

What I have finally managed to finish is the top for the scrappy strings project I started while away last month:

"Scrap Vortex" is now in the "flimsie" category.  I already have ideas for how I think I want to quilt it but don't have a backing plan as of yet.  Right now figuring that out will not be a priority so this project will probably sit around for a (long) while before it moves further forward.

However, that doesn't mean there isn't new stuff starting!  Having put out a few Blue and White quilts for the change of season to Spring, I realized I could use a few more.  My stash yielded some starter for not one but two projects.  Some filler for one just arrived at the end of last week but the other is already almost a finished flimsie:

This is another American Patchwork and Quilting magazine freebie:  It is the "Roaring Waves" color variation of the "Quake" quilt that was originally published in the Spring 2016 issue of “Quilts and More” magazine.   It's always interesting to see how different fabrics and colors can work in the same design.  

It is a little wider than it is long so I'll be adding small borders to the top and bottom to bring it square using the fabric sitting at the top of it.  Ironically, I had purchased that for use in the other B&W project I was trying to start up.  I may still include some of it in that one too if I have enough leftover.  Since it turned out to go so well with this, I will also use it for the binding.  I also already have ideas for how I want to quilt this but still have to figure out what I am going to back it with.  

Cross Stitch

At the start of March I had three projects going:

I had finished stitching the "Year of the Dragon" in early February so now needed to work on "fully finishing it".  My plan had been to finish it in a lantern design and I had gone through my Asian fabric stash to pick choices for that.

I've gotten as far as deciding on the final fabric and format of it.

The Dragon print in the picture above will be on the back.

And there are plans a foot to finally try making  my own cording and tassels to add to the finishing.


Because things have gotten busy on the garden and quilt front,  I haven't moved forward on that yet.  

For Black History month in February, I had started on two projects.  One was the cross stitch version of the Fat Quarter Shop's "Stronger Together" campaign from last year:

I finished stitching that in the middle of March and now need to think about how I can frame it for display along with the history information provided.

The other Black history month project I worked on was "Harriet Tubman":

Work on this one is still on going and the great news was that it also counted as a March "Women's History Month" stitch.  I've loved stitching on the 18 count Fiddler's Cloth I chose for this.  As a primarily Aida stitcher, I like the way the stitches sit on the weave of this fabric and feel like it gives it a "closer to linen" look.  I definitely look forward to using this kind of fabric for CS projects again.  

At this point it looks like this will also be my focus CS project for the start of April.  That said, I also have things coming for a new stitch along that starts later that month!  So I have no expectations that April will be any less busy!!