Showing posts with label 2013 Finishes. Show all posts

Tuesday, December 31, 2013

2013 Year In Review Part 2 -- Early Finishes and Plans for 2014

In Part 1 of this post, I talked about my recent (since November) finishes.  As for the early part of this year, my other finishes have been detailed in previous posts and they included:

January: UGRR/Pioneer Samplers


March: Merrimac Dresdens
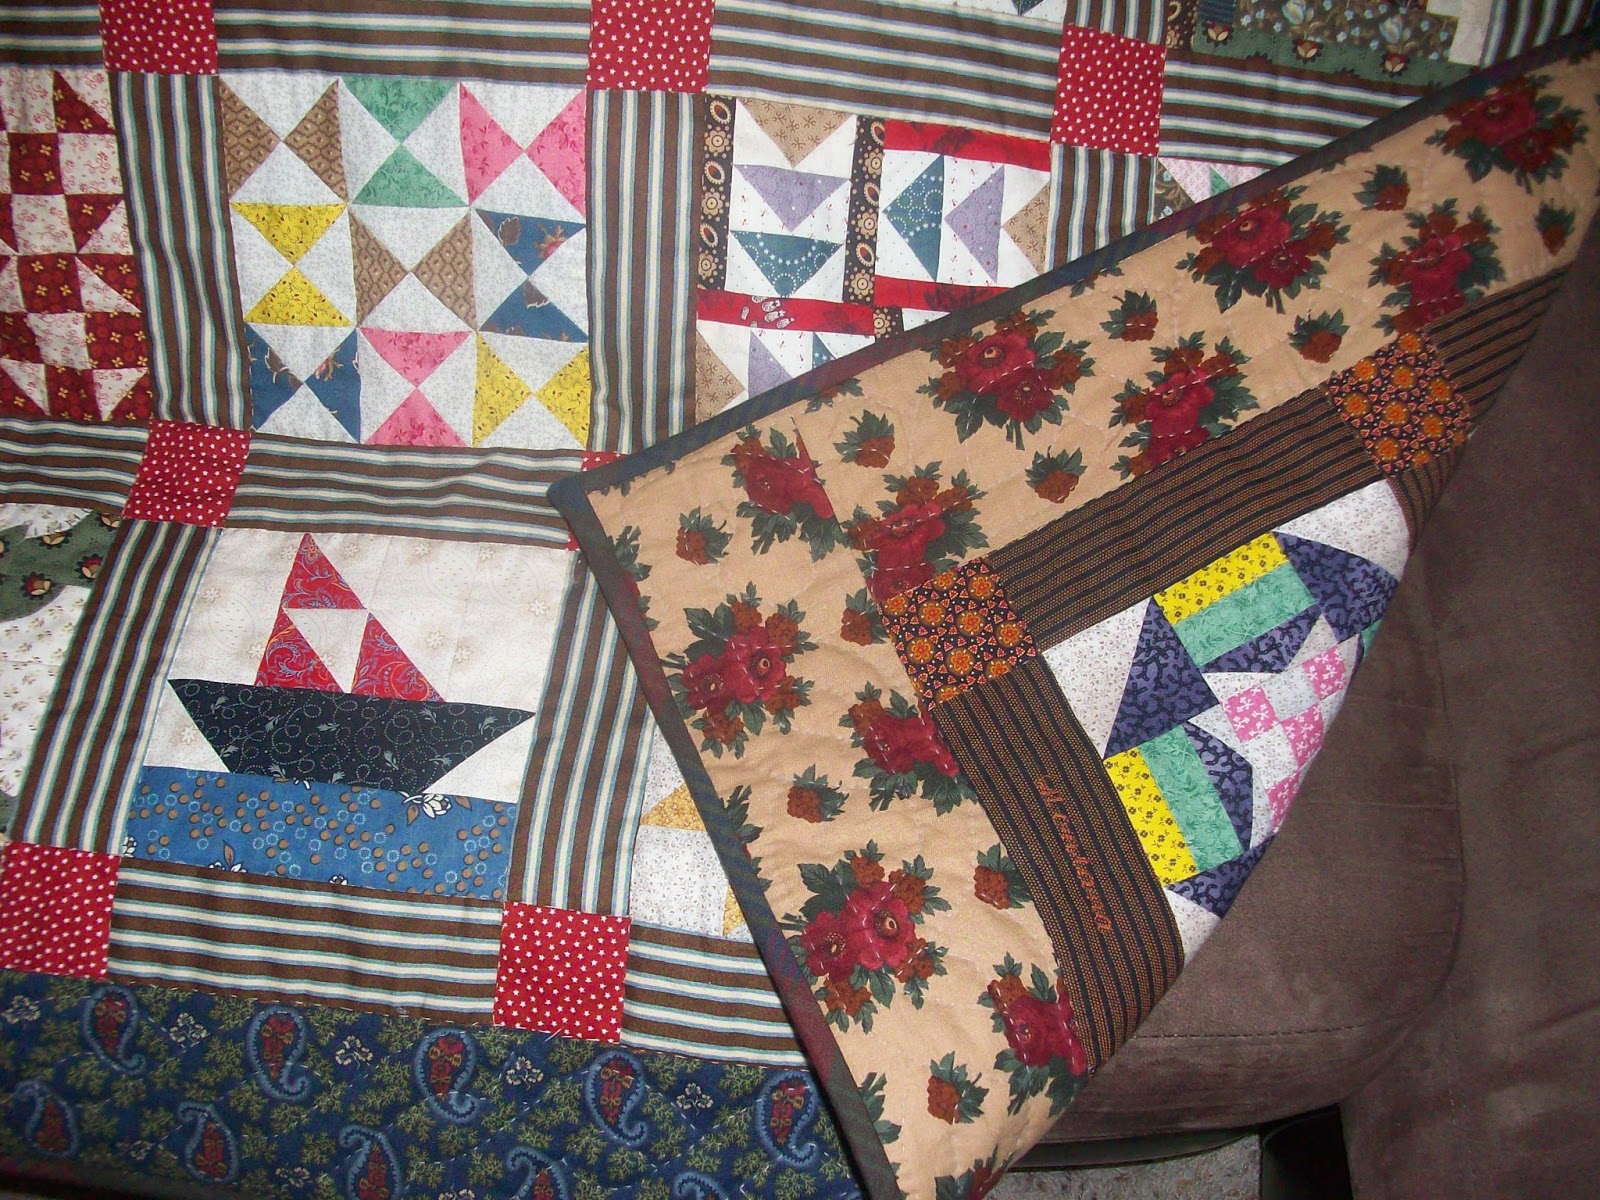

May: Brrr!


and the "Tribute" fabric line series all completed in June:
Valor

Tribute Mini and Star Spangled Runner  


Looking back I guess I really can't complain about my productivity but that also doesn't guarantee that the REST of the UFOs will get done either!

So what's up for 2014?  Well, the UFO fest must continue because I want (need?) to clear out some of the stuff sitting under my cutting table so that it can be fully functional (that is, be closed down when I need it to be).  My Double Wedding Ring  project is one of those gremlins under the table that comes to mind since it's one of my original bucket list projects and right now only needs borders and quilting.


More than a couple of my UFOs are TBQs (To Be Quilted) so I hope to sprinkle in more than a few those as well.


I'm realizing more and more that I am comfortable with doing the actual quilt stitching so now it's only the "quilt whispering" (deciding what to quilt where) that I have to get more confident about.  In a conversation today with Teri Lucas (check out her work and blog) at Hartsdale Fabrics a LQS, she gave me a lot of ideas and a challenge to try in the coming year to help loosen up my willingness to let my quilting get "Foot Loose and Fancy Free" (which just happens to be the name of one of her many classes, check out the details of that and all her classes here).

I am also only a few more projects away from completing my first "quilt gallery" in my home.  I've always wanted to create quilt displays around my home tied to a theme.  The UGRR/Pioneer Samplers and Merrimac quilt are part of a series of quilts I have done using Civil War reproduction fabrics.  In the TBQ pile (bottom left) is my CW Chronicles BOM a bed size top that once finished will be displayed on my bed.  The UGRR/Pioneer Samplers have been hanging at the top of my entry stairwell since they were finished in January.  Also in the works are sampler blocks for not one but TWO lap quilts that will be displayed on my couch.


I've got about half the blocks done for both and already have border and backing fabrics purchased so hope to get those finished in the early part of the year as well.  Lastly will be a couple more mini quilts as well as the "Soldier Cot Quilt" from Kathleen Tracy's book "The Civil War Sewing Circle".  Along with the Merrimac Quilt these will be displayed in the stairwell  that goes upstairs to our bedrooms.  I had hoped for this to have all been completed by the end of this year but now am shooting for a finish by June of 2014.

What's the biggest project on my "To Do" list?  Early last year a quilting friend and I initiated talks to do a quilted project for the Bronx division of the New York City Family Justice Center that aids victims of domestic violence. The plan at the time was to make three quilts for display in their offices.  The projects will include some fabric squares embellished by the clients of the office.  We procured some donated fabrics back in July and the embellished blocks were delivered at the end of August.  I was able to do some preliminary work on it but have not been able to proceed on it as the school volunteering and  holiday commitments got under way.  I realize now that the problem is that this is not something I can work on in between other projects, I'm going to have to clear the time and space to focus on this by itself if I am to move it forward.  So this will have to be a priority project for the New Year because I really want to deliver something wonderful for an important organization that is doing work for a very worthy cause.

But before all that can happen I have a quilt date tomorrow!  Tomorrow the Planet Patchwork website will be holding its VERY LAST New Year's One Day Mystery!!!!!   This website will be shutting down for good in 2014 so this is my last chance to participate in one of these.  They have held these Mystery quilts on either the day after Thanksgiving or New Years Day for years.  The projects are designed by Merry Meyhem, the alter ego of quilt designer Merry May and co-author of the book "Insider's Guide To Quilting Careers" with Linda Hahn.  I have participated in two previous mysteries, one last year and in 2007 so I really wanted to participate in this one last time.  The good news is that if what they say is true, the fact that I'll be at the machine at the very start of the year will be a good omen for how I will (or hope to) spend the rest of the year! 

This also sets me up for more UFO/TBQ quilting in 2014 since last year's mystery needs the borders finished (I changed the design of the original) and the 2007 one is TBQ.  I am sorry to see this website go since it was one that was very informative for me when I first started quilting.  However, the bonus for me was that I finally scored a copy of the "Dear Jane" book from the their store closing sale.  Doubt THAT will be added to my 2014 project file but definitely some "Janey" work will be in my quilt future! 

So that's it for me and 2013.  Here's hoping that you and yours have a joyous New Year's Eve and a healthy, happy, prosperous and productive 2014!!

2013 Year In Review Part 1 -- Recent Finishes

Once again I didn't expect to be this long from the blog but things have been both busy and stagnant since my last post in November.  But I wanted to close out the year by taking a moment to look back on what has happened and what I can expect for the New Year.

Getting Back To the Teaser

In the last post I had teased  this.....

Click on the picture to what the squares say up close! 


....and thought I 'd get back soon for a detailed post.  This STILL isn't THAT post but here's a look at the whole project:


I've used that white shoe cubby in my quilt space for years to store my fat quarters.  When we moved in 2011 and I set up my studio in our dining room, I felt that the box (which hangs over my cutting table) would need something to make it a little more interesting.  

Early in 2012 I saw this dresser when Monique Reynolds of the Monique's Stitches/Sew Fun By Monique blog did a guest post on Allison Rosen's Within A Quarter Inch blog.  I loved it and it reminded me of a project I had wanted to do for my old quilt space:  make curtains alternating selvedge string squares with panel blocks I had purchased from Block Party Studios (Note: the link is to their latest panel "What Quilters Really Think V" although my project used panels from versions II, III & IV).   

I was a little disappointed when we moved since the curtains wouldn't work for the dining room but when I saw Monique's dresser I realized I could retrofit the idea to my storage box.  The result is what you see here.  I leave it open on a day to day basis (I love to see my FQ's!) but can close the front down when the dining room space has to do its normal duties.  

I have two other projects planned for my quilt space which I hope to get to in 2014.  When they're done I hope to do a "my quilt studio" posting.  This year was a very special one for my little quilting space but I'll say more about that in that future post.

Another UFO Down

For the last two years my goal has been to clear out UFOs and WIPs.  Unfortuately, I've found myself bottled up lately when with the year rushing to a close, I realized that there was still a (too) LONG list of things I had wanted to have done before the year ended.  With Thanksgiving and Christmas and a spate of volunteering at my DS2's school I was pretty sure I wouldn't get to all of it.   But wanting to get at least something knocked off the list, I had gone back to working on another old UFO and managed to get it done at the start of December.


This is called the "Sage Sampler".  None of the fabrics are actually sage colored --- it's named after the color of the frame I put it in.  The blocks finish at 3" and was an attempt to work from a limited pallette of scrap fabrics.  Started way back in 2004, I had six of the blocks done and made the green Fleur De Lis applique in 2010 after I took a Hand Applique course.  Wanting to take as few old UFOs into the New Year as possible, I pushed to finish this one.  And now after all these years it is finally hanging in my bedroom as originally intended.  Hopefully for 2014 I can finish the three other quilt projects I have planned for that room as well as finally work on the wood I bought to make some quilt display ladders.

The Magi Were Better Gifters

Another thing I wanted to finish up were some projects for a friend of mine.  My friend attended her first quilt show with me earlier this year (although she is not a quilter).  It was the New Jersey Quilt Fest and will be coming up again in March 2014.  While there we went to a lecture by Kaffe Fassette and all the quilts from his last book "Shots & Stripes" were on display (and for a great review of the book see this post at the Quilt Inspiration blog).   My friend had particularly loved his "Girder" quilt.  At the time, I got the idea to make her a mug rug "snapshot" of it as a remembrance of attending the show.  Here it (finally) is (finished size  6-3/4" X 5-1/2):


The mug on the back  is a quarter size version of the "Big Mugs" block from the Dec '/Jan '14 issue of Quilters Newsletter Magazine and can be picked up from their website here.  Unfortunately, I still owe my friend two other gifts, a cat panel print that she purchased at the show that I am now feverishly trying to finish quilting up for Christmas for New Year's before her next birthday in February!  The other is a jewelry pouch I started years ago for her that is complete except for embellishment (I want to try some beading and couching) and binding (in more of those shot cottons!).  As I said, she'll definitely have it for her birthday at the latest (and hopefully THAT won't be famous last words!)

Well that's it for the recent finishes, Part 2 of this post will review the finishes from the beginning of the year and the additional things I hope to accomplish in 2014!  Stay tuned!

Saturday, June 29, 2013

Catching Up On June Pt2: NewFOs and the Red, White & Blue Phase

In my last post, I showed my "Valor" UFO quilt finish.  However, that was not all that went on this month.  There was also a lot of NewFO fun going on:


On the left is the "Star Spangled" (finished) table runner, in the center is a "Quilts of Gee's Bend - Blocks and Strips" lap quilt flimsie and on the right is "Tribute", a (finished) mini quilt.  If you viewed the "Valor" quilt post, you probably recognize the fabric used for the runner and the mini -- they were both also made from Pat Sloan's "Tribute" fabric line from 2011 (which still can be found around the web as of today).

UFOs have been my primary focus this year and getting "Valor" done was part of that.  I had discovered the "Valor" kit in the Spring 2011 issue of Fabric Trends For Quilters (now Quilt Trends) magazine.  It had been designed to showcase Pat Sloan's (then) new line of fabric for P&B Textiles called "Tribute".  But also in that issue was a lap quilt called "Tribute" also designed by Pat.  I loved that it was made from the same fabrics as "Valor" as well as that it had applique on it.  Back then I had just learned how to do hand applique about six months prior so was on the lookout for projects to try my new skills on.  Having already decided to buy the "Valor" kit, I had hoped that like most kits, there might be a generous amount of fabric left from the primary project that could help jump start this one too.

"Valor" was completed as a top in 2011 but not quilted until this year.  By this time I had also purchased the Gee's Bend kit and looked forward to making it to display on my (brown) couch during the summer months between Memorial Day and July 4th.  So I didn't have a need for another patriotic colored lap quilt even though I still wanted very much to make Pat's "Tribute".  So the solution:  make it a MINI! 


The original lap quilt was designed to finish at 40"x 46".  My mini finished at a little larger than 14"x 16".  With the piece that small, I didn't do any hand applique after all (this was all fused with zigzag around the edges) but I did get to really stretch my ability to figure out just how small to go with all the design elements and still make the quilt look like the original.  I did have to change a few of the fabrics and eliminate a few design elements to make it all work but in the end, I think it's a pretty good approximation of the original.  I was particularly aided in that process by Quiltmaker Magazine editor Diane Harris' blog article on "Fabric Scale" that appeared on the Quilty Pleasures blog during the week I was working on this project.  What's even better is that I have a display space in my dining room for mini quilts so this patriotic beauty will get to be on display ALL year long!

The other new finish was a table runner called "Star Spangled".  The pattern for it appeared in a magazine:  Quiltmaker's July/August 2011 issue.  I think I had received it just around the time I was either contemplating or had already purchased the "Valor" kit.  So of course it was another case of "hey, this will be great for the kit leftovers!". 
 

As noted when I talked about "Valor" in the last post, I had actually purchased some more of this fabric line during a Fourth of July sale at Fabric.com.  During that sale I also picked up that Obama 2008 print.  When plans to display it somewhere else in the house were preempted, I decided to take a little of it and use it for the backing on this runner.  "Valor" will be displayed off of our terrace on July 4th and while sitting out there I can also use "Star Spangled".

And last but not least is this flimsie made from one of the "Quilts of Gee's Bend-Quilter's Collective History" Kits by Windham Fabrics.  The design is based on an original quilt by Loretta P. Bennett that was interpreted for the kit by Debby Kratovil and the fabrics are all hand dyes.


I realize that a kit is probably an ironic choice for attempting a quilt in the style of a Gee's Bend quilter since their quilts are truly improvisational and "make do" fabric-wise.  But I really chose this because I liked the colors of the quilt and haven't had an opportunity to use hand dyes before.  Oh and there's the fact that the kit was on sale and I love a good kit sale!  I've also been warming up to "modern" quilts and thought this design reminded me of the modern style.  I'm actually planning to try some of the modern quilt stitch patterns when I get around to quilting this.  It was extremely quick to make up -- definitely a "quilt in a day" because that's exactly how long it took to make! Although that time did not include pre-washing the fabrics (something I never do but highly recommended for these fabrics) and the cutting. 

I've seen another one of these kits for a good price so might buy and make another one.  I have a vow that along with UFO busting I want to complete any new projects I start this year so that I don't  add to the UFO pile I'm trying to whittle down.  But for now, this one will sit for awhile as I move back to projects already on the UFO list. 

I'll link this post to Barbara's June NewFO linky at the CatPatches blog once it's up.  Bye for now!

Catching Up On June Pt1: Another Quarter 2 Finish: Valor

I haven't blogged all month but you'll see from this and the next post that June was a busy quilting month for me.  First up:  UFO #2 for this quarter (and #4 for the year) is done!  Pat Sloan's Valor quilt is quilted and bound!

Edited to add:  The link to my original Quarter 2 Finish-A-Long List is here.


This one started back in 2011, the year we moved.  I first saw it in the Spring 2011 issue of Fabric Trends For Quilters (now Quilt Trends) magazine (when Mark Lipinski was still the Editorial Director).  I don't know what attracted me more: that it was a Pat Sloan design (of whom I'm a big fan) *OR* the Red,  White and Blue fabrics which I had been collecting because I'd been jonesing to make some Quilts Of Valor *OR* the Lemoyne stars (which gave me an excuse to invest in Deb Tucker's tool) *OR* that it came in a kit which (as always) I was suckered persuaded into believing that would mean a fast turnaround for the quilt *OR* the "dream" that I could have a new quilt to display in our house for the patriotic holidays.

Probably all of the above was enough to make me ignore unpacking boxes that year and rushing to buy the kit and few additional pieces from the "Tribute" fabric line which Pat had designed for P&B Textiles and had been newly introduced that year (and still can be found around the web).  The additional pieces that I purchased were not used in the quilt so were not included in the kit.  Unfortunately I didn't get started on it until right before the July 4th holiday that year (and in fact worked on it all during the holiday) and finally finished the top by the end of that month.  I thought it would get quilted before the next year's holiday rolled around but that was not to be so.  And this year it was on my list to be quilted in April, then got bumped up to the May schedule and yet still took until this month to complete.  But a finish, is a finish no matter how long it takes to get there!

Pat's instructions called for the Sawtooth and Lemoyne Stars to be made using triangle squares (HSTs) but I made the Sawtooth star points as Flying Geese blocks and used my favorite method for those:  Eleanor Burns rulers and what she calls the "Triangle Pieced Rectangle" method.  I call it the "Two Squares" method because that's all it takes:  two squares and sewing 1/4" on both sides of a center diagonal line twice and then you have four geese!  You can see Eleanor herself demonstrating the method here.  It should be noted that in the video Eleanor also squares up the blocks with a regular ruler but I will say that using her rulers (if you are willing to make that investment) does make the trimming go faster.

And what can I say about Deb Tucker's Rapid Fire Lemoyne Star ruler except that "I'm a complete convert"!  I always shied away from making Lemoynes because of the diamond unit cutting and set-in seams.  With her ruler and instructions, Deb has made it possible to strip piece these and sew them together with regular (straight) seams.  Now I'm collecting Lemoyne quilt ideas because I want to do more, more, more with this one!  I also love and have used her Tucker Trimmer ruler and have the Hunter Star ruler but haven't tried using that one just yet (yep, I'm a gadget fanatic!).

It should be noted that using these two methods meant I wound up being a little short on the background fabrics from the kit but as always the Quilt Muses were looking out for me.  Fabric.com just happened to have a "Red, White & Blue" fabric sale the week I started on this and was carrying the fabric line at that time so I was able to do a little discounted stash enhancement to help continue the journey (as well as start some new ones as you'll see in the next post).

So very happy to be 2 for 3 for this quarter and look forward to hanging this one outside off of our terrace for the July 4th holiday!

Tuesday, May 21, 2013

Bloggers Quilt Festival -- Spring 2013

It's been a while since I've posted so what better way to get back in the groove than to participate in the Bloggers Quilt Festival hosted by Martingale quilt author Amy Ellis of Amy's Creative Side.

Spring Blogger's Quilt Festival - AmysCreativeSide.com

 This is a wonderful biannual tradition that was pioneered by Amy and allows quilters and non-quilters alike to sample all the glorious creativity going on in the quilting world today.  This is the first time in a few years that I've had something finished in time to coincide with the festival so I'm excited to contribute again.

The project I'm offering up is my Brrr! quilt in the Throw Quilt category.  Finishing at 65" x 88" it's large for a throw but too small to consider it a true bed quilt for my queen bed even though that's where I plan to display it during the winter months.


I'm happy to say that this one was a UFO that had been sitting around since 2009 awaiting quilting but is now finally done!  The pattern is "Brrr Park" by Minick & Simpson and made from their Moda fabric line "Winter" from a kit purchased in 2008 from Keepsake Quilting.  The backing, a lovely flannel (one of my favorite kinds of fabric) was also purchased from Keepsake.  I thought the theme of it was the perfect complement to the patten design.


I didn't make this right after purchasing it for one reason:  all those Half Square Triangle Squares (known in the quilt world as HSTs)!  I was put off by the prospect of making so many HSTs (there are 40 in each tree and another 166 around the first border).  The thing that jumpstarted the project for me at the time was Quilt-Pro coming out with their Print & Sew: Triangle Magic software.  This allows you to print out a sheet of paper (letter or legal, your choice) with HST sewing and cutting lines on it for the finished size HST you need.  Then you layer your fabrics right sides together, sew on the sewing lines, cut on the cutting lines and voila you have anywhere from 4 - 48 HSTs (again depending on the finished size needed) done in no time!
These were not from this project but you get the idea!

Brenda Henning also makes a similar program called Trianglulations that will do the same thing.  I highly recommend them if you have a project that calls for making gobs of HSTs (and any of you still waiting to start your Civil War Chronicles BOM will know what I mean!)

Once the top was made and promptly layered, this quilt sat around waiting for quilting.  I've spent the last few years trying to build up my machine quilting confidence.  Every machine quilting expert says that you have to put in the time on the machine to get better at it and they are absolutely right.  Every project I do shows some improvement in my stitching and (to use Carla Barrett's term), "quilt whispering" (deciding what to stitch where).  I particularly had a lot of fun with that on this quilt as I did a lot of different motifs:

Swirls

Free-form interpretive on the Trees


Snowflakes

Scriptwriting/Words

and even a little straight-line with a walking foot


As I often do with quilts that will be displayed on the bed, I also stitched up some coordinating accessories to go with it.


The print pillowcases and the neckroll cover were made from fabric from Moda's "Figgy Pudding" line by Basic Grey from a few years ago.  Now I just have to wait for Winter to return (but there's no rush there I assure you)!

So thanks for stopping by and please continue on your tour of all the fabulous projects being presented in the Bloggers Quilt Festival.  Postings will be added through Friday 5/24.  Then you can vote on your favorites in each category from 5/27 - 5/30 and the winners will be announced on 5/31!  Enjoy the rest of the show!!

Monday, April 1, 2013

A Finish for the Q1 Finish-A-Long

It's time to report on my First Quarter Finish-A-Long efforts (and finally get back to blogging after too long away).  Despite a hope for four finishes this quarter (well, three and a bonus as I talked about here), I only got one completed. 

My #2 project, the "Merrimac Dresdens" is quilted and bound. The top and binding is made in fabrics from the Marcus Brothers "Merrimac" line that was issued way back in 2008 and the top was finished in November 2011.  After putting it on my Q1 2013 FAL list, I started basting it in late January with hopes of completing the quilting by the end of February. But the stitching took a lot longer than expected when my initial stitch plans changed a couple of times during the process and at one point I took a break from it during the latter half of February before getting back in gear and finishing it up in early March.


For the quilting, I free-motion outline stitched the plates and stitched a decorative pattern on top of the blades (the plates were machine blanket stitched to the backgrounds during the piecing process).  I used two different stitch patterns to fill the backgrounds of the blocks and a vine design in the border with a fill around it. 


The floral fill was the original background fill stitch I chose (and was based on and supposed to look like Leah Day's "Swirling Petals"). After doing a few blocks and seeing just how long it took to complete, I tried the wavy line fill as a test of a faster alternative. While I found that I liked it, I didn't like it enough to want all the blocks done that way or to rip out the floral fill I had already done. So a compromise was reached and I scattered four wavy line fill blocks throughout the top and continued the rest with the floral fill.  There is also some of the border vine scattered between a few blocks (another attempt at minimizing the amount of fill to be done) but the fabrics are so busy and thread so well matched that you can't really see them.  Overall, I love the texture created across the quilt but wish I had chosen a simpler motif to get it. 


The backing is a print from Andover Fabrics “From Lucinda’s Window” fabric line.  That line commemorated the "Reconciliation Quilt", an applique quilt made by  Lucinda Ward Honstain of Brooklyn NY completed in 1867 which depicted scenes from her life during and after the Civil War (you can download an IQSC article about that quilt here) .  I love to do contrasting backs and the applique cheater print against the dusty brown reproduction prints of the same time period really accomplished that. 

* * * * * * * * * * * * * *

Edited To Add:  I got to see the actual "Reconciliation Quilt" in April, 2014 when the New York Historical Society in NYC hosted the "Homefront & Battlefield" exhibit of Civil War quilts, clothing and artifacts.  I rounded out the day by also visiting the General Grant National Memorial (more commonly known as "Grant's Tomb") also here in NYC.

* * * * * * * * * * * * * * *

The good news is that this finish checks off things on a few lists:  a UFO done, a "bucket list" project (Dresden Plates) completed and the second of five quilts to be completed for a Civil War quilt display series I am trying to put together.   I also did get some work done on the #1 project on my Q1 list but that will be a story for another post!

To see what everyone else accomplished for the first quarter, head on over to Leanne's "She Can Quilt" blog and check out all the links to see all the projects that have been finished!  A note about the Finish-A-Long:  during the Q1 linky period (through April 8), Leanne has lined up other bloggers to post interesting tutorials.  There is already one from Jennie of "Jennie's Threads" for a block carrier.  So check that out too!

Friday, January 18, 2013

First 2013 Finish

Happy dance, happy dance!  The Underground Railroad and Pioneer Sampler wall hanging is finally complete!  I put on the last of the binding on Wednesday and ran out and bought the rod to hang it as well.  Now heeerr's the samplers!
 
Pioneer Side

 UGRR Side


And yes, it is reversible!


So a little (o.k., a lot of) background:  these samplers are from the books of the same name published by Eleanor Burns of Quilt In A Day fame.  The Pioneer Sampler was the first QIAD TV series I ever saw back in 2003 (my second year of quilting).  I fell in love with Eleanor's techniques and loved the shaded colors of her quilt not realizing then that it was to be "my style".  That same year I heard mention that the UGRR book was also going to be released and vowed to eventually get it too. 

And the episodes can still be seen on QNNTV.com.

After seeing the UGRR series when it came on TV and once I had both books, I realized an important history lesson.  Although I had always known about both of these two movements in U.S. history, I had never really taken note of the specific time period they occurred in.  By the time I got the UGRR book in 2005, Civil War Reproduction fabrics were all the rage.  I was surprised to realize that all of these social movements were happening around the same time!  Needless to say I immediately decided that both of these samplers had to be made in the CW palette and began collecting stash. 

But I also felt that these two needed to be part of the same quilt since to me they represented two sides of the same coin:  a difficult and hazardous flight to a new place for a new and better life.  As intense as we feel our own time is, imagine living through an age where the political upheaval of the War was going on along side the fight over slavery and the migration of thousands across country to establish new homesteads, towns, cities and states.  The idea to make this a reversible quilt was furthered when I read an article in a back issue of Quilter's Newsletter Magazine.  In the November, 1996 issue (#287), Elizabeth Akana gave instructions in a "Quilters Workshop" article for making a rod pocket between the layers of a two-sided quilt (“Invisible Sleeve” with Kaye Jesse).

Like most projects this one progressed in dribs and drabs.  I started piecing the blocks in 2010.  Wanting a wall hanging, I planned to make both with  6" finished blocks.  Easy enough for the UGRR since that book provided instructions for both 6" and 12" blocks.  But the Pioneer book only provided 12" blocks so that meant I had to redraft them myself to the smaller size as I went along.  I got them done but didn't put the tops together until 2011.  

At that time, to even out the tops so they could be made back-to-back (the Pioneer sampler is only 12 blocks while the UGRR has 15) I added text blocks with information about each that I printed on muslin that I tea-dyed and prepped with Bubble Jet Set (the UGRR text was provided in the book and the Pioneer text was information I had collected from reading while making the project.  You can see close-ups of the text in this post).  They got layered because I hoped to push myself to finish the project by joining Myra's PHD Challenge that year.  I was disappointed when I didn't get them finished but appreciated that I managed to get them that far and was determined they would not languish forever. It also helped that Myra extended the Challenge into the new year!

By this time I decided that I wanted to hand quilt the two pieces.  But admittedly daunted by that prospect (well, that and I had a lot of other projects on my plate), I let it sit until December when I started on the hand quilting in the hopes of putting this one to bed as my last finish for 2012.  Didn't happen but once it was underway there was no chance of letting it flounder any longer.  After quilting in the ditch around the blocks, sashing and sashing squares (and finding that rather difficult to do with all the seams), I was not sure I wanted to quilt the blocks themselves.  I felt the power in the samplers were in the blocks and their story and since this was not a show quilt, it wouldn't suffer from the lack of extra quilting.  Not to mention it would save me about another two months of work! 

But once the centers were quilted, I felt the borders still needed something so I set out to find a stitch pattern -- nothing too complex -- to finish them off.  I found two great but simple cable designs in the book "Quilting With Style" by prolific hand quilters Gwen Marston and Joe Cunningham

You can see the stitching better from the back.
Since the borders had no seams, they were far easier to quilt (a note to myself for future hand quilting endeavors) and the stitching finished off the borders perfectly.  

By now I really wanted this up on the wall!  I was willing to bind it, live with it for a while and (heretical for me) be willing to go back and remove the binding and quilt them more at a later date if it really, really, REALLY bothered me. After tack stitching the wrong sides of the two quilts together, it was on to the binding.  And THAT almost didn't happen when I couldn't find the fabric I had planned to use for them, then found it but realized it wasn't going to work after all!  But scraps to the rescue!  Like many, I keep the leftover lengths of binding from my projects.  It just so happened that this plaid binding....


....leftover from making this quilt in 2008....


....turned out to have the perfect coloring to be a good finish for this project as well.  Bonus:  it was already cut!  This was a brushed cotton fabric and although I used the "fuzzy" side on the original quilt (which was made with brushed cottons and flannel), for this quilt I used the flat cotton side which is more in line with the fabrics used in these quilts. Although I usually add my bindings completely by machine, I finished this one by hand to insure that it was presentable on both sides.  It took a little finagling to cover the join where the two quilts form the sleeve but it got done and I even figured out how to add a label!


So the first finish for 2013 is in the can and I hope it won't be the last!