Showing posts with label Tuesday Archives. Show all posts

Tuesday, January 3, 2017

A New Tuesday Archives Post: 2017 Word of the Year and Goals

Happy New Year!
 
http://myplvl.blogspot.com/2017/01/tuesday-archives-143-new-year-goals.html


This week, Val over at Val's Quilting Studio is asking everyone to post their goals for the New Year in the Tuesday Archives link up.  I am more than happy to oblige in this annual quilter's "right of passage" as we hope for a productive quilting year.

Word of the Year:  Prioritize

Since planning is still my big goal, setting my priorities is a first step to that.  I've found in the past that I need to get better, on a day to day basis, of considering and setting priorities.  I've come to understand that priorities can (and sometimes have to) change day to day, week to week and month to month regardless of the overall goals set.  So the push this year is to manage that better.


However, that doesn't mean that there won't be those times when "what I WANT to do" will override "what I NEED to do"!  I just need to make sure I take note of that when I re-do the list.

APQ and TBQs

American Patchwork & Quilting Magazine is once again doing their UFO Challenge for 2017.  You make a list and each month they pick a number and you try to get that project done.  If successful, that's (potentially) twelve projects off your "To Do" list by the end of the year.


When I sat down to make my list, I realized that outside of projects that have specific deadlines, all but one of my UFOs were "TBQs" -- that is "To Be Quilted" or close to it because they  need the backing prepped.  I decided to try to give this a whirl.  The first number has already been picked so if you want to join in, make up your list now, go here and get your UFO goals for the year started!

This Just In!  While checking on links for this post, I found out that Judy Laquidara over at Patchwork Times is also doing a UFO List pick.  She's has also picked her first number and ironically, on my list that just so happens to be a quilt designed by her!  However, I believe my APQ pick would be easier for me to finish and a finish will keep me motivated so I'll stick with them on that one.  I will be joining Judy for her monthly Quilt-A-Thons but if you'd also like Judy's help picking your UFO projects, find out what her first pick was here

Staring Down The Bucket List

My next big and admittedly ambitious goal is to finish the last four items on my original bucket list.  Why ambitious you say?  Well, those projects consist of some pretty heady quilt designs:  Double Wedding Ring, Lone Star, Complex Applique (in the vein of a Baltimore Album) and a Hand Quilted Wholecloth!  The plan right now is to devote attention to one of these projects each quarter. 

I'll start the wholecloth first since once it's in the hoop, I can take a little time each week for the rest of the year stitching it up.


The Double Wedding Ring is  already half done -- the last time I worked on it, I only got as far as cutting out the border strips for it.  Let's hope this year I can get the border applique done, get it layered up and quilted! 


In some ways I feel the Lone Star is the easiest to piece (can be done by strip piecing) but not to choose!  I've got at least five different versions I want to try (and fabric already in house for at least two) so the one that gets made up (yes, definitely won't be more than that this year!)  might not be a "traditional" Lone Star. 


Up to now, I didn't really know exactly what I wanted to do for my "Complex Applique" project.  That's why it pays to shop your stash or shelves!  Long ago I fell in love with Robert Callahan's applique samplers when they appeared in McCall's Quilting magazine.  At the time they came out, they were soooo beyond my abilities, I could only dream.  However, that didn't stop me from setting up a box and occasionally throwing some "starting stash" into it. 


Now that it's many years down the road, applique is not the scary prospect it was back then.  I'm finally ready to tackle one and try to get that stash box off the shelf once and for all. 
 
All that said, while I'd give better than average odds that at least one of the Bucket List items probably won't make it all the way to the finish line this year, starting is still that much closer to finishing!

But Wait There's More!

Other big projects I want to get to this year are:

Finish my Label Pledge (So far two down, six to go!)

Finish my (first two) Quilts of Valor (and hopefully start on that during this week's Quilt-A-Thon with Judy at Patchwork Times).

Make a Tote Bag For my Featherweight (kit and supplies are already in house)

As noted earlier, I've got some "specific deadline" projects, mostly gifts and for decorating at particular times of the year so have to schedule those accordingly.

Oh and did I mention that I'm trying for the first time to do one of Bonnie Hunters annual mystery projects -- this year it's called "En Provence"?  Well, it's actually not a mystery any more since the reveal came out on Sunday.  I've had the stash set up for a while but the aborted "Holiday Quilt-A-Thon" put a wrench in an early start so at this point I'll be playing catch up. 


The good news is that from what I've read over the years, that's par for the course for most people for her mysteries so I'll be in good company!

As usual, I think I've lined up too much but out of sight, out of mind!  If you'd like to see what your other fellow quilters have in store for their year, hop on over to Val's at Val's Quilting Studio and peruse all the lists!  Have a Very Quilty New Year!!!

Tuesday, December 13, 2016

(A New) Tuesday Archives: Mitered Corners

Each week Val over at Val's Quilting Studio posts a topic for her "Tuesday Archives" link up and invites quilt bloggers to link up an old or new post that covers that week's theme. 

http://myplvl.blogspot.com/2016/12/tuesday-archives-141-mitered-corners.html

This week's theme is Mitered Corners, an interesting topic for which I had a past project perfect for the topic but viewing the post I wrote for it,  you might not realize just how it fits this topic.  So a new post on an old project is in order!

Back in 2009, I made a quilt for my DH's aunt, one of my MIL's four sisters.  That year she had been diagnosed with breast cancer and underwent treatment for it.  It just so happens that when we received word of it, I had just the day before looked at the book "Quilter's Think Pink" online (does anyone remember Clotilde's, the precursor to the Annie's Catalog?) and saw a pink ribbon quilt in it called "Ribbons of Hope".


At the time, I also needed backings for two other quilts so I headed to my favorite site for bulk fabric purchases, AAA Quilters Supply.  I not only found my backings but found a bunch of pink fabrics perfect for the blocks and a fabric that presented a unique opportunity for the "borders".

In the picture of the quilt above, you can see that it is designed with a light pink inner border and a dark pink outer border.  At AAA, I found this fabric:


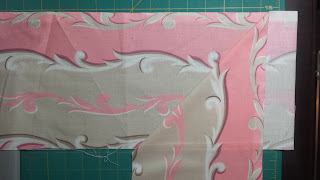
It's from Freespirit's "Girlfriends" fabric line in the print called "Patricia" in the pink colorway (and if you like it, AAA still has some in the green colorway here).  As soon as I saw it I realized that if I used it and mitered the border, I would have the illusion of two borders for my quilt but only have to fussy cut and sew one!


This is what the finished quilt looked like:

 
All the light and dark neutrals and the lightest pink solid came from my stash.  The rest, including the backing and binding:


....came from AAA (and they still have some of that backing fabric in the yellow colorway).  When my husband's Aunt was here in the Spring with my MIL, she told me she still has the quilt and uses it every day when she sits in her favorite chair.  It's always gratifying to a quilter to know that a gift is appreciated.

Head over to Val's if you'd like to find some other fun ways to use mitered corners in your projects.  Also check out the sidebar of her blog to find out what are the upcoming topics for the Tuesday Archives link up.  Maybe you have an old post or can create a new one to share with other quilters!

Tuesday, October 18, 2016

"Call of Duty" T-shirt Couch Quilt Finished!

**Warning: Process Post, long on details, heavy on photos!**

So what do you do when you live in a house full of guys, and your couch looks like this?


Oh, and the guys are all gamers?


You make a t-shirt quilt for your couch out of the guys old t-shirts!


I love my comfy couch but hated the peeling "leather" on the arm.  I had checked out a patch kit at Joann's but it said that it had to be applied from underneath the spot to be repaired.  Since I can't do that with this couch I had to find another option.  Years ago, my DH had gotten a t-shirt for "Call of Duty" as a promotional item with the game.  It was too small for him to wear and the boys didn't want it so I used to drape it on the back of our living room chair because, I admit, I liked the cheddar color in the logo!  Then one day I had draped it over the arm of the couch and liked the way the logo fit perfectly there.  Only problem was that any time someone sat on that end of the couch, they would invariably knock the shirt off the arm so I was constantly putting it back in place.    

Then one day it dawned on me that since I had always wanted to make a t-shirt quilt, why not make one for the couch?  I have kept a lot of our old shirts for a "one day" project and was pretty sure we had some that would coordinate.  From a design standpoint, I figured that if I made it long enough to drape down both sides of the arm of the couch and extended it under the cushions, it would help it stay in place.  The more I looked at the original t-shirt, I realized that after using the front motif there was still a lot of fabric left in the back.  I could use that to make a pocket to hold our TV and cable box remotes and the weekly TV guide from the Sunday paper so that those things no longer needed to lay around either!

Fortunately for me, since a t-shirt quilt has long been on the "To Do" list, I had purchased some t-shirt quilt interfacing two years ago during a sale so with that and a supply of shirts I was ready to rumble! 


I originally picked six shirts that coordinated with the "Call of Duty" shirt.  I wasn't sure which motifs I'd use or how big I would cut them or how much space I wanted to cover.  Some shirts yielded more than one motif.  In the end I picked a group of shirts that could be trimmed to fit the width of the inspiration shirt which was about 24 inches. 

I cut out the motifs from the shirts and backed them with the interfacing and I played around with them until I had a layout I liked.


Of course that meant that some other motifs I had cut wouldn't be used now but are already prepped for use in a later project.


Once I had a layout, I had to decide whether to just sew them together or add sashing.  I opted for sashing but wasn't sure what I wanted for that.  I wanted to keep the colors and patterns muted -- my living room is informal but it's not only a man cave!  Eventually I  found a camouflage fabric that channeled all the shirt background colors and surprisingly was also a knit! 


Laying out the images from the shirts again, I found I didn't need wide sashing.  What was used varies in width but are no wider than 2" (cut) in any area.  Once I interfaced and added the sashing, another motif got eliminated because I swapped in another small motif and then I didn't need the additional length:


The t-shirt interfacing makes the knit fabric thick so when sewn together, seams were pressed open to reduce bulk.  I had a remnant piece of "Star Trek" flannel I had picked up earlier this year.  Between the fact that it is one of my DH's favorite shows and I love flannel quilt backs, this was obviously destined for this project!


With the now heavier knits and flannel for the back,  I knew I needed a lightweight batting.  The lightest batting I already had in house that was close to the size of the project was some fusible fleece. 


Fortunately the top was not wide so I could cut this up and "Frankenstein" it back together to have a piece of batting the right dimensions for the project.  After picking out threads from the stash for the quilting (sorry for the fuzzy picture):


....and once it was all layered up (easy since the fleece batting was 2-sided fusible), you know what's next:  how to quilt it?  

I started by "stitching in the ditch" around the sashing to both stabilize the top and define the sashing areas.  After that, I took this as an opportunity to try get in some Free-motion practice.  There's a little bit of everything here:  On the Olive shirt I did Stippling.  On the Black shirt I did a free-motion rendition of a design from a pantograph I saw on-line.  For the big "Call of Duty" header, I just outlined the logo and did some organic (no marking) free-motion vertical line background fill:


Although you can't see them in this picture, on the black shirt there are some minute "pokies" of the white backing thread coming up to the top.  At first I was a little concerned about that but I ended up liking that they mirrored the "flaked off" condition of the t-shirt motif!  (That t-shirt is for Microsoft OS (operating system) 2 so you KNOW how old THAT shirt is!!)

For the pocket piece I took the back of the "Call of Duty" shirt, interfaced it, folded it in half and quilted it with a piece of the leftover fleece sandwiched between the halves.  I did the same straight line fill for the pocket but did it horizontally and with a walking foot because I had trouble maneuvering the smaller section by free-motion (stitched a few lines, struggled with it, ripped them out and changed machine feet and method).  When I attached it to the top, I stitched it down in two places to create three pockets: 


On the light grey basketball shirt,  the printed motif is raised and rather rubbery so I decided to stick to quilting just around the edge of it with a "rounded rays" design I had used before on this quilt.  On the black Kung Fu shirt, the motif and words were outlined and then echo quilted.  On the small light grey section (the later addition which was also cut from the basketball shirt), it was supposed to be basketballs and pebbling but by this time I was rushing to finish this up so the balls didn't get conveyed too well.  Oh well....


Once the big sections were done, I went back in with the walking foot and stitched about a quarter inch away from the sashing seams and in some of the wider sashing sections also stitched down the middle of them. 

I bound the whole thing with more of the camouflage fabric although this time with no interfacing, so it's applied as double fold binding.  I actually had to do two different widths of binding: 2-1/2" for the three sides and 3" around the pocket area since it was six layers thick.  The binding was attached by machine, front to back and then glue basted onto the back to make it easier to do the front finishing "stitching in the ditch".    I did however have to hand sew it when I overlapped the 3" binding over the ends of the 2-1/2" binding with a fake mitered "join".  

And with that, this one is in the can!  Onto some seasonal decor projects!

Tuesday, April 19, 2016

A New Post for the Tuesday Archives: Design Walls

Wow, Val who blogs at Val's Quilting Studio picked the perfect "Tuesday Archives" topic for me this week!  I had just finished upgrading my design wall  this morning when I checked to see that this week's topic is Design Walls

So this week my wall went from this:


To this: 

Here's why:  I had put up this "permanent" design wall back in 2012 after we had finally gotten around to painting the townhouse after moving in in 2011.  In our previous apartment, my design wall was a flannel backed tablecloth stapled to the wall:


(Those blocks are from my Brrr! quilt which can be seen here.)

When we moved, I mounted the portable design wall I had constructed in 2010 (details on that in this post) to the wall as a temporary measure....


......using these giant 3M hooks:

17004 Command(TM) Utility Hook
Photo courtesy 3M Command Products
Click here to find out more about them

Product Plug:  I love all the various 3M hanging products!  I use them to hang all my quilts, picture frames, a bulletin board, posters, signs and my design wall.


As you can see from my 3M storage case, I use the small clear hooks, all the sizes of the picture frame (Velcro-style) hooks, the plastic and metal picture frame hooks (for frames that have those sawtooth hangers on the back) and the cord clips (see this Bonnie Hunter post about that).  My Underground Railroad/Pioneer Sampler quilts are hung on a curtain rod that is hung on two designer 3M hooks!  Recently, I saw that Janet over at the Rogue Quilter blog also uses 3M hooks to hang her "Yardstick Quilt Holders", something I must try in the future.

My current design wall is made from three 2ft wide x 8 ft long, 1" thick pink foam insulation boards you get from Home Depot.  I had cut the boards down to six feet because although my walls are 8 ft high, I needed to accommodate for the outlet on that wall which I did by hanging the wall above it rather than cutting an opening in the boards:


I also decided to only mount the wall as high as I could reach without using a step ladder.  At the time, I believed that six square feet of wall space would be enough to handle most jobs and it has.  My plan for the open space above the wall?  To make a quilted (what else?) banner declaring this "My Happy Place".  And while I have gathered ideas for that, I hadn't up to now started on that project yet. 

However, I admit there have been a few jobs over the years where I could have used just a little more space.  Earlier this month I was finishing up "Christmas Cobblestones", a Moda Bake Shop project, that started as a leader/ender for last month's pieced label project


Unfortunately, I only have a shot of the finished top but while I was laying out the blocks and strip-pieced sashing to confirm the final layout, I needed just a little more space for it all.  For that, I had to tape the top sashing to the open wall space above the design wall.  Right then it clicked in my head:  maybe I really should have made the design wall to the full height for those times that I needed it AND (more importantly) why couldn't I PIN my "Happy Place" banner to the wall for day to day display and then just take it down when I needed to use the full wall?   

Fortunately being a quilter, I never threw away the "scraps" of the original insulation panels so was able to pull them out and measure out the additional amount needed for the new inserts.  As can be seen in the picture below, I prepped them the same way I had done the original wall, clicking them together and then taping the back seam with Duct tape, covering it with batting stapled to the back and mounting the 3M hooks on the back of the boards and the wall. 


using these.....


Click here to find out more about them.

I'm glad to have a full wall now and the bonus is that I pulled out my banner ideas folder and hope to start making some of the parts for it which I can put on the wall as I finish them, designing as I go which should be fun!  I haven't done any quilt work lately so hopefully the next time you stop by there will actually be a "project-in-progress" on it for you to see!

If you'd like to see what other design walls look like and what they have on them, click over to Val's Quilting Studio and see "how's it hanging" in other people's studios!

http://myplvl.blogspot.com/2016/04/tuesday-archives-107-design-walls.html

Monday, January 18, 2016

Another Hand Work Finish?

This little embroidery piece has been sitting around since I finished it in February of last year.


I came up with the idea to do it back in 2012 when President Obama was running for re-election.  At that time there was much talk about the historical precedence of his presidency and how he was inspired by Lincoln.  It was also interesting to reflect on the significance of his presidency in tandem with the commemorations of the 150th anniversary of the Civil War that were going on at the time.

I got Bonnie Browning's "Designs on Freedom" book when AQS was offering it as a gift with purchase.  The book has patriotic line drawings perfect for rendering in embroidery or applique.  The prior year I had downloaded a free Obama drawing they had offered that is not in the original book (and they offered it again on President's Day this year which you can get here).

I combined the Obama drawing with two others from the book:  one of Lincoln (on page 15 ) and the elements from "Give Me Liberty" (on page 25 but also available for free on the AQS website).  My plan was to add it to a quilt that I made back in 2002 called "Spontaneity" that was displayed in my downstairs bathroom which is decorated in a Red/White & Blue theme.


Testing, testing.....


 At this point, I thought two things:  wash the quilt since when it was originally made that first border was much whiter!  Second was that the embroidery needed a border -- maybe some trim?  Something that reminded me of turn of the century political banners.  I did eventually find a trim I liked:


I also did wash the quilt.  Yeah, about that....


 Yes, the reds ran and it didn't help that they were all next to the white border!  The little squares on this quilt were fabric swatches that I had received back when I belonged to a subscription fabric service.  I never expected to wash this wall hanging so never gave any thought to the color fastness of the swatches. Even after that, I thought I might be able to fix it by hitting those spots with a bleach pen.  So I went ahead and trimmed and turned the edges of the embroidery so I could add the trim and put it on the quilt.


Edited to Add:  Always love an opportunity to use another gadget!  I actually trimmed the edges of the embroidery with the Creative Grids Corner Cutter using the edge with the 3" radius. 


Surprisingly this is the same tool and edge I used to trim the corners of my (much larger) "Re-piecing the Past" sampler lap quilt.     

I whipstitched the trimmed out piece to the little quilt and hung it up.  I was pretty happy to finally have it done and in place. 

However, my DH was not!  While he liked the embroidery and the original little quilt he was not as jazzed about them together.  He also thought that hanging it in the same room as my "Sweet Land of Liberty" quilt took away from the larger quilt.
Sorry, hard to get a shot of both in this small room!
I do respect his opinion as he has offered good visual insight on my quilt projects before -- not to mention he has to also use this bathroom!!  So I'm probably going to take the embroidery off and try to figure out another way/place to display it.  Still counting it as a finish though!!