Saturday, December 31, 2016

"Get It Done!" - Closing Out the Year

You know the old saying, "When People Make Plans, God Laughs"?  Well so went the "Holiday Quilt-A-Thon"!  Right after I said that, between last minute shopping (for unexpected relative gifts), my youngest son getting really sick (upper respiratory needing a doctor visit, antibiotics and bed rest) and prepping food for the Christmas Day event we had to attend, the Quilt-A-Thon was a "Not-Quilt-A-Thon"!  Then right AFTER Christmas, my throat started to get sore and I knew the jig was up! So the rest of this week has been lots of fluids and as much resting for me as I could to keep it in check.

I'm feeling better physically and maybe I'll get to work on a few things before we head out for the New Years Eve showing of "Rogue One" we had planned to do before typhoid hit the house!  It'll definitely be a lot less than I had hoped to get done as the year finished up. 

So time to wrap up the last "Get It Done" of the year.  From the December Goals List, the only things I did get to:

1.  Fall Decorating Projects:  If I find a new ribbon (or decide on a plan) for the treat jar, I will work on that.  I'll also at minimum die cut the pumpkin and circle appliques for the long pillow and finalize the background to complete a "kit" for future finishing.  I also have a set of plain pillow covers that I want to whip up so those are at the ready when next Fall rolls around.


Pillows Done (the two colorful print ones,) ✔


Made the final fabric choices and cut out pumpkin shapes and stems with the Go!,


Cut leaves and circles (also with the Go!)


Kit up for finishing next year although I still need the pillow background. ✔


Treat jar done (except for further garnishing of the lid next year) ✔


5.  Labels Update:  Finish all outstanding labels (seven and one update label) and now I have an "official" cause:  to honor taking the Quilt Alliance Labelling Pledge.


I had just started the quilting on the "Cardinals" label when my son got sick.  Between that, getting used to quilting on my old machine again and me getting sick, I haven't gotten back to this.


Did format and print out the fabric sheets for the "Geese" labels.  Still need to be trimmed and bordered.

6.  Finish Wool Ornaments:  And hopefully get them on the tree this year!


We opted for a small tree this year so all the ornaments finished LAST year did get on the tree.  DH was even impressed, at first he thought I had purchased them!


 I started working on the three remaining mitten ornaments and got the motifs for one cut out and two more traced (with one using an alternate design) before nursing duties and illness interrupted.

Everything else on the goals list (Slow Sunday Stitching: QAYG blocks,  QOV #1 and #2, Autumn Double Wedding Ring, Husband and Wife Gift Quilts, Baby Quilt, Graduation Quilt and using a  Scrappy Trips project as a "Leader/Ender")  weren't touched.  I do have to run to the store and we're not headed to the movies until much later so maybe I can try to set up for a "Slow Sunday Stitching" session tomorrow. 

Here's hoping your quilting year ended well and you are looking forward to ringing in a New Year full of fun projects and finishes!!

P.S.  For those of you looking to Quilt-A-Thon in 2017, Judy Laquidara over at Patchwork Times is reviving her monthly Quilt-A-Thons.  See the schedule she's posted for the year here (and on her sidebar) and tips for getting set up for the first one here.

Wednesday, December 21, 2016

Catching Up On Quilt Labels - Part 1

The Quilt Alliance Pledge

Meg Cox who bills herself as a "Quilt Journalist" recently talked about labels in her November 2016 email newsletter.  In it she said:

"Even though I'm no longer president of the nonprofit Quilt Alliance but just a regular volunteer, I love to spend part of my time at Quilt Festival volunteering in the Alliance booth. And this year was especially fun because the Alliance was urging all the quilters who walked by to "take the pledge," to literally sign a pledge saying they promise to label ALL their quilts -- the ones they made and the ones they didn't. To keep the story of each quilt ON the quilt, for the sake of both family and history. 

So now, I'm going to urge all of YOU to sign that same pledge. Go....to the Alliance website and make this promise: your name will be put in the basket to win some customized quilt labels from Story Patches, whose unique QR codes can take people online to the part of the story that didn't fit on that small patch.  To inspire you further, go to the blog of the Australian quilter (who made a label pictured in the newsletter), to read her post titled Quilt Labels 101. "


http://quiltalliance.org/labelingpledge/

Right after reading that, I went to the Alliance website and took the pledge.  As of this year, out of the 85 quilts that I have made in my "quilting lifetime" (aka the last 14 years), I have seven quilts that do not have labels and one that needs  a label for a significant update made to it.  That means I'm batting 90% which is pretty good, all things considered.  However, Lynn Rinehart, a certified quilt appraiser reminds us in Episode 206 of "The Stitch TV Show",  that for non-quilters, quilting is an "overlooked" art form and if the maker documentation or the stories of a how or why a quilt is made is lost, then no credit goes to the artist who made it.  Unlabeled quilts keep quilters as a whole from getting validation for the history of the craft, skill and effort that goes into making a quilt. 

In the episode, Lynn also talked about a museum exhibit mounted by quilt collector Gerald Roy and the Boston Museum where quilts were hung along side modern works of art to showcase how the quilts stood up against other forms of art.  Lynn said that none of the quilts in the exhibit were newer than the 1930s or 40s yet while every piece of  artwork was signed by the artist, NONE of the quilts were!  Special enough to rate hanging in a museum yet the makers of those beautiful quilts are all lost to history!

Other Forms of Documentation

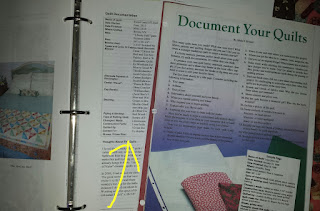
When I started quilting, it was commonly taught that you should label your quilts so I immediately got into the habit of doing it.  In fact, in the very first quilt magazine I read, there was an article about documenting your quilts both by labelling them and by maintaining a separate written record of them. 


After reading that first article, I created a blank word processing "Quilt Documentation" template and for each project I start, I begin by recording information about the quilt:  start (and eventually the finish) date, quilt name (once I decide what it is!), inspiration or pattern used, fabrics, batting and what or who the quilt is made for.  The covers for the binders where I keep this information also make great scrap quilt projects and you can see the ones I've made in these posts.  In addition, that documentation process has evolved into a personal journal that not only records the quilt process but what is going in my life and in the world at the time.  

Convinced You Should Label -- Now What?

Of course when it comes to the actual quilt label (as Amanda the Australian quilter noted) the difficulty we all face in accomplishing this is that by the time we are ready to make it, we are so focused and anxious about finishing the quilt that we're loathe to take the extra time and effort to get it done.  To make that easier, I try to think about how I want to create the label for my quilt as part of the quilt design process or, at the latest, as I decide how I'm going to make the back.  My preference is to usually try to piece a label area into the back of a quilt as part of  the backing.  For instance, a light colored strip or section that can be written on after the quilting:

Quilt:  Sweet Land of Liberty

 ....or to do a corner triangle which can be attached after quilting.   Bonnie Hunter has a great tip for that here or try Pat Sloan's method here.

Quilt:  Fabric Gal

...or monogrammed onto the binding which is also done after quilting.

Quilt:  APQ Reproduction Print Table Topper

I've Still Got Some Labels To Do!

So why do I still have unlabeled quilts?  In almost every case, it's because I've come up with an idea for an elaborate quilt label.  Now on the one hand, quilt labels are another opportunity to get creative with my quilting projects.  However, it also usually means that whatever the idea, it requires additional extensive design or production time.  If (when?) that gets done, then it usually needs to be added by hand after the quilt is quilted.  Until recently, hand work  in quilting used to be a danger zone for me --- the surest way to make sure that my label DOES NOT get on right after the quilt is finished!   

Fortunately in the last few years, I've become more comfortable with the idea of doing hand work.  In fact, having recently restarted a hand work project and planning to participate in the "Slow Sunday Stitching" linkup at the Kathy's Quilts blog, I realized that getting those labels done is another hand work project for that forum.  Since it would be nice to get all the outstanding labels done before the New Year, I'm trying to work on those as part of my recently announced "Holiday Quilt-A-Thon"

The first two to work on: 

1.  The quilt that is currently hanging up:

Quilt:  Flying For Cover

I had collected information about Geese  when I made this but never organized what I had into a proper label.  Well actually, I had ideas about what I wanted to do but now I've decided to "dial it back a bit" in the interest of getting it done!  So I've worked on the layout and prepped some muslin for putting through the printer:


 Next up, print it out and sew it on!

2.  The one that should be headed up (couldn't bear to hang it up without a label):


The pieced label for this has been finished since March but needed the red circles (berry) appliques stitched down and needs to be quilted itself:


As of this writing the berries are all stitched.  Onto the quilting!

The Special Edition "Get It Done!" Labels List:

Flying For Cover (2010)

High Strung + 2 (2016)

Spontaneity: Lincoln/Obama Update (2016)

Vintage Treasures (2010)

Brrr! (2013)

All Spruced Up (2011)

Tribal Scratch (2010)

Merrimac Dresdens (2013)

My label journey continues in Part 2!


Need More Label Inspiration?  Check out these links:

For one of my favorite link ups, Val's "Tuesday Archives" had the topic of labels back in November. See it here.

More from Bonnie Hunter at Quiltville on other label ideas that she loves.  In her post, Bonnie talks about a "Scrabble Letters Label" she found on a Pinterest board that didn't link to the actual post --- you can find the details about it on Rebecca's Cheeky Cognoscenti blog here and here.

Deanne Eisenman of Snuggles Quilts did another great post about labeling your quilts that you can read here.   I agree with Deanne that it's sad that so many of the wonderful antique quilts are listed as "maker unknown".  We all can appreciate the work and love that went into making them so it's unfortunate when the maker herself is lost to history!

The folks at  Generation Q magazine linked to a post by Katy Jones at I'm A Ginger Monkey  on the label topic. 

I've also read about this topic on many other blogs like Debbie's Stitchin' Therapy blog, or the editors of Quiltmaker as part of their "Block Friday" series, at Martingale Publishing's "Stitch This!" blog here and here,  and on the American Patchwork and Quilting Magazine website here and here.

Edited 2/19/17 To Add:
During a web search I discovered the blog of Eric Wolfmeyer, a quilt artist who has many of his quilts finished by Amish hand-quilting groups.  He wrote a great blog post showing his unique quilt labels and also discusses why labeling is important.

Edited 3/18/17 To Add:

Dawn, blogging at First Light Designs has a simple circle label idea using CDs and is attached with fusible web!!  Check it out here.

Edited 6/5/17 To Add:

Check out another great post by Handi Quilter on the basics of labeling!  They offered a great "new to me" tip in their post:  An embroidered label (attached after the quilting) that is made from the same fabric as the backing makes it look like the information was embroidered right on the back. 

Check out the rest of the posts on this thread for more label ideas!

Edited 10/24/17 To Add:

Here's another great post on the basics of labeling by Shasta Matova on the Felt Magnet site and also check out her Pinterest Board with some great examples of label ideas and designs!

Tuesday, December 20, 2016

Look Back, Looking Forward: Resolutions Update

This is sort of an addendum to my "Get It Done" reports:  Back in October in a Sew News blog post, Online editor Jill Case asked readers if they had kept their New Years Resolutions or if they even remembered what they were?

Graphic Courtesy SewNews.com
Since a big part of my "process" this year was getting a handle on setting my priorities and meeting them, I figured it was worth my while to try to answer that.  So from my New Year's post here's how the year has gone:

Word of the Year:  Efficient.

My plan here was to better manage the process part of a quilt so that working on it would be smoother and I could get better at estimating both the time I have to do stuff, the time I need to devote to stuff (if I'm trying to meet a deadline) and what I can reasonably expect to get done within the time allotted.  That would get done by making smaller, more realistic "To Do" lists and continuing to do my monthly "Get It Done" reports to assess my progress.

I have kept up the reports (which can be accessed from the labels link on the sidebar) and they helped me understand where I went wrong in the past.  The big lesson I learned is that it is important (at least for me) to detail every aspect of what I have to do for a project instead of starting with just some vague idea about how easy or hard I expect the project to be.  I have come to realize that I could better estimate my time and what was possible to accomplish if for example, I understood from the start that I needed to make twelve blocks that require ten HSTs and four rail fence units each and made a test block to see just how long each step would take.  I also wouldn't be caught by surprise if (when?!?) I fell behind if I hadn't made a certain number of blocks or units on the days I planned to work on them.

It's certainly easier to make short lists when you know exactly what you are actually capable of getting done!

On the Project Side.

I had listed six things I wanted to get done although in my typical fashion, some of those things actually consisted of more than one project!  I have managed to get a few things done and have a few more that are either in process or scheduled to be worked on.  Last year I would have considered that a failing grade but now I'm able to put the idea of "doable" in context and see that actually, all things considered, I stayed reasonably  (there's that word again!) on track.  So what were the main themes this year?

1.  Hand Work

I had three hand work projects planned at the start of the year.  One was almost done when the year started and one was soon to be layered.  I'm pleased to say both of those got done (see them here and here).  The last one is a hand quilted wholecloth which is also a "bucket list" project.  It  remains undone because I decided I wanted to make some "design decisions" about how to proceed with it but preferred to devote my time to other priorities.  So it was set aside and I hope to make it a priority for the start of 2017.

2.  Staring Down the Bucket List

In addition to the wholecloth quilt, my other big bucket list goal was to finish my Double Wedding Ring quilt.  Admittedly, a family illness and a summer of house guests along with focusing on other projects have kept this from getting attention.  I had it scheduled for some attention in November but that had depended on whether I got the things I wanted to work on in October done as well.  Neither of those things happened and while it was put on the list again for December, it might ultimately get moved on to the lists for next year.

3.  UFO Busting -- Get It Done!

The first part of this goal was to keep up the monthly "Get It Done" reports which I have done.  The second part was to limit new projects in favor of focusing on UFOs.  Results on that are mixed:  while I haven't started any totally new projects (things I bought fabric for this year and then immediately started working on), I have stashed a few.  The two hand work projects at the start of the year are so far the only true UFOs (things I started work on in a prior year) that I've completed this year.  The other projects I've worked on are what I call "HSY" (aka the "Hussies") meaning they are projects whose stashes were already in house but I "Hadn't Started Yet".  So not new to me but certainly newly introduced to the sewing machine (QOVs, T-shirt quilt) or the work table (Barn Quilts).  However, given the length of my HSY list, that's not necessarily a bad thing either! 

I will say that while I have at least two more HSYs I'd like to get to before the year ends, if I get to the DWR and my Wool Ornaments as planned this month, those will be UFO work.  We'll see!

4.  Charity Quilts:  Quilts of Valor

The good news is that this one is well on it's way.  I've got two tops done (seen here and here) and have the backing for both in house.  I didn't make my deadline of getting them quilted and done for Veteran's Day but I'm pretty confident I can complete them by year's end.

5.  A Functioning Featherweight

Along with the hand work, I'm pleased to say this got finished at the beginning of the year and I even got to put it to work (seen here)!

6.  The Baby Quilt
This hasn't been worked on and had been tentatively put on my "To Do" list for December in the hopes of getting it done as a Christmas gift but at this point that's not going to happen.  Oh well, another one for next year's list!

 I've already starting making my list for 2017 so hope for getting things done springs eternal!

The Holiday Quilt-A-Thon Is On!

Whew!  DH and I got the Kringle gifts for his family (and the cookies I bake for my MIL and her sister each year) to the post office this morning so they are now off to North Carolina.  My community commitments all finished up last week and my gardening classes finished up the week before.  We'll be picking up gifts for our sons over the next few days -- they are old enough now that they already know what they're getting so it's only about putting it under the tree, no wrapping necessary!  All that's left on the "To Do" list is dinner with my family on Christmas Day.  So that means I'm commitment free so it's time for....

....a Holiday Stay-cation and Quilt-A-Thon!!
 

At least that's what I promised myself once all the Holiday Hoopla was over.  I'm hoping to spend the next two weeks with some well deserved "Me-Days" which means "Me-Quilting"!!  Of course, focusing on quilting doesn't come without some travails such as:

 
 ...my Janome conked out on me again!  The same thing happened to me at this time last year!  And I think it's the same problem:  I had opened up the needle plate to clean out the bobbin area and a spring popped off which I think is to the cutter mechanism.  So she'll be sitting out this round until I can take her in after the New Year.  


However, unlike last year when I had to resort to a stint of "all hand work, all the time" in response, this year, I've got back up:
  

I had gotten my old Euro-Pro machine serviced this summer so she's back in action and as you can see here, already hard at work on an update project hopefully be revealed soon.  And as reported at the beginning of this year, I've also got more back-up support:


My Featherweight machine is still operating after the tune-up I gave her (and this picture was of her working on the project that the Euro-Pro's project will update).  I also recently bought a few gadgets for her that I will hopefully get to try out during the stay-cation.

Despite all the holiday busyness, I've already managed to get to a few of the things on the December "Get It Done!" list, am working on a few more, have started a "I couldn't resist" new project and if I'm lucky, might even get started on my big New Year's bucket list project.  Looking forward to the personal down time and ratcheting up the quilting time! 

Hope your holiday plans are moving along well and that whoever or whatever you want to spend time with -- be it family, friends or your stash -- that you get to do what you love and love what you get to do!  

Tuesday, December 13, 2016

(A New) Tuesday Archives: Mitered Corners

Each week Val over at Val's Quilting Studio posts a topic for her "Tuesday Archives" link up and invites quilt bloggers to link up an old or new post that covers that week's theme. 

http://myplvl.blogspot.com/2016/12/tuesday-archives-141-mitered-corners.html

This week's theme is Mitered Corners, an interesting topic for which I had a past project perfect for the topic but viewing the post I wrote for it,  you might not realize just how it fits this topic.  So a new post on an old project is in order!

Back in 2009, I made a quilt for my DH's aunt, one of my MIL's four sisters.  That year she had been diagnosed with breast cancer and underwent treatment for it.  It just so happens that when we received word of it, I had just the day before looked at the book "Quilter's Think Pink" online (does anyone remember Clotilde's, the precursor to Annie's?) and saw a pink ribbon quilt in it called "Ribbons of Hope".


At the time, I also needed backings for two other quilts so I headed to my favorite site for bulk fabric purchases, AAA Quilters Supply.  I not only found my backings but found a bunch of pink fabrics perfect for the blocks and a fabric that presented a unique opportunity for the "borders".

In the picture of the quilt above, you can see that it is designed with a light pink inner border and a dark pink outer border.  At AAA, I found this fabric:


It's from Freespirit's "Girlfriends" fabric line in the print called "Patricia" in the pink colorway (and if you like it, AAA still has some in the green colorway here).  As soon as I saw it I realized that if I used it and mitered the border, I would have the illusion of two borders for my quilt but only have to fussy cut and sew one!


This is what the finished quilt looked like:

 
All the light and dark neutrals and the lightest pink solid came from my stash.  The rest, including the backing and binding:


....came from AAA (and they still have some of that backing fabric in the yellow colorway).  When my husband's Aunt was here in the Spring with my MIL, she told me she still has the quilt and uses it every day when she sits in her favorite chair.  It's always gratifying to a quilter to know that a gift is appreciated.

Head over to Val's if you'd like to find some other fun ways to use mitered corners in your projects.  Also check out the sidebar of her blog to find out what are the upcoming topics for the Tuesday Archives link up.  Maybe you have an old post or can create a new one to share with other quilters!

Monday, December 12, 2016

Slow Sunday Stitching: Resuming the QAYG Project

I was hoping to link up to Kathy's Slow Sunday Stitching link up but it's already closed!  However, you can click the button below and take a moment to go look at all the beautiful hand work everyone worked on this past week.

https://kathysquilts.blogspot.ca/2016/12/slow-sunday-stitching-binding.html
 
As for me, that's my incentive to get it done earlier next week and I'm so excited that I've gotten back to this that I'll just post it anyway!   So the story goes like this:  Back in October, Debbie over at Stitchin' Therapy blogged about a table topper in her collection:
 
Photo used with permission from Debbie at the Stitchin' Therapy blog.
 She shared a story about this little quilt and her memories of the wonderful woman who taught her guild how to make them and who is now deceased.  As soon as I saw it, I knew what it was because I have some too:


These are Reversible Quilt-As-You-Go blocks, a design that appeared in (the also dearly departed) Quilter's Newsletter Magazine, July/August 1998 issue.  The instructions were in the article "Reversible Quilt As You Go" by Margaret Gutowsky.  I was originally attracted to this by the traditionally colored blocks featured in the article and the idea of making a quilt that would not need additional quilting when the blocks were done. 

I started this waaayyy back in 2005, despite considering myself an avowed "machine quilter".  At the time I was a parent volunteer in my sons' elementary school and I chaperoned students attending a weekly ballet program in Manhattan.  I thought it would be interesting to have a quilt project that I could take along with me to work on.  However, the class sessions were fairly short so I didn't get as much done on them as I hoped to during that time.  When I was no longer doing the chaperone duties, this project never got back up to the top of the "To Do" list despite the fact that I've kept the pouch it's stored in "in plain sight" all these years. 

Having become way more open to hand work projects over the last five years (as evidenced by the "Hand Work" link on the sidebar),  I've frequently made plans to try to resume working on this on a regular basis.  The last time I talked about them was back in February, 2015.  At the time, my plan was to use them as a SSS project until the end of that year and finish it up.  Obviously that didn't happen!

After commenting on Debbie's post, she suggested I get back on the horse and I heartily agreed!  With the busy holiday season in swing from Halloween to New Year's, it's taken me a while to get set back up.   Yesterday I was finally able to do so: 


As usual, it was a little hard to get back in gear.  While I already have a bunch of blocks pieced together and batting squares cut, the tough part is stuffing the batting in and getting it squared and laying flat inside the pieced block.   Another reason I think the stitching was once slow going was that when I originally started out, I used Warm and White batting to stuff into the squares but found it difficult to needle and that was another reason my initial enthusiasm for the project was dampened.  At some point, I got a hold of another bleached white needle punched cotton batting which was a little lighter so made the stitching a little easier.  However, I don't remember what I'm using now or where I purchased it so hope I don't wind up needing more in the future! 

Edited to add:  Looking back at this post from 2010, I had noted that I started using Fairfield's Soft Touch batting.

I'm also still trying to work out the best needle to use.  A straw needle (seen on the left below) makes finer stitches but they bend too much for my taste (or maybe I'm pushing them in too hard).  I like the heavier and firmer Dritz needles (on the right) but can't get fine stitches with them --- what I produce with them is more in the "Big Stitch" category. 


Fortunately that is fine, since I'm looking forward to this having that rustic, hand made "first quilt" look when done.  I'm glad to attempt working on this again because I also REALLY want to start my (bucket list) hand quilted wholecloth project at the beginning of the year (the one I was supposed to start at the beginning of this year) and getting into the hand work groove now might help me meet that goal.  At the least I got two lovelies (at the top below) finished this week and added to my pile: 


I'm realizing that I've completed a lot of blocks with a red (or pink) side so I've organized the blocks I've already got sewn together so that the ones I work on next use other colors and add more variety to the completed pile in the coming weeks.  I'm hoping to have enough done by the end of the month to start laying them out and stitching them together into rows.  We'll see!

Thursday, December 1, 2016

Get It Done! November Recap, December Goals

Well as usual it's either feast or famine surrounding the monthly goals.  Ironically in a month where we celebrate by feasting, for the goals it was famine last month!  

Of the five goals on last month's list I only got to one -- trying to work on the Fall decorating projects.  However, even that didn't get very far.  I got the wool motifs for the Fall Treat Jar sewn up and even sourced the ribbon and a little bird for the top of it....


...but the ribbon was too loosely woven to work as hoped and I stalled on whether to go buy another or try to salvage it by adding fabric to it.  I also worked on the layout for one of the couch pillow covers.  Using APQ's Pretty Pumpkin Pillow pattern and my Accuquilt dies, I needed to size it up for my much larger pillow.....


...however, once I was satisfied with the layout, I discovered that I only had two oranges in my wool stash AND couldn't locate my flannel stash which I needed for the basket!  I had used them last year at this time when I made some holiday pillowcovers and now can't for the life of me find the box I know I have them in!   I did order some wools and was sure the flannels would turn up when I started clearing out my "studio" (aka the dining room) for Thanksgiving.

Unfortunately then "life" started piling on.  Between cleaning, shopping and planning for the holiday, finishing up a pruning class (and required garden work days), temporarily writing the weekly community newspaper column and handling other responsibilities for our Tenant Association while our President recovers from surgery and attending a couple of unplanned committee meetings, quilting consistently got pushed aside.  I also admit I got a little too distracted sourcing a cool new accessory for my Featherweight machine (something I will report more on later).  The biggest mistake was that I didn't set up things that could be sewn in those small, in-between time increments so ultimately I never got back to any of the quilting.

So what's up for December?  Way back in September, I had already planned out the things I wanted to work on as the year draws to a close.  I'm hoping to correct the mistake I made last month by making it a point to plan out what I want to work on each week, so I can juggle my priorities a little better.  While I'm still conscious that too long a "To Do" list usually doesn't pan out for me, I do want to keep a few things in the forefront of my priorities.  I've also got to identify the things I can get done -- say in less than a half hour or while watching TV in the mornings with DH when he comes in from work -- so that even if hours or a full day devoted to quilting aren't possible, something can still get accomplished.

December Goals List

Carryovers From Last Month:

1.  Fall Decorating Projects:  If I find a new ribbon (or decide on a plan) for the treat jar, I will work on that.  I'll also at minimum die cut the pumpkin and circle appliques for the long pillow and finalize the background to complete a "kit" for future finishing.  I also have a set of plain pillow covers that I want to whip up so those are at the ready when next Fall rolls around.

2.  Slow Sunday Stitching: QAYG blocks.  As noted previously, this is something I'm hoping to pick back up after seeing a finished one on another blog.  I want it to be an ongoing weekly project through the end of the year until completed.  If I can stick with it, it will also warm me up for the hand quilted wholecloth project I want to start in 2017.

3.  QOV #1 and #2:  Get the backs made up and get these layered and basted for quilting.  Only if time and desire permits, I'd love to get them quilted as well.

4.  Autumn Double Wedding Ring:  I'd like to get this one off the list at least to a top this year so want to get back to it.  Need to get the applique borders on and if possible, layered and basted as well.

Projects Planned For The Month: 

5.  Labels Update:  Finish all outstanding labels (seven and one update label) and now I have an "official" cause:  to honor taking the Quilt Alliance Labelling Pledge.

6.  Finish Wool Ornaments:  And hopefully get them on the tree this year!

7.  Husband and Wife Gift Quilts:  For two married friends of mine.  If finished this month, give as Christmas gifts, if not, their birthdays are in February so I have a head start!

8.  Baby Quilt:  Putting this one back on the list but have to contact the Grandmother to see if the original theme still stands.

9. Graduation Quilt:  Another gift that the recipient was warned in advance might take a while to come.  At minimum, I'd like to at least get this started by pulling out the stash accumulated to date and seeing where I stand with it.

10.  Scrappy Trips as "Leader/Ender":  Scrap quilt project to work on while doing other stitching.

That's certainly a long enough list!  Looking forward to the end of the year!

Tuesday, November 1, 2016

Get It Done! October Recap, November Goals

With November here, the end of the year is in sight!  I'm pleased with what I got done for October.  As usual not as much done as hoped but two big projects I really wanted to get to, did get completed.  For the things I didn't get to, I was also able to see just when and how I got off track (there were nine-whole-days where I didn't get to quilt!).  Because of that, I immediately knew when or if I wasn't going to meet my deadlines.  Knowing that first hand rather than guessing or assuming is something that will be very helpful for me as I try to whittle down my project lists going forward.  So here was what was on the list for October
 
1.  T-Shirt Quilt:  Since this is a decorating project, it can start the list off this month. 
 
 
DONE and on the couch and blogged about here.
 
2.  Fall Decorating Projects:  Not even going to list them all out but let's just say if I can try to get to one a week, I'd be doing good.
 
Only got one done but it's a biggie:
 
 
 A Fall Barn Quilt (BQ #2) is DONE and blogged about here.
 
3. Halloween Quilt:  This one was started on last year but progress was slow.  This time I know I need to set it up as a leader/ender if I'm to make any progress on it.  Would love to "put it to bed" (pun intended) this month if I can! 
 
 
NOT DONE.  This is last year's shot of it -- this year I didn't even get a chance to pull it back out of the box!  And so it will stay until next Summer (if I really want to have a shot at finishing it) or Fall!
 
4. QOV #1 and #2:  Already noted that I'll be looking to nudge either or both of these to a finish if I can.


The "Cosmic Valor" QOV (#2) top is DONE (details here)....


....and I did get the backing for it.  Couldn't get it and "Combat Gratitude" (QOV #1) layered for quilting during the month so I know they won't get done for Veteran's Day.  However, I definitely will get them layered and quilted before the end of the year.

So what's on board for the November List?

1.  Fall Decorating Projects:  The other projects I had wanted to work on last month included two small table mats, a pillow cover and a treat jar to decorate so I'm going to see if I can try to get one, some or all of those done this month.  I have other decorating things to do around the house in prep for Thanksgiving so I'm hoping each thing will motivate me to get some of the quilt projects done to complement them.

2.  Slow Sunday Stitching: QAYG blocks.  This is something I'm hoping to pick back up after seeing a finished one on another blog (hopefully more on that later!).  I expect this to be an ongoing weekly project through the end of the year.  If I can stick with it, it will also warm me up for the hand quilted wholecloth project I want to start in 2017.

3.  QOV #1 and #2:  I want (at minimum) to get the backs made up and get these layered and basted for quilting.  Only if time and desire permits, I wouldn't mind getting them quilted as well.

4.  Double Wedding Ring:  I'd like to get this one off the list this year so want to get back to it.  Looking to at least get the applique borders on and if possible, layered and basted as well.

5.  Black & White Mini Quilt:  This is a decorating wild card.  Like the t-shirt quilt, it's a project I've been thinking of doing for a long while.  However, it is something I have to design and I've already established that DESIGN TAKES TIME in the project planning process!  What I am willing to try to do is give myself a day or two to explore what ideas I have.  If I feel I can move it forward I'll do so, otherwise it'll have wait a little longer for another time and place.

I can see everything except #5 scheduled into weekly "To Do" lists.  As always the challenge will be to then stick to that along with the other things in life I have to do.  Getting to #5 is going to depend on if I don't get derailed off of whatever I schedule and then wind up with some excess free time for it.  As always we'll see, we'll see, we will see!

Quilt Decorating II: Barn Quilt # 2

Back in June I made a Barn Quilt which I posted about here:


It is a quilt decoration that I had always wanted to do to hang on my terrace wall.  I have always planned to make a few so I could switch them out with the seasons.   When my DH had brought me a large board to make the signs with, I cut it into two approximately 24" squares that I figured I could paint on both the front and back and have four different designs.  Not to mention that if I wanted to do a new design, the boards can always be whitewashed and a new design painted over it.

The one I did in June is meant to be a summer piece so now its time for something for the Fall.  Since I have a wreath I also display out there, I wanted to get the sign done fairly early so I could switch to the wreath for late Fall/Thanksgiving and then leave it up but change out the foliage on it for Christmas.  It took me awhile to get the background paint I wanted for it and then to finally get a break between projects to work on it. 

Originally my plan was to use another of the quilt blocks from my original inspiration piece, the "Barn Quilt Trail Midwest Medallion Quilt" by author Suzi Parron.


My plan was to use the leaf design on the center right.  However, I realized there were couple of issues:  the first  was that I wanted more color for the sign and wasn't sure how or where to add it.  The other was that the original orientation of the Medallion block is on-point.  My board already has a hole drilled in it for hanging it "straight set".   So the debate was did I want to have the motif placed as a straight set so then it was oriented on the diagonal or did I want to drill a different hole and try hanging the board "on point"?  I was concerned about whether a hole in the corner would be able to hold the weight of the board and how the new hole would affect the original block that is painted on the reverse side.  I decided to look round for another design I could use.

Eventually I came across this one:


This the "Autumn Fantasy" block and quilt from Judy Martin's "The Creative Pattern Book".  I liked that this block was designed to be straight set and viewed on the diagonal (solves that problem) and loved the range of coloring in it.  Sold!  So after bringing in the Summer barn quilt and cleaning it off, I painted the background, traced off the design and pulled out my little pots of paint. Some colors had to be mixed.  


It took me a few days to tape off and paint sections and then let them dry before moving to the next section. I also added a stem because I felt it helped finish the design.


By the end of the last full week of October, I was almost done with all the painting when I ran into a problem:


I had planned to paint the last section by combining the dark purple on right with the burgundy color on the left.  However, it is a large area and I was out of the burgundy paint and had used up all of my blue paint when I made the summer sign so couldn't even mix up my own.  Truthfully, I also didn't have much of the purple left either.  Time for a change of plans!


It took me a few days to decide on a color.  Some of the block variations in Judy's inspiration quilt used more green in them and I liked the idea of adding more in mine also.  However, I also wondered if brown or some other color might also work.  I wasn't trusting what I was visualizing in my head but didn't want to paint test spots on the actual board that I might have to paint over.  Then I realized I could use the "Draw" function on my phone to test out colors. 

I finally settled on using a medium dark olive green and painted that in.  The last bit of painting was the final narrow border of black painted in around the edge.  Once all the painting and a few little touch-ups were done, it was time to seal it with polyurethane.  It was pretty cold that week so I had to wait for it to get warm enough for that step which finally happened the Sunday before Halloween.  Once finished, here's it hanging:


I'm thrilled to get another one done.  I'll see if I get any feedback (positive or negative) from my neighbors again.  I'm already thinking about spring --- I want to take the other (empty) board I have and do a basket design with some "applique" motifs.  We'll see!