Showing posts with label Table Runners. Show all posts

Thursday, September 19, 2019

A Quilter's Favorite Reward.....


.... a gifted quilt received, put to use and appreciated! My friend sent this shot of her new desk mat in place.  I'm glad to know it worked out perfectly!

Saturday, September 14, 2019

The Latest Gift Quilt: Have Some Moscato At Work!


I'm happy to go to Alycia's  Finished Or Not Friday link up this week with another finish.  Woo Hoo!  The desk mat for my friend is finally
D-O-N-E!!

That didn't take too long did it?!?

Reiterating the back story (and if you've read this before, please feel free to skip ahead):  I have a friend that I've made a number of projects for.  She has taken most of the things I've made for her to decorate her cubicle at work.  For years, Melinda Pirone's "Moscato Di Asti" pattern was on my wishlist waiting for just the right combination of desire/need/fabrics to make it happen.  My friend's request at the end of 2017 was for a quilted mat for her cubicle desk.  Leftovers from that year's Quiltville mystery project presented the perfect combination of need and the resources to get it started!

My first attempt to actually start working on this was in 2018 when we had planned to travel together to visit another friend of ours.  This was one of two projects I "kitted" up to take along on that trip.


However, even after the trip plans got pushed back, I kept the two "kits"packed up so I could grab them at a moments notice of travel.  Fast forward to this year and my friend was coming to attend a music event in the community garden I belong to that was held back in the Summer (sigh, yes Summer is as good as over!).  I figured it was a good time to start working on her mat and maybe get it done to present to her.  Of course, the usual "best laid plans" (and the fact that I was working on three other projects at the time) meant that I only pulled it out and started on a bit of the piecing.  It took a lot longer than planned to finish up the other projects so only then did I get to really work on this.  Once it became the focus project, it was full speed ahead!


Last week when I posted I had shown my progress (above).  Only problem was that I had pieced some strips in advance and when I put up the blocks already made on my design wall, I also put up ALL the strips already prepared.  What I DIDN'T DO was check back on my plans for the layout. The strips I laid out filled out five rows of seven blocks and I thought that meant I needed to add enough additional strips to complete that many blocks.  At this point, I had to struggle to have enough of some of the fabrics that I started with to do that.  I did get it done (with a few fabric substitutions and some "poverty piecing" of small scraps) and got it finished.


Except --- Yikes! --- it was now TOO BIG!!  I had only needed FOUR rows of blocks!  The good news is that only meant taking a row back off  and fortunately doing so didn't wreck the balance of the colors in the design.  Whew!  The other good news was that I put some of the extra blocks together to use to  make a small quilt stitch sample for that step in the project.


I had a pretty "marbled" (thanks, Rebecca!) print I planned to use for the backing.  I had planned for the finished top to be 20" x 35" (5" finished blocks set in a 4 x 7 layout).  I had measured the backing piece and it was just about that size, possibly only needing a few extra inches in strips around the edges to widen it a bit.  Yet when I finished the (re-sized) top and held up the backing to it, it was not as wide as the top by a significant amount.  What gives?


Yeah, turns out you have to read the measurements on your mat correctly!  Tip:  when measuring from the short side of the mat, DON'T read the numbers at the end on the long side,  LOL!!
So this of course meant my backing piece though tall enough was not actually wide enough to make a one piece back.  No problem, leftovers to the rescue!  I  had enough of some of the fabrics and decided to try something I hadn't done before --- I cut 2-1/2" strips and created a panel for the middle in the style of a "jelly roll race" quilt!


BTW, in my last post I had said that I thought I had used up all of the original light (white on cream) fabric I originally worked with.  Wouldn't you know it, now I found some more under the pile of the other fabrics!  It wasn't that much (only enough to provide two strips for the backing panel) but it would have been more than enough when I was piecing more block strips. Those strips will also serve as my label area.  Even so, I still needed to add some extra strips on the top and bottom to give me extra for the quilting.

As I did with another project this summer, I used preview paper to decide on the quilting.  I wanted to highlight the "stars" and wound up doing a combination of a swirl and outline quilting on them.  For the background the best thing was the simplest:  stippling (fast and easy).


As usual, I didn't really want to change threads too much.  I found a nice medium gray that worked on the dark areas however, it was too dark for the stars.  I was going to use white thread on the stars but realized that using a light gray actually worked better --- it made it all look like it was stitched with the same thread and giving the subtle contrast in color a nice overall balance.


Last was the binding.  For myself, I probably would have gone with a dark purple or burgundy but my friend likes lavender so I went with that for her benefit.  And clearly there's no question that the fabric I used is 100% cotton:


So my friend will have hers and I put a binding on the stitch sample and now have a little mug rug as a momento of working on this project!


My friend has two projects for her home that she wants me to make, but both will require design work.  I bought EQ8 last year so working on those may be an opportunity to get familiar with that program.  No time soon though, I've got QOVs to get to next!

With this project and post done, now I can go see what our gracious link up host Alycia is up to and check out what everyone else worked on this week.  Got a Finish?  Even if not, link up and let us see what's inspiring you this week!

Friday, September 6, 2019

Finished Or Not Friday --- WIP Edition


I can report in early for this week's "Finished Or Not Friday" (hosted by Alycia over at her Alycia Quilts/Quilty Girl blog) because thankfully, I don't have to have anything finished!

The "Emerald's" blocks at the top of the wall are being put away for now.

I am currently working on a desk mat for a long time friend of mine.  I've made her a few mug rugs (seen here and here) and quilted a panel for her (here) that she purchased when she attended her first (and only) quilt show with me a few years back.  All of these are displayed in her cubicle at work.  She had asked for the mat at the end of 2017 and had nudged me about it again in November of last year, hoping to get it for Christmas.  At that moment I had a lot going on so told her it would have to wait until at least the New Year.  Well, I guess it has simmered long enough!

This is going to be my mini version of the "Moscato d'Asti" pattern by Melinda Pirone of Sew Precious Creations.  I had always liked this design and the coloring but never had the project space to embark on making it for myself.  When my friend put in her request, I knew it was the perfect thing to make for her because Moscato is her favorite wine and lavender is her favorite color!  The original pattern used jelly roll/2-1/2" strips to make a lap sized quilt.  Since I'm shooting for a 20" x 35" finished mat, I'm using 1-1/2" strips instead.  I had made note of this pattern when I first saw it yet when I finally had a good reason to go purchase it,  I couldn't find it available anywhere!  Fortunately, the design was an easy one to figure out how to do.

I had hoped to have gotten this done by the end of August but all the recent Red, White and Blue projects got in the way of that.  I had cut the fabrics out back in May 2018 because we had discussed making a trip together to visit another friend of ours and I had hoped to take it along as a travel project.  When the plans fell through, I figured that having it already prepped would make it easy to start working on whenever I was ready to tackle it.

Empty food containers are great for mini quilt kit storage!

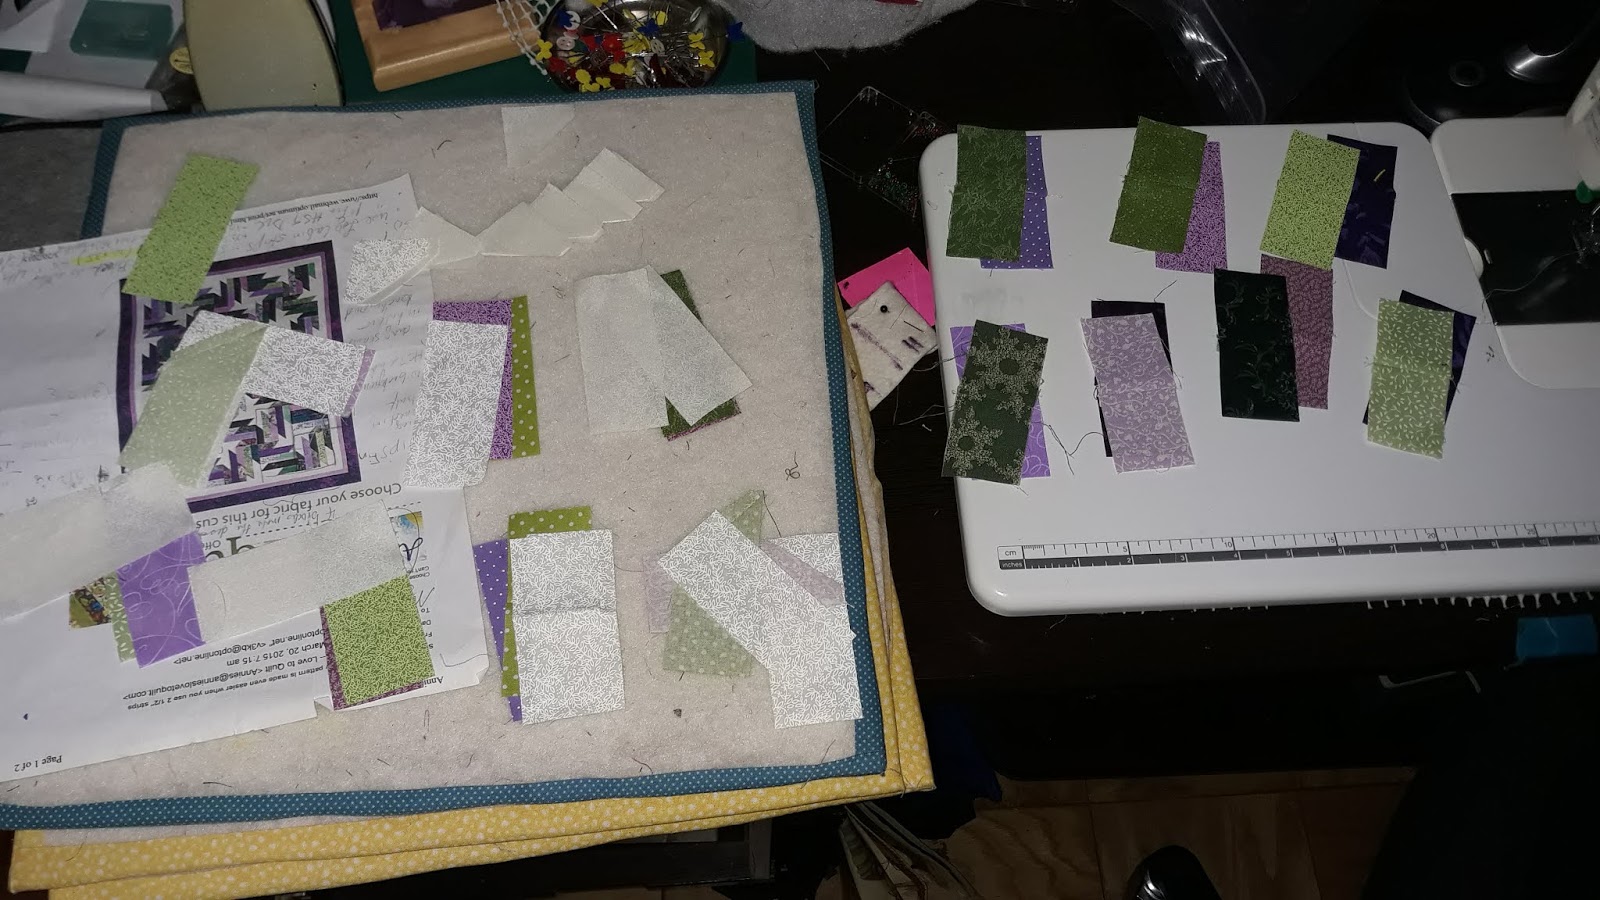
A lot of the green and purple fabrics were leftovers from making Bonnie Hunter's "En Provence" mystery.  The problem is that I thought I had cut enough strips to make all the blocks but now find myself short!  In the picture at the top of the post, you can see I have enough of the two-color pieced strips and have placed them where I need to add more blocks to the layout.


I will need more colored long strips and attach light HSTs (which I have) to the ends of them.  I also need  more short light strips to attach to the short color strips I have.  However, I don't have any more of the light fabric I used!  The white-on-cream print I used was leftover from making my second QOV top.  I've searched that stash and checked my project notes --- nope, there's no more.  Fortunately, I've got a couple of scrap stash sources that have yielded a supply of "close enough" light strips that I can cut down and hopefully that should cover my needs.

So maybe just maybe the weekend will yield a finish?  I've got an appointment to go to this afternoon and things to do over the weekend so I'm not holding my breath!  When I get back later today, I'll be headed back over to Alycia's to see what everyone else has got cooking or coming down off of their design wall!

Saturday, August 31, 2019

Three Cheers For the Red, White & Blue! --- Part 6 and The Finale!

As August comes to a close, so does my Summer of Red, White and Blue Projects!  This is the third RWB project to make it to the "Finshed Or Not Fridays" Link Up, now hosted by Alycia over at her Alycia Quilts/Quilty Girl blog.


After spending so much time on my last project, the "Star Spangled Runner", it was a relief to get a quicker one completed.  I had hoped to get this done to post yesterday but I still had some quilting to do on it today along with all the finishing stuff.  So the "Salute To Stars" Table Mat made it just under the wire for the end of August!


Like the runner, this is another free pattern from American Patchwork and Quilting magazine.  As the pattern notes, it is easy to make the original design larger or smaller by adding or subtracting blocks.  The free pattern is actually the "color option" of a larger lap quilt that appeared in the magazine.  I made mine with even fewer blocks in order to fit the 18" square table I want to use it on:


I also recently saw a pattern  made up of the same basic blocks but in a larger size and laying them out in a way that creates a long runner.  A very versatile design indeed!

I opted to make a slight change to the design.  The original quilt used Flying Geese blocks to create an outer border around the center of the top.  I opted to go for a 3-D substitute and use a Continuous Band of Nesting Prairie Points instead!   I've only used this technique once before as the "binding" finish for a Feathered Star wall hanging way back in 2003 in my early quilting days.


I learned about the technique from a pamphlet --- one of those "Free with Subscription" gifts I got back when I started my Quilters Newsletter subscription.  I still miss that magazine!!


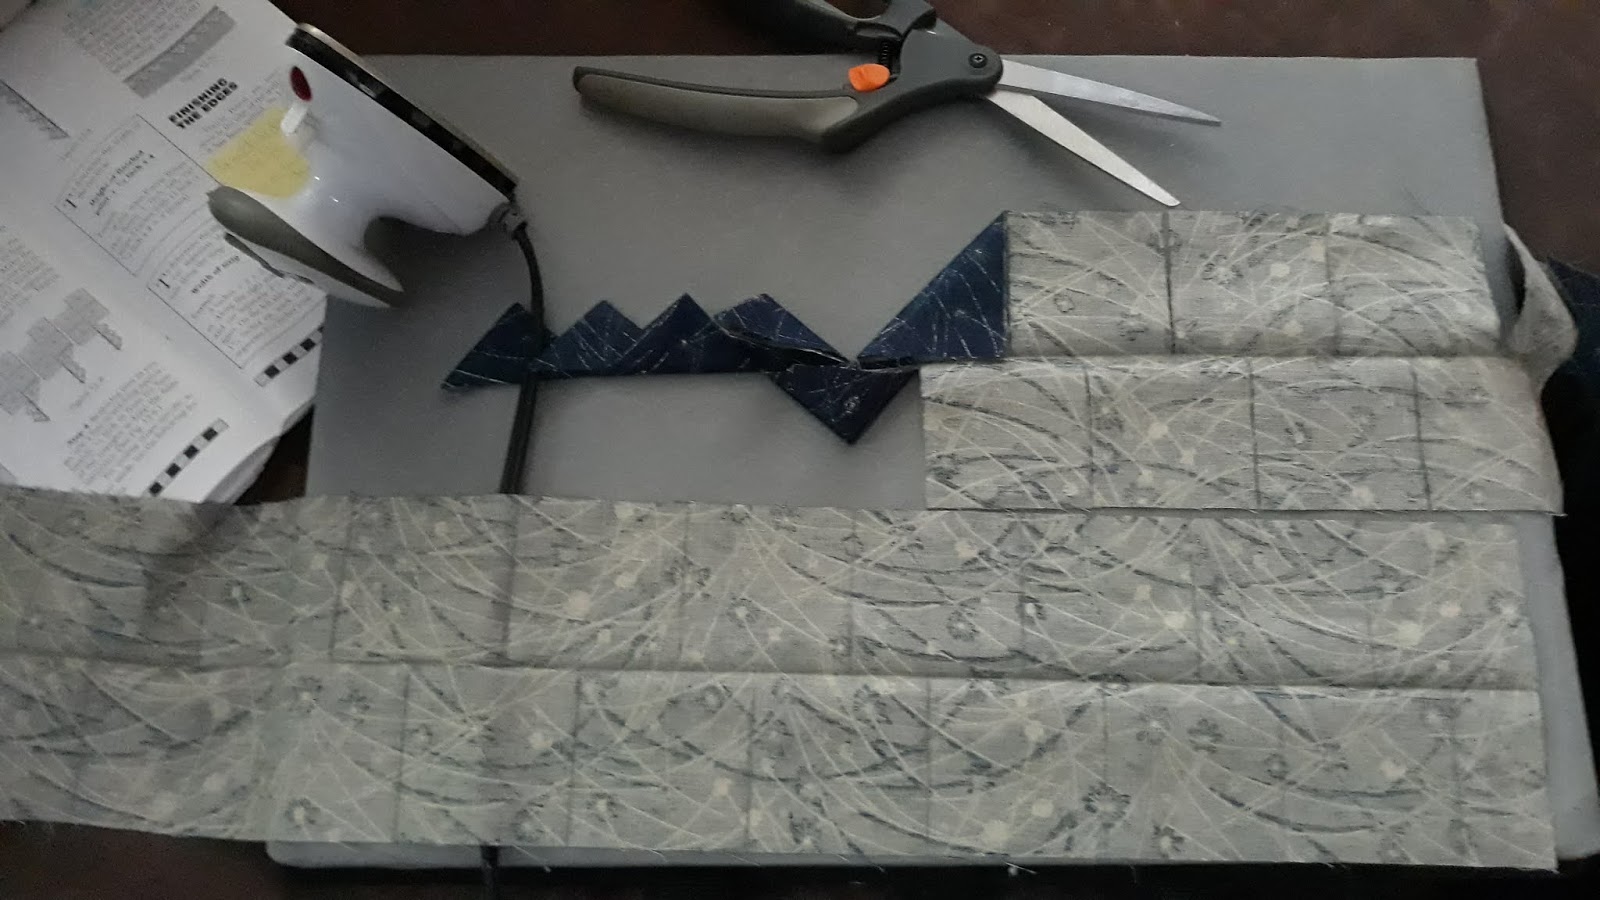
Even though Flying Geese are my absolute favorite block, I liked the idea of being able to make the triangles float above the striped outer border.  They are easy to make too -- only requiring a strip for each set of points, some marking and cutting (with scissors for a change!), folding and pressing.


There are a number of videos around the web showing how to do the technique.  I also found a PDF from the Utah State University Cooperative Extension (!!) showing how to do two-color and piped variations.  The two sides of the finished band get folded together and the band gets sewn in between the turned under edges of the top and backing.  In my case, I sandwiched it between the center of the top and an outer under-border.  

I had to "Frankenstein" some batting scraps for this and then decided to quilt it with some simple, straight forward grid quilting.  It was easy to do since I just had to follow the lines or edges of the piecing and the striped border print and it could all be done with a walking foot.

When it came time to finish the quilt edges, I was going to bind it with a traditional binding but then this week, Bernina's "We All Sew" blog put out a bunch of tutorials on various binding techniques.  One of them was for an "invisible faced binding", a technique I've seen but haven't tried before.  In addition, the way they did it, it provided a convenient label area and hanging sleeves (in the form of triangle corners) as part of the process so I was definitely in for that!


This was one of those RARE times, I was willing to hand sew down a binding!  If I want to hang this up in the future, I only sewed down the center edge of the triangles --- I left them open at each corner so I could slide in a dowel rod for support to hang it.  Of course, this won't be completely done until I write in the label information on the triangles!

I've been playing in my RWB stash all summer so all of the fabrics for this have been sitting on my cutting table while I worked on each project.  Needless to say repeats abound in the fabrics I used for all of my last few projects.  I had cut the squares for the star fabrics from the some of the same fabrics used for my last QOV top and the blue Prairie Point fabric and the striped print underneath it were also used for the corner squares and borders on it too.


And speaking of QOVs, now that my RWB Summer is done, it's time to focus on the other things I was supposed to be working on this summer --- namely, getting them quilted!  Well, I have that and another small (not RWB) desk mat to finish for a gift.  I admit I also have a new project that I want to embark on this weekend.  Thank goodness it's a long weekend!!

But before all of that, I'm heading back over to Alycia's to finish checking out what others are working on or celebrating finishing this week.  Link up and show us what you got (that we will want to make too)!!

Friday, August 23, 2019

Three Cheers For the Red, White & Blue! --- Part 5

First off, it's appropo that I get to post this finish this week because Alycia of the Alycia Quilts - Quiltygirl blog is picking up the reins for "Finished Or Not Fridays" today from Myra over at Busy Hands Quilts!


If you have not visited Alycia's blog before, I encourage you to do so --- especially if you are interested in Quilts of Valor.

Alycia is a longarm quilter who also serves as the Colorado Coordinator for the QOV foundation.  On her blog you will see so many great QOV quilts.  Heartwarming pictures (taken by Alycia who is also a photographer!) of the ceremonies when the quilts are awarded are always in her blogging queue.  You are also just in time to start picking up the instructions for Alycia's latest QOV mystery quilt series called "The Lone Rider"!  The fabric requirements are posted here and the first clue will be posted on her blog on September 4th.  Thanks to Alycia for picking up the link-up mantel for all of us!!

As for me:  Woo hoo!  My "Star Spangled Runner" is finally finished!!

s


Backing and Label Area

This is the "Star Spangled Banner", a free pattern from American Patchwork and Quilting magazine.  I made it with four blocks instead of the five used in the pattern because that was all I needed to fit our diningroom sideboard (really an old dresser).  The logs were cut with the Accuquilt Go! Log Cabin die.  As I like to do, the backing has an area pieced into it for me to write in the label information.  The stars appliqued on the front and on the label area were also die cut with fusible web attached using an Accuquilt die.

I should have been finished with this one a couple of weeks ago but it was held up by the quilting --- or more correctly, the decisions that went into choosing how to quilt this.  In my previous post about this I had previewed some quilting designs and was set to look through a few more books for ideas.  That led me to scrap all of my previous ideas and come up with a new one.  The log cabin blocks are so linear and I really wanted to "quilt against type" and try to either incorporate or just use designs with curves.  My finished stitch plan for the blocks and borders ended up to be this:


Up to now I had been sketching on the preview paper with a dry erase marker I keep in the kitchen with a board I use to make grocery lists.  The great thing about the Back-To-School period is that everyone has great sales on office/school supplies.  I was able to pick up some new dry erase markers at Dollar Tree that can now be dedicated for use with my preview paper and be kept stored with it.  Sweet!

With the stitching plan done, it was time to layer it.  The batting choice was simple:  about this time last year, Jinny Beyer had a sale on Quilter's Dream Select batting, precut 18" wide and on sold by the yard.  This is one of my favorite battings and my preferred loft (although she also carries it in the thinner Request loft).  At the time, I was comtemplating making a bunch of runners for the sideboard and since they need to finish 17" wide, this was a perfect fit for my plans!


So with batting already in house, it was a quick layering especially since as a smaller quilt, I could spray baste it.  Next up was to decide on which threads to stitch it with.  I started with stablilizing and additional rounds of decorative stitching in gold around the stars, ditch stitching with red around the borders and with blue between the blocks.  All of that was done with white in the bobbin.  However, when it came time to decide on what to use across the top, I was stumped.  I generally don't like to change thread color if I can help it, especially if I'm quilting a continuous design.  With every color I looked at, I felt that the contrasting thread along with the contrasting curved stitch design would overshadow the log cabins too much.  It took way longer than it should have to remember that I had another option: (invisible) monofilament thread!


I keep a supply of monofilament thread primarily for use to attach bindings but I have used it for the general quilting in cases like this where you need to stitch over a lot of different colors.  There was a time when experts like Harriet Hargrave and Diane Gaudynski promoted the use of monofilament as your primary quilting thread (although now,  Diane primarily uses silk thread).  I had purchased cones of  Superior's Monopoly in both clear and smoke a while back during a sale because I heard it was a great "low sheen" brand of monofilament.  I have another project that I had been considering using it for so was glad to get a chance to try it out on this extensively.  Nova the Nouvelle, which is a fairly new-to-me machine, stitched really smooth this round and had no trouble with the monofilament thread.  I'm pleased with her performance!

Close-up on the quilting


Edited To Add:


Close-up on how I stitched the Stars

Once the quilting was done, I already had the binding picked out -- the same red print used on the short side borders.  This was also another chance to put a new quilty gadget to use!


I had purchased this little ditty a couple of months ago when Green Fairy Quilts had it on sale.  After I press my bindings, I usually would wind them around empty toilet paper rolls.  I could then hang them on the lever that raises the seat on my quilt chair and feed the binding from there to the quilt while I applied it.  The challenge was to not pull the binding too fast otherwise the roll would slide off the lever.


This handy gadget helps wind it up when I make the binding and then can be attached to my sewing table and feeds it way more smoothly than the chair system did as I apply it to the quilt.  I also bought couple of extra winding rolls in the event I want to make up a few bindings in advance.

Glad to have cleared this project bottleneck and now can get the quilt traffic flowing smoothly again!  So with this one done, I want to get going on the other RWB Table Mat I have fabrics picked out for and a gift quilt that's already in progress and that I promised to finish by month's end next week.  I hope I can keep things moving!

Head over to Alycia's to see what else everyone has brought to the finish line this week as August soon comes to a close!  Even better, post your finished or not-nearly-finished-project and let us see what's occupying your quilt studio right now!

8/24/19 Edited to Add:  Also linking up with Amy Ellis through email for her "One Thing Challenge" Follow-up.  I had started using her weekly prompts to help keep me on track when making my most recent QOV top.  When that was finished this project was reported on (almost a month ago to the day) when I had finished this runner's top.  So now I can check in and say that it's competely done and in the can!

Saturday, July 27, 2019

Three Cheers For the Red, White & Blue! --- Part 4

I had noted in a previous post that I purchased a used straight stitch machine.  I wanted it primarily for quilting my quilts and need to get comfortable using it.  I've made one mug rug with it and pieced the last QOV top with it but want a chance to quilt another project a little bigger than a mug rug before moving onto working on some of the layered or flimsie lap quilt projects I have outstanding.  So what better step up from a mug rug than a table runner!

I have a sideboard in my dining room (really an old dresser) that right now is still sporting a Christmas runner (gasp!).  I had planned to make a Spring runner for it but got way laid so why not a summer runner to honor Memorial Day and July 4 --- even if they have already passed!  Ok, so it'll be ready for Labor Day.  The good news was that the fabrics came from what still remains from the stash collected for the QOV top.  As of now the top and backing for the runner are finished:


It's the "Star Spangled Banner" (free) pattern from American Patchwork and Quilting (and not to be confused with the "Star Spangled" runner I made for our terrace table back in 2013 -- has it been that long?!?).  This was another Accuquilt Go! project for me since I was able to cut the block strips with their Log Cabin die.


Accuquilt has enough of a variety of dies that it's possible to cut just about any project out with one.  While I often examine a potential project to see if I can use the die cutter to make most of the cuts for it, there are times when hauling out the cutter and dies for a project isn't worth the effort.  However, for log cabin block strips it is so worth it!  I cut all of the blue strips with the die from the leftovers from the recent QOV project.  I also cut some of the light strips from that stash too but was also able to use a few light strips already in my Log Cabin Strip Storage Box.


This was an idea I got from Mary Johnson over at Making Scrap Quilts From Stash (and unfortunately, I can't link to the exact post --- she changed her blogging platform in 2018 and the 2016 post I got the tip from is not on her current site).  Ingenious, huh?!?   Mary makes a lot of charity quilts for Heartstrings and always has a ton of projects in the works so obviously knows a lot about keeping things organized.

APQ's original runner design featured white wool stars appliqued on but I did mine in a gold cotton print.  For some reason, whenever I am looking at QOV designs, I always want to add either a touch of gold or gold stars to the design.  And while this project isn't for a QOV, I'm still in that mode right now so that's where my mind went.  The stars were also cut with the GO! with fusible attached although I still have to fuse them down to be stitched in place.  The central panel in the backing will be the label area and written on when the runner is finished.  I've always said that the easiest way for me to ensure that a quilt gets labeled is to make sure the label (or a space for it) gets put into the backing. If I have to add it later, it might never get done!

So next step is to get this quilted!   To that end, the shininess you see on the top is the plastic preview paper I have over it as I audition stitch designs:


I have a few more books to look at for ideas specifically related to log cabin blocks/quilts before I choose the final design.

It should also be noted that I'm also collecting the parts for another table mat:


This is another APQ free pattern.  I'm making it smaller than patterned to go on a table in our living room.  Can't use up too many of these RWB scraps though, have to save some for future QOV projects!

Linking up on Pat's Sloan's latest UFO check in.  Go see what everyone else is working on too!

Sunday, November 11, 2018

More Decorating For the Season

I'm embarrassed to say that the dining room decorations haven't budged since last Christmas!  This is what's been on the sideboard (really my husband's childhood dresser) all year:


Since we'll be hosting Thanksgiving this year, it's definitely time to change that out -- even if I'll be putting it back next month!  I'll swap it out for the only other runner I've made for this space so far:  the one I call Autumn Leaf Dance:


This is Gerdrun Erla's Abundance pattern (also available from her as a PDF).  Mine was made from a batik kit from Connecting Threads.  Along with that change I needed to make a non-quilty one.  I have this narrow bookcase that was my mother's (and made for her by her sister-in-law's husband) that holds my collection of some of her crystal and Lladro statuetttes:


I fill the vase with bouquet's of fake flowers cued to the season.  So it was time to change out the bouquet from the holiday one.....


......to the autumn one.  Presto chango!  I also have a Spring/Summer combo bouquet which obviously didn't get put in place at all this year.  The flowers for these bouquets are gathered from the Dollar Store and I store them bundled together so I can just pop them in the vase when the time comes.

I've always liked the idea of making more runners.  The Christmas runner came from this book:


I do have a few more books with ideas galore.  Back in the Spring, Jinny Beyer had a sale on Quilter's Dream batting (both Select and Request lofts) in the 18" width just made for making runners.  She has it on sale again here, now until Tuesday.  I bought a few yards since I hate to cut up a good twin batt to supply a piece for a runner.  The top of our "sideboard" is 17 inches wide x 50 inches long so a craft batt would have to be pieced together to make an appropriate sized filling.

Are you making any new runners for the Fall/Holiday season?  If you have any favorite designs, please share!

Tuesday, September 5, 2017

It took until the holiday weekend to get back on track...

With September now firmly in place, it's time to get my bearings.  In my last post in early August, I was all fired up and ready to get down to the nitty gritty of quilting my latest two projects and then.....NOTHING!  I had stitching plans for both but then got overwhelmed when it was time to actually sit down and stitch.  For the "Abundance" table runner (quilt design by Gudrun Erla from a Connecting Threads kit), the plan was to fuse down the leaves and since the body of the runner was already quilted (done quilt-as-you-go),  it was going to be a simple matter of choosing a thread to zig-zag around the leaves, then bind and finish it.


The problem was that after I got all the leaves fused on, I was really struck by the beauty of the design and suddenly the plans for a simple zig-zag edging didn't seem like enough.  I began to question the original plan of choosing just one color thread for them all and once I started considering doing thread changes, I began to see the possibilities for quilting more detail like veins in the leaves and maybe even doing some wood grain stitching on the "tree trunks".  However, going for more detail also meant committing to more time working on what was supposed to be a "quick-and-finished-this-week" project.  Needless to say I wound up going back and forth on this to the point that I didn't sew at all.

This puts me in a new and interesting phase in my quilting: early on I was determined to machine stitch my quilts but terrified to actually quilt them (aka "mess them up") so would often take weeks (months, years) to get up the courage to tackle them.  Now I'm more confident in my ability to stitch them but get bogged down on achieving "just the right balance" of quilting detail.  I love the end look of custom quilting but am aware of how much time (and sometimes extensive thread changes) it takes to execute.  Since my projects generally don't start out with the intention of being "show quilts", I usually want to try to default as much as possible to the use of one thread and simple continuous stitch designs.  However, once you get that "big" quilting idea in your mind's eye, it's hard to settle for less.

So I thought that instead I'd move on to quilting the other lap quilt I had also been working on but that didn't happen either.  I got bogged down again trying to decide how I wanted to quilt that quilt too!  By then two weeks had passed and every day I'd say, "I should quilt" and every day I didn't.  Instead I tried reviewing my stitch pattern books and then all the Craftsy classes I've signed up for over the years and waited (hoped?) for inspiration to strike.

Also during this time, my old iron started "peeing" every time I used it but fortunately on my last trip to the warehouse club they had an iron on sale for $20 so I got it.  Well a new iron also highlighted how bad my ironing board cover looked....

Picture from last year

....so I kept busy by making a new one: 


How lucky is it that I had purchased this blue Alexander Henry print on sale probably two years ago, and it just happens to be the perfect coordinate for my new iron! 

I also busied myself with die cutting additional applique motifs out of the scraps of all the batik bits that already had fusible attached.  Hopefully these can become or add to something one day.


Fortunately, I finally got some really good news when Craftsy sent out an email two weeks ago offering free views of one lesson from each of two of their classes:  Christa Watson's "Quilter's Path: Plan It, Stitch It" and  Helen Godden's "Escape the Ditch:  Empower Your Quilting".  Both pointed to motifs that helped me get over myself and finally jumpstart the quilting of both of the stalled projects!  For this one, Christa reminded me again about the idea of doing a "wood grain" motif which sent me back to viewing how Angela Walters did it in her "Machine Quilting Negative Space" class and that gave me the push to go back to the runner. 

So during the last two weeks of August, over the course of five (not continuous) days I pushed through to get the stitching done.  I detailed stitched the "tree trunks" and then the leaves in batches corresponding to the (bunch of) necessary thread changes.


I was using a medium dark brown bobbin thread which coordinated with the back.  It worked fine through the first two rounds but then one day it seemed like I just couldn't get the tension right -- there were a lot of "pokies" and thread breakage.  I had to walk away from the stitching for a day or two and when I regrouped I found that raising the feed dogs back up while lowering the stitch length to zero seemed to solve the problem and it was another two (again, not continuous) days to finish up the leaves.

I thought I was done and ready to move on to binding but then it still didn't seem quilted "enough".  So I decided to stitch in the background as well, completing that on Sunday and then bound it on Monday.


Before doing the background stitching I had another brainstorm to take some of the extra leaves I had cut and fuse them onto the back to use to write in my label information.  For those I used the colored threads on the back but a neutral thread on the front which created "shadow" leaves in the center front.


9/7/17 Edited To Add:  I was finally able to get a good shot of the "shadow" leaves on the front.


In the end, I'm happy to finally get the runner I now call "Autumn Leaf Dance" done.  It's not bad and while I like the background stitch motif, in hindsight I feel it's now quilted too densely.  So "Note To Self":  always sketch out your potential stitch designs!!  If I were to do it again, I'd use the same motif but execute it on a larger more open scale.  However, finished is better than perfect and every project is a practice for the next.  Moving on!