Showing posts with label 2025 Finishes. Show all posts

Sunday, August 10, 2025

Slow Sunday Stitching: A May-nia Project Fully Finished!

Good morning on a sunny Sunday for a quick "Slow Sunday Stitching" check-in with the good crafty folks over at Kathy's Quilts!

Last night I finally "fully finished" my "Craft Supplies and Other Lies" piece!

I had started stitching this for "May-nia", continued it during "Red, White and June" and completed the tail end of it along with resuming work on another piece for "Christmas In July".   After that I found a frame that I liked and decided to go the route of mounting it on it rather than putting it in it.  

I debated a long time about how exactly to go about that.  In the end, I mounted the piece on some foamcore and batting and laced it in place.  It needed a little something around the edge so I made some cording from the flosses it is stitched with using the Clover tool purchased awhile back.  

Then I nailed it to the wooden patterned surround in the frame using brads.  The hope was that the nail heads would disappear between the fabric threads which went fine for all but one corner that took some tugging to cover.  I  know it's a little skewed on the surround but I think I can live with that --- well, I'll see if I still feel that way after a few days (or weeks) of looking at it displayed, LOL.   

So with that done, I am now ready to get back to some stitching!  I haven't stitched on anything since finishing the "CIJ" piece.  Now to fill my evenings,  I am going back to another "May-nia" start:  New York Skyline by XstitchByTA.


This is how far I've gotten on the next page of the pattern (it is a total of five pages).  I expect this to fill my days through the Fall and probably right through the start of the actual Christmas season --- not the shopping season which will probably begin in earnest in the next week or so, LOL!!

To see what other crafters have filled their stitchy days with (or to add yours!), head over to Kathy's Quilts for this week week's "Slow Sunday Stitching" link up to see what others are whipping up in their craft spaces! 

Friday, August 1, 2025

Finished Or Not Friday: Another Pop-Up Bucket!

 Hello August!  Just here to report a quickie along with everyone at Quilty Girl Alycia's for this week's "Finished Or Not Friday"!

Last year I made one of of the Fat Quarter Gypsy - Sew Organized Design "Stacking Pop-up" buckets to use as a sewing station garbage can when I visit my MIL for a mini quilting retreat.  That one was coordinated to go with the bag and supplies I use if I take my Juki sewing machine with me.  

The outside fabric is actually a recycled sheet!

The Juki travel set-up.

At that time I also had planned to make another one for my Featherweight's travel sewing kit.  As I said on the last post about my "Catch-All Cuties" sewing tools totes,  I like to have a separate set of tools for each of my sewing set-ups.  I purchased fabrics to go with the black, red and white color scheme of all things Featherweight.

I had purchased the red lining fabric for it when I Shop Hopped with my MIL back in October.  I wound up ordering the black and white exterior fabric when I got back home.  That happened because I decided that the fabric I had purchased for that on the Shop Hop would go better with a panel I already had in stash to make a future holiday quilt.

However, before I could get that one made up, I actually made another one!  On the July 4th holiday weekend, my husband and I went on a camping trip to Letchworth State Park.  Since this was a short trip, we used our small camp set-up:

On our last trip with this same kit over the Memorial Day weekend, one thing we realized was that we needed a small garbage can for our tent.  We've tied plastic bags to the little table we use inside the tent but really wanted something a little more structured.   Fortunately, when Joann's had gone out of business this year I had picked up some fabrics because I loved the bright colors of one and the camping theme of both:

At the time, I had thought I might use them to make a new roll up kitchen utensil storage pouch for my DH.  When I saw we needed the can and since I had made one of these Pop-ups before, I decided I'd use some of it for that instead!  For the sewing station cans, I had used a "Large" pop-up, this time around  I made a smaller "Medium" sized one:


And hard at work in our tent!

These Pop-ups also come in an even larger "Extra-Large" size as well as a "Small" and "Mini" size. They are easier to make than they look and full instructions for all the sizes are in the  "Stacking Pop-up" pattern which is sold seperately from the wire frames.

You only have to cut out six pieces to make it:  one side piece out of each fabric used for the outside and inside, interfacing (the same size) for both of those and circles for the bottom out of both the outside and inside fabrics (a template for that is provided with the wire frames).  

If you are going to secure the folded up Pop-up with ties, you cut two additional fabric strips to make those but you can also use a strip of elastic for that.  Note that I used a twill tape printed like a ruler for my first large one and I recycled an elastic headband from a broken headlamp for my camping version.  

With the camping one done, I figured I'd end a busy July finally making up the second Large one for the Featherweight kit.

All finished, open and closed!

This completes my set of DIY travel accessories for my Featherweight!

If you want to make things like this for your Featherweight, check out the making of my tote bag, foot controller drawstring bag and extension bed cover here (all using Jeni Baker's Sew Portable Travel Set design) and the Catch-All Cutie I made for this set here.

Want to know what else everyone is making to start off this new month?  Well then head on over to Quilty Girl Alycia's for some "Finished Or Not Friday" reports!  

Sunday, July 27, 2025

Slow Sunday Stitching: The End of "Christmas In July"

With July drawing to a close,  I managed to finish the "Christmas in July" cross stitching for this month just in time.  So I am joining in over at Kathy's Quilts for a little "Slow Sunday Stitching" show and tell!

First off a stitching finish:  the Fat Quarter Shop's "Letters To Santa" pattern is done!

Stitching on Aida and then being able to go back to "mongamous stitching" this past week helped get this done.  At this point, I don't know how I want to "fully finish" it.  I might take cues from how FQS did theirs:

I'm particularly eyeing the bow on it since I just did a project for a blog hop and made a Patchwork Bow using Liza Taylor's tutorial:

Although it is patterned using 2-1/2" cut squares, she says you could use any size squares.  So I could see using one or half inch finished squares to make another bow to use for finishing the cross stitch piece.  Once I decide where and how I want to display it for the holidays,  I can make more decisions about the "fully finishing" of it.

And speaking of "fully finishes":  My little "Christmas Log Carrier" ornament is now done!

I was supposed to stitch this as part of "CIJ" last year but didn't get to start it until the end of August.  During a few spaced out stitching sessions (probably between other projects), I finished it in October.

The pattern finishing just called for putting some seam sealant on the edges and turning under the handle loops and glueing them in place.  However I wanted to finish it just a little more so first cut some fusible interfacing to secure the back of the stitching:

Next I cut some coordinating holiday fabric so I could line it.  I really liked this fabric but it was directional so I seamed two pieces together so that I could make a lining piece where the print would run vertically on both sides.  

I stitched them together along what had been the cutting lines, leaving the handle ends open and an opening on one side so I could turn all the edges in and so no sealant was needed!  I edge stitched the opening closed and all around the edge and stitched the "handles" down to form loops.  

Last step was to find some wooden dowels for the handles.  I didn't have a dowel the size I needed on hand but did have something that worked perfectly in its place:

It pays to hold on to some of these chopsticks after all!  I cut a chopstick down into two pieces the size I needed.  Then it was finding some ribbon in my stash and Cinnamon sticks from the pantry and this little ornament is now done!

I look forward to seeing what everyone has for this last "Slow Sunday Stitching" for July over at Kathy's Quilts!   

Friday, July 25, 2025

Christmas In July Blog Hop!

Welcome to the "Christmas in July Blog Hop" hosted by Melva of Melva Loves Scraps!

I am excited to join in to share some ideas about holiday crafting!  I always enjoy this kind of event that prompts quilters (and cross stitchers!) to focus on a specific category of projects to encourage getting some work done on them.  

Like many quilters, I often have trouble getting all of my holiday projects done in time -- usually because I don't start thinking about working on them until November or December, LOL!  I did "Christmas in July" for the first time last year and worked on two projects with mixed results.  

The words I chose for my MODA "Letters To Santa" quilt top.

My color scheme for last year was Red, Green, White/Light, Black and Gold.  I say the results were mixed because while I did get this top started,  I didn't complete it until December.  This year, it is still waiting to be quilted which is what I thought I'd be working on this time around.  However, a July 4th weekend camping trip and my husband being on vacation these last two weeks has definitely gotten in the way of that plan!

The other project I started for "CIJ" last year was this one:


That WIP is a "Scrap Squares" quilt using 2-1/2" squares that I cut from the "LTS" leftovers and from my Christmas stash as I auditioned fabrics for that top.  The plan was to use the squares to surround some holiday-themed panel blocks to make a lap quilt.  The project was influenced by the "Scrap Squares" quilts that I've seen quilt designer Pat Sloan make so many times.

Pat calls it "making a bonus quilt while making other things".

At this point, I still need to work on the layout of it and piece it together.  However, while working on that project I happened to come across this:


It is a tutorial for making a "Patchwork Bow" by pattern and fabric designer Liza Taylor of  Liza Taylor Handmade for her "Summer Sewing Series".  As long as I've been a quilter, I've always looked out for ways I can use my scraps rather than just collect them.  When I saw this, I figured that it would be another great holiday project for the squares I was already cutting.

So this Hop is a good excuse to try making that project now!  Liza's instructions call for sewing rows of three squares together and then sewing the rows together to create a "pieced fabric" strip that will serve as the "ribbon" for making the bow.  Fortunately, I had already started piecing together pairs of squares last year in preparation for adding them to the layout of the other quilt so I had a head start on doing this now. 


Liza had used "pieced fabric" on both sides of her "ribbon".  However after I had decided to make this design, I saw a great holiday print on sale at the Fat Quarter Shop and decided to purchase it and would use it as the backing for the "pieced fabric" front.

If you like it,  I see it's still available now.

The benefit of doing that meant I only needed half of the amount of squares that Liza calls for!

After I got all of my squares pieced together,  I cut two 6-1/2" wide x WOF backing strips, seamed them together and trimmed the backing to the length of the "pieced fabric".  I then completed the "ribbon" following Liza's simple instructions that include how to mark it to create the pointed ends.  

Of course, now I also needed to make sure that I remembered how to tie a nice decorative bow.  I found this video tutorial helpful for doing that:


It was pretty simple to do and here is the finished project!!


These bows would be great to display with a matching quilt or at the base (or even top) of a Christmas tree.  It could also be hung on a front door or in a window but you'd have to be careful to check if the fabric might fade from exposure to sunlight. 
  
Now if I can get this top quilted, I'd be gravy!

If this is your first time doing "Christmas in July" or want even more tips for how to approach doing it, check out Kris O’Neill's "Christmas in July 2025" video series on her YouTube channel "Sew the Distance".  


Kris is making a video daily for the month of July with tips on how to choose, thrift and organize your holiday stash and projects.  She also has offered a few projects to make with your stash.  But don't wait too long to watch it:  Kris says this series is a "Summer Special" and she'll remove the playlist from her channel at the end of August.

And of course there is even more to see from the other participants in this Hop!  Be sure to check out all of their posts too!

"Christmas In July Blog Hop" Schedule:

July 24

Melva at Melva Loves Scraps -- Our hostess!!

Diann at Little Penguin Quilts

Carol Andrews at Quilt Schmilt

 July 25

Melva at Melva Loves Scraps -- Our hostess shares another day of inspiration!!

Vivian at Bronx Quilter  --- You're Here Now!

Gail at Quilting Gail

Linda at Texas Quilt Gal

There is still a few more days before July ends so I hope you have been inspired to pull out a project and get your holiday season started early!

Sunday, June 8, 2025

Slow Sunday Stitching: Red, White & June Week 1

Well, one week into "Red, White & June" and there's been a lot of activity going on!  Linking up for "Slow Sunday Stitching" at Kathy's Quilts with a report on what happened this week.

One FFO Down!

With two projects needing to be "fully finished" as part of the stitch work this month, I was hoping to get an early start on either my "United We Stand" or "Patriotic Parade" pieces.  "Parade" won the draw!

It turned out to be the easier of the two to finish.  Despite the fact that it came in a kit with finishing supplies for a little pillow...

...when I had pulled it out last week, I realized that framing it might be a better way to go instead.  For the patriotic season (from Memorial Day to Labor Day)  I have these two quilts up on display right now:

They hang together today just like they did last year.

When I hung them last year, I realized I wanted a little something extra to go under the Lone Star wallhanging.  I had purchased a seasonal sign from Dollar Tree which was okay but that I didn't love.  When I pulled out "Patriotic Parade" this year, I realized that framing it might give me just what I needed to fill that space.  So the plan was hatched to go to a local home decorating store to see if there were any frames of interest.  If I didn't find anything there, I would check at Dollar Tree and see if they might have some decorative boards or canvas I could use to double mount the piece.   Well, I did find many frames at the decorating store that I liked and one in particular hit the mark for me (and unfortunately I forgot to take a picture of it before altering it).

I liked the overall color of the frame but wanted to add little RWB touch to it.  My thought while in the store was that I could paint the small strip of space between the center and the outer frame edge in Red.  Then I could use the Blue ribbon in the finishing kit to add a ruffled edge around the stitched piece that would line the inner edge of the frame.

However, when I got the frame home and tried inserting the piece into it, things took a slightly different turn.  In trying to test out how the piece would need to be centered in the frame,  I was able to just about squeeze it with all the excess fabric left around the stitching into the frame and get the back on --- tight!   It took a bit to get it all in (with no lacing!) and then was in so tight that I really didn't want to take it back out!!  

Okay, so I moved forward with painting the thin space with Red and also decided to rub on (and off) a little bit of white piant to both brighten and further distress the outer edge.  But now how to add some Blue?  I decided to tape off the edges and over the piece and then carefully paint around the inner edge of the center of the frame.  The effect of the Blue is subtle but it's there.  

Lastly the finishing kit had also come with a cute RWB star button which I hadn't remembered until after the piece was already in the frame.  Luckily I was still able to get it sewn on even with the piece still firmly wedged into the frame.  So now it's all done and up and I'm happy with it!  

So for next week I'll try to work on the finish of  "United We Stand".

Progress on Resumed Projects

I had said that I hoped that the stitching I had done on Linen and Evenweave projects during "May-nia" last month would help when I resumed stitching on the two RWB projects I had previously started in 2023.   Results were mixed on that front.  I moved both pieces a little bit forward but it still felt awkward to get back in the swing of working on them.  In both cases I managed to get another letter of each stitched.

I got the "R" added to "Home of the Free"....

,,, and the "O" is in on "The Right to Vote"

In the case of "Vote",  I'm finding this linen harder to work on mostly because it is a softer and looser weave than the Linen in the "Craft Lies" piece I worked on last month.  One thing I find when stitching on certain Evenweave and Linens is that I prefer to hoop those in order to pull the fabric taunt to make the weave easier to see.  This is in complete contrast to when I work with Aida -- with that I can stitch "in hand" comfortably because most of those fabrics are very stiff and the holes are clearly visible.

I'm hoping that as I continue to work on these,  I'll get more comfortable and the stitching will go a little smoother going forward.   

Continued Work on the "May-nia" Pojects   

Speaking of those "May-nia" projects,  I just couldn't give up working on them so continued to stitch on them for this month as well.  Here's the progress made on those:  

"Craft Lies" is now this far!

The "New York Skyline" is a little further along too!


I'm normally more of a monogamous stitcher so it may be a challenge to continue at this pace and keep all these cross stitch balls in the air!  

I hope you'll go back to Kathy's Quilts and see what other crafters had been whipping up during their "Slow Sunday Stitching" sessions this week!

Monday, June 2, 2025

Slow Sunday Stitching: The End of May-nia, the Start of Red, White & June Stitching

Well Hello to June!  And hello to all visiting from another week of hand stitched wonder over at Kathy's Quilts for Slow Sunday Stitching!

With the start of this new month,  I have come to the end of my cross stitch "May-nia" period.  As usual not as much got done as hoped but I had a lot of fun stitching and have become more comfortable working with fabrics like Evenweave and Linen during this round.  That will be a big help with projects going forward.  

Progress:  One Fully Finished!

The good news is I got one project "fully finished"!

This is "Year of the Snake" by The Frosted Pumpkin Stitchery and I can now call it D-O-N-E!  And better than last year's  "Year of the Dragon" I can actually get to enjoy it while there is still half of the year left!  This is the third in this series that I have done, the first was 2023's "Year of the Rabbit".  

I had planned the finish for this to look like a gift but ran short of the scraps I had of the fabric I liked for the bands around the sides.  I wound up having to piece a square of another fabric into the center on the back to make the scraps stretch and then used a bias strip of that same fabric for the "bow".   

Dare I plan to do another for 2026?  If so, I'll go back to doing it as a "New Year's Stitch" and try to finish it earlier in the year .

A Little Bit Backwards To Go Forward

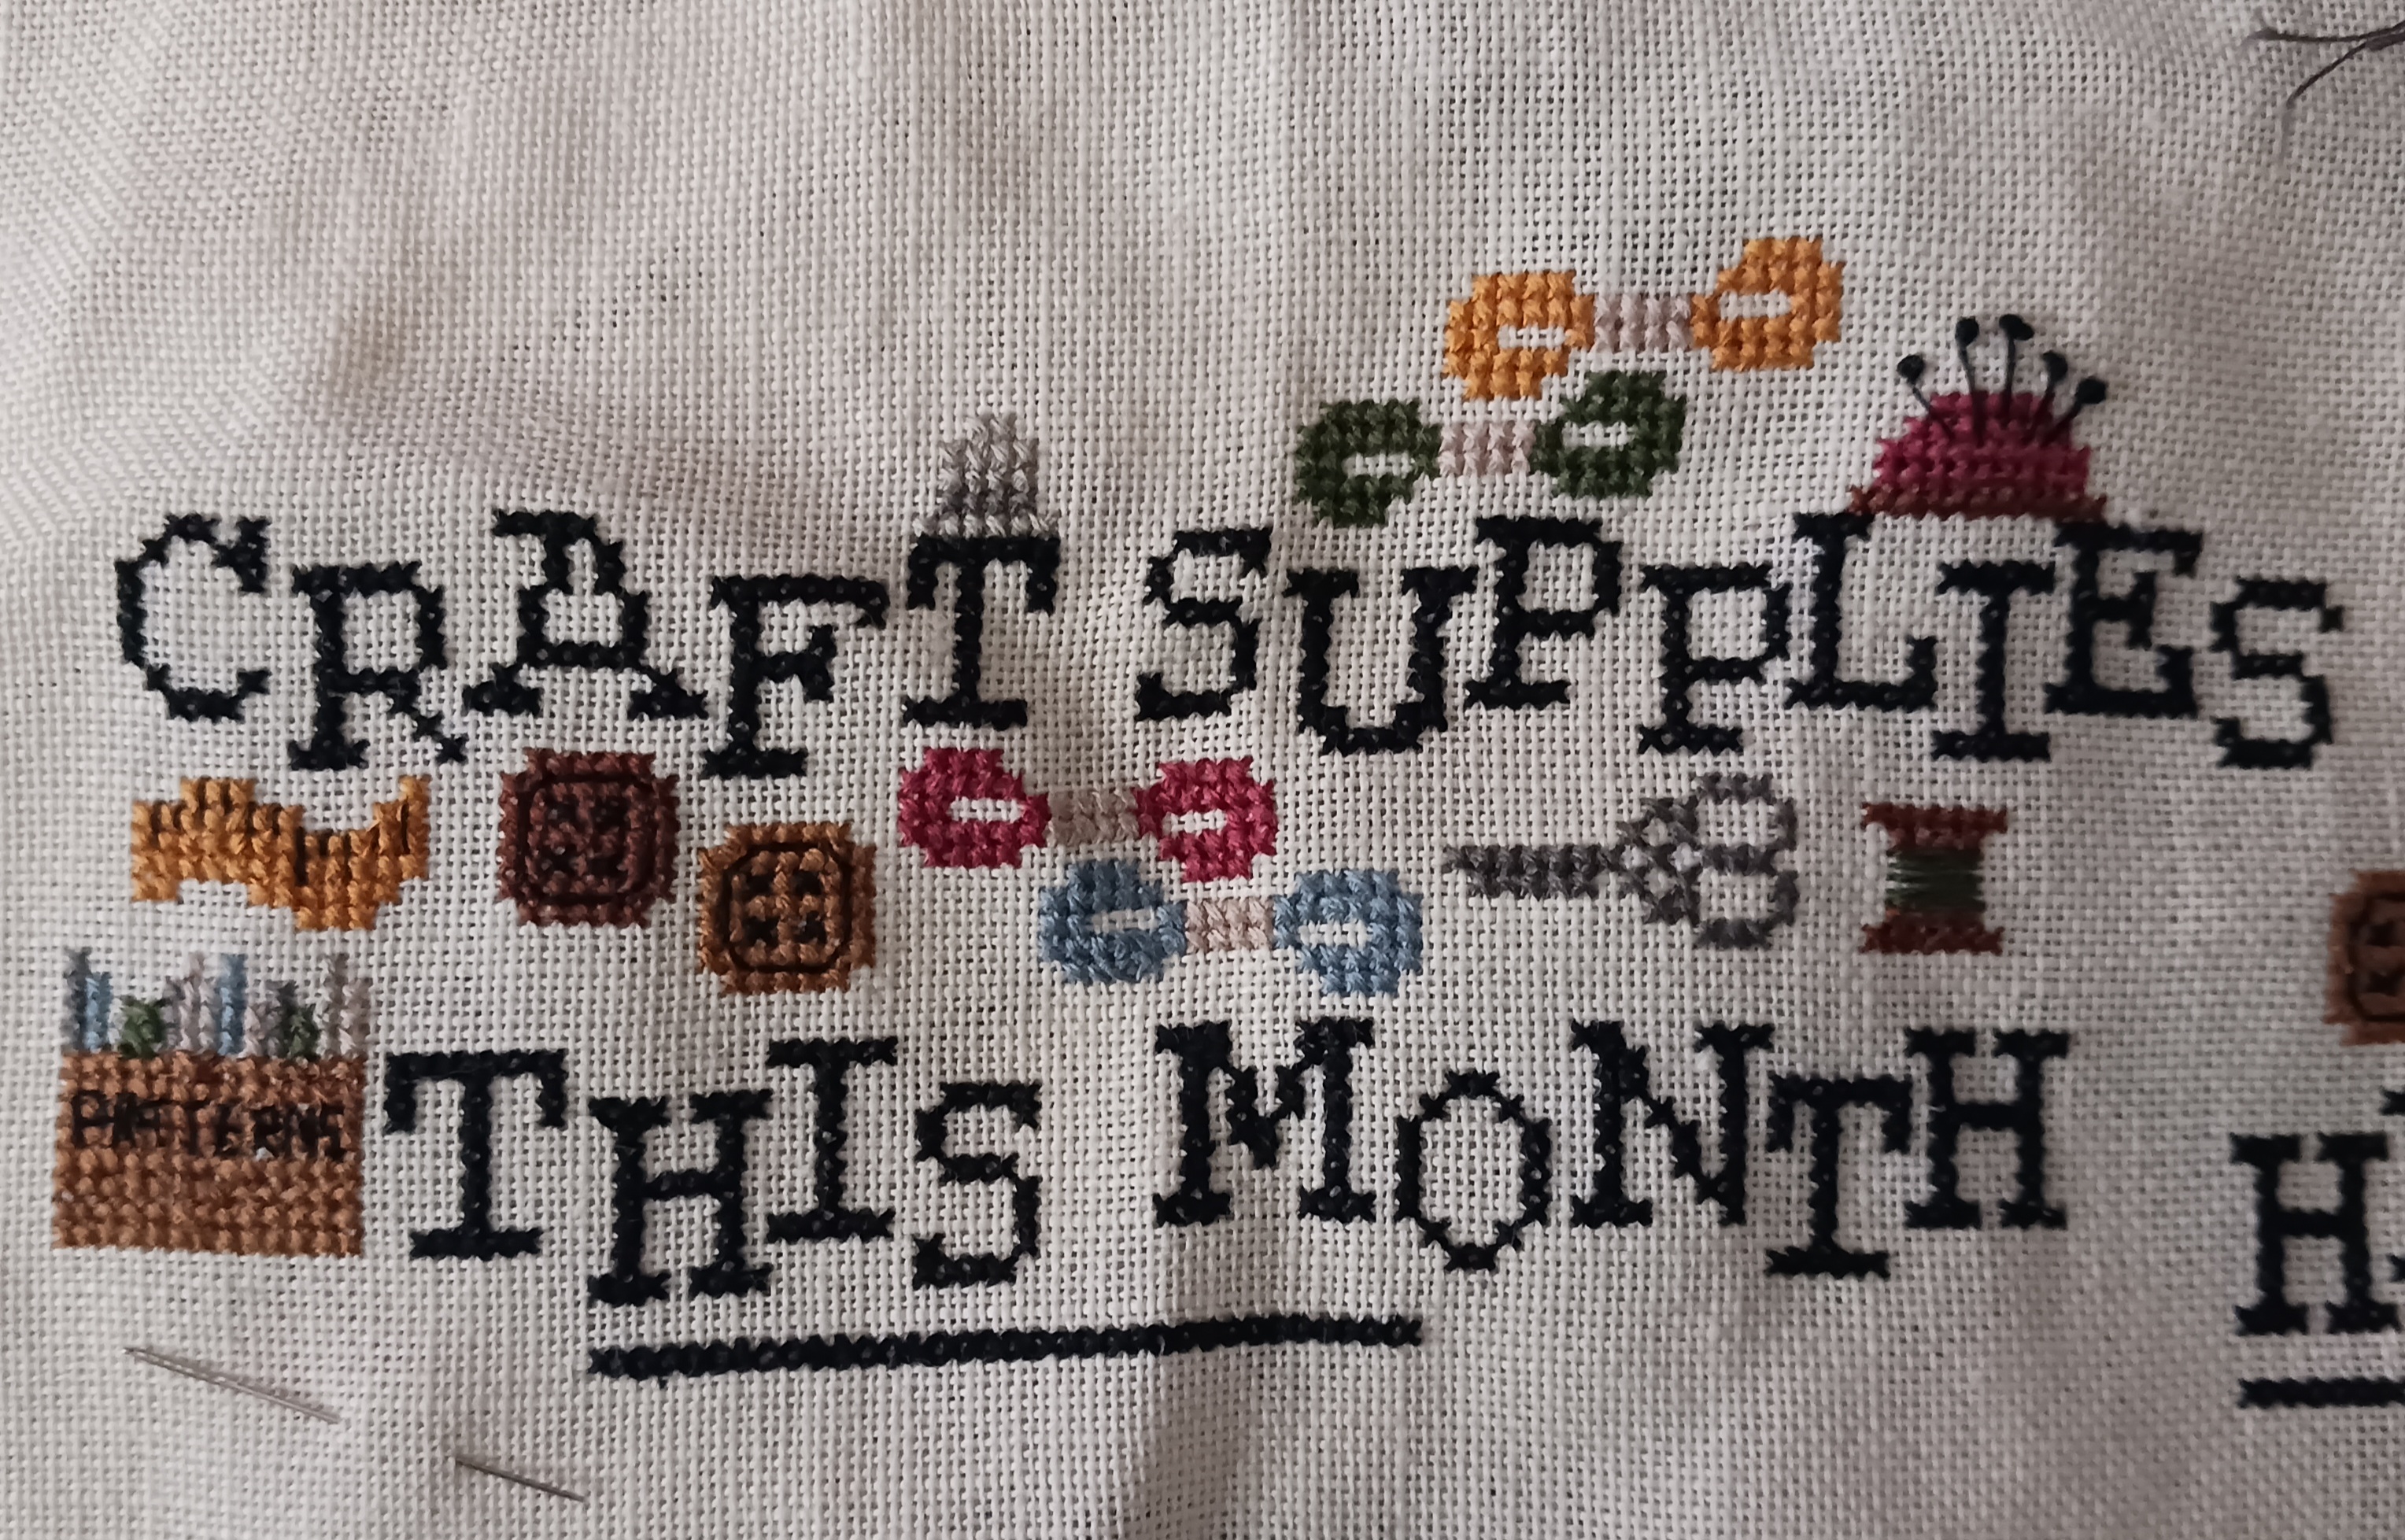
It took a restart to get my "Craft Supplies and Other Lies I Tell Myself" May-nia project going!  On the plus side, I have really enjoyed stitching this one more than expected given that it is stitched on Linen and I stitch more often on Aida.  

Since I've had a bunch of stuff sitting in my stitching chair that has the really bright lamp next to it,  the Linen has often been best worked on in bright daylight if I'm sitting on the couch and only able to use my lighted magnifier.  As such, early morning sessions of a half hour to an hour have been frequent during the past month.  

That said, I totally bungled this at first!  I got a whole section done only to realize I hadn't started at the center or at least far enough in to get to the edge of the piece with space to spare for additional motifs and framing allowance.

For some reason I started it here and then realized I was waaay too close to the edge....

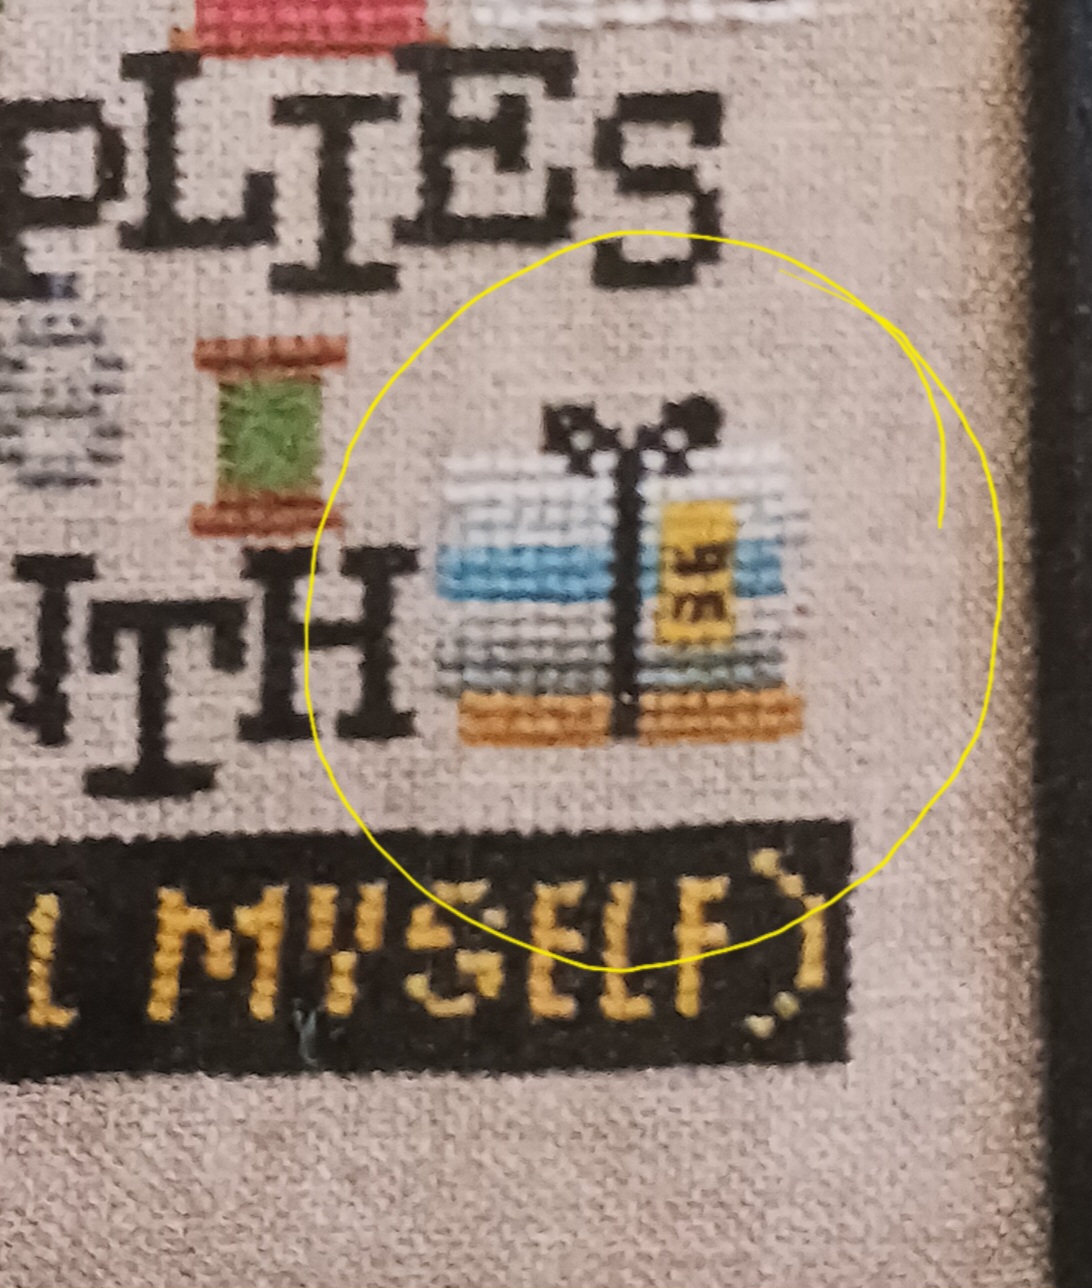
...to have room for this next motif!

So I had to restart it.  By now though I was more comfortable with the stitching and got further faster on the second round.

Although I'm not ripping the initial stitching until I absolutely have to, LOL!!!

A Start on a Project, Just Not as Much as I Thought

"New York Skyline" was another long desired start for last month.

The pattern image.....

...and this is as far as I got.

I thought this one would go fast since I don't have to change thread colors.  However,  a lot of counting and direction changes added to continuing to get experience working on an Evenweave fabric meant it went slower than expected.   I am pleased with the progress and love seeing the design unfold so I'll probably keep stitching on this one in dribs and drabs until it's done.

Bonus stitching this month!

We went camping over the Memorial Day weekend with my husband's co-workers again.  My cross stitch project for the last few camping trips has been "Open Your Heart" so I took it with me again.  Before the trip I was here:

At this point I had three more pages of this pattern to stitch to complete the top half of the design.  Between the drive there and back, some stitching around the campfire when the weather held and in the tent when it was raining (which it did on and off unfortunately), I managed to get halfway through one page.

I still have the top of this page to complete.

The new part added is actually the first page of the pattern.  When I started this project back in 2023,  I had chosen to do so on the fifth page (bottom center).  That was because it had both a lot of "filler stitching" which was good for long car drives to campsites.  It also had the most color changes in the piece which at the time I started this was expected to be the biggest challenge and learning curve for me.  

I'm also happy with the progress made on this.  We have another camping trip booked for the July 4th weekend so I'll have another opportunity to pick this up again before the year is out.

Only One Left Behind

I had planned to work on one more thing during this May-nia period but never got to it:   


Oh well.   Maybe I can pick it up for Sheri's (Colorado Cross Stitcher) "Cross Stitch Summer Camp" this year.  If so, this could be my "August - Try Something New" project which would be adapting a pattern for self framing.

Moving On To June  

Now that it's June, I'll once again be stitching with the Fat Quarter Shop during their "Red, White and June SAL".

As always, they have compiled a section of patterns and supplies perfect for the SAL on their webite.  For my projects,  I'll be returning to the patriotic projects I started for 2023's SAL (I missed out on doing it in 2024):

  • "Fully Finish" Primrose Cottage's "United We Stand":

This will be a simple pillow finish and I have the backing finishing supplies.  What I don't have is Pom-pom trim but I've long wanted to try the special edge finish pictured here for a quilt so this little project maybe the perfect time to test it out.

  • Finish Stitching Primrose Cottage's "Home of the Free"

  • Finish Stitching Mani Di Donna's "Right To Vote"

Admittedly, both of the last two should be helped by the progress made on the May-nia stitching.  Working  on "Lies" which is on Linen  just like "Vote" and "Home" which is on Evenweave like "Skyline" as well as a previous "Fudge It" finish  got me way more comfortable working on both types of fabric.  So I am hoping the work on both of these UFOs will go much faster this time around.  Who knows, maybe there'll be more finishes to show at the end of this month!

Another Bonus Project

I had stitched "Patriotic Parade" in 2024 for the Colorado Cross Stitcher's August challenge.  For me, the "Try Something New" prompt was "try cross stitching with wool thread".  

I finished stitching this one up in October that year but I still need to "fully finish" it.  I had purchased this project as a kit which came with the fabric, floss and finishing supplies.  Since it too is a Patriotic-themed piece, it fits right in with "RW&J" so I'm hoping to work on completing it this month right along with finishing "United We Stand".  Looks like it'll be a another busy crafting month and that's just for the cross stitch portion of it!  

What have you got planned for hand stitching in June?  I'm sure if you need inspiration, checking out all the others that are posting over at Kathy's Slow Sunday Stitching link-up will give you lots of ideas to pursue!