Showing posts with label 2024 Finishes. Show all posts

Monday, December 30, 2024

7 Days of New Year's - Day 5: Finally Back To the Quilting!

After days of focusing on cross stitch, it feels good to finally get back to quilting!  In yesterday's post, I mentioned that at one point my cross stitch work got held up by work on three late Christmas quilting projects.  Two of those weren't finished, one of which was the "Letters To Santa" quilt that despite an early "Christmas in July" start, only got as far as having the borders finally added...

....and the backing made up.

I should also note here that the companion "Letters To Santa" cross stitch while further along than it was in the Summer....

Stitching done from the Summer until now....

...was bumped to work on the piece for my MIL that I talked about finishing in the last post.  I should note that my MIL's gift will be on its way to her the day after New Year's because I now need to bake up a fresh batch of the peanut butter cookies I usually send her.  My husband works for UPS and said if I mailed the ones I had baked last week today, they might wind up sitting and not get delivered until after New Year's anyway.  So I'll make a fresh batch on New Year's Day and in the meantime we don't mind munching on the ones from the batch on hand!

The second project was a new one that I actually made up surprisingly quick after realizing I needed another display quilt in what was supposed to have been this year's Red/Green/Black/Gold color scheme.  That happened because I saw this tutorial in with my Christmas stash.  I found it as I re-organized that stash into a new storage container when I set up to resume work on the "Letters To Santa" top:

Another great storage bin, this one is from Michael's.

It was easily strip pieced using a bunch of busy fabrics pulled from the stash:


The good news is that the backing for this is also already made and the binding cut.  So now it and the "Letters To Santa" quilt sit awaiting quilting in 2025.

So the one thing I did mange to finish in the lead up to Christmas was my Red & Green version of the Temecula Quilt Company's "12 Days of Christmas" mini quilt.  

This design was offered as a quilt along all the way back in 2011 and I had made up tops in three different colorways back in 2020:

In 2022,  I finished the Red & White version (on the right) for holiday decorating that year.  This year since the Red & Green version (on the left) fit my intended color scheme, I layered and quilted it and it went up on display (along with two other older quilts) in time for Christmas as you see in the first picture above.  

To get it done meant I had to quickly decide on a quilting scheme for it.  I had forgotten how simply I had quilted the Red & White one:  for that I had just outlined the blocks, cross-hatched the side borders and stitched straight lines across the top and bottom borders.  

Reviewing that made it easy to decide to quilt this one even simpler:  For it, I outlined the blocks and just straight line stitched around all the borders, following the path of the side border stripes and the lines of words in the top and bottom borders.  

When that got done in far less time than I expected,  I decided to also finish up the last Blue & White one during one of the "7 Days" sessions which was the task for today.  So like for the Red & Green, I spray basted the layering and then planned the quilting.  

For the quilting I again outlined the blocks.  Quilting the sashing was easier than for the Red & Green since like the Red & White version, this one employs sashing squares so it was easy to stitch straight up and down the sides of the sashing columns and then across the sashing rows.  For the borders I went even easier than the prior two:  I just free-motioned all the borders with loops and swirls.  

Done!  The binding had been picked out when the top was made back in 2020.  As I did for the Red & Green, I used Edyta Sitar's "Faux Double Fold" binding method that uses 1-3/4" cut strips.  The binding strips were attached to the front with the corners mitered in the traditional manner, folded to the back (see Edyta's method in her video for that) and then machine stitched in the ditch from the front to secure the folded edge on the back. 

So that's another project completed for the "7 Days" sessions!  When I checked my email today I had received a notice that Kari Shell was running one of her free EQ8 workshops for a Winter mini wall hanging.  I signed up for the evening session for today although there is another session scheduled for tomorrow if you are interested.  So with this quilt done,  I checked that out as the last thing (before posting this) for today!  

Sunday, December 29, 2024

7 Days of New Year's - Day 4: Two Cross stitch Finishes For Some Slow Sunday Stitching!

While I had not expected to spend the first few days of my annual "7 Days" craft-a-thon working on cross stitch, I can now say it has paid off!  Even better, the results happening today means I can join in over at Kathy's Quilts for some "Slow Sunday Stitching" talk!

For the past three days I have been trying to finish up what was supposed to have been a Christmas gift for my MIL.  She and I both quilt but after I started cross stitching a few years ago and then saw this cross stitch design, I just knew I had to stitch it for both of us.

This is "Time to Stitch" by My Big Toe Designs.   I had started it early in the month with the expectation that since this is not a full coverage piece, I was sure I could get it done in time to make the early mailing deadlines for Christmas.  But checking my project tracking notes, I see I lost a week when I stopped stitching to try to get three Christmas quilt projects done in time to display.  Yeah, only one of those got finished in that effort!

As I talked about in my Day 2 post, I had originally purchased an 8"x 10" frame for this.  However, even before I finished the stitching, when I tried to insert this into it, the 14 count natural AIDA fabric I used would not squeeze neatly into it.  In a way that saved me because by then I had decided I wanted to add a line of text to the design.  I wanted to emphasize that the sentiment while stitched in cross stitch, also worked for our joint love of quilting.  However, even though I found a really small font in a book that worked,  it would have put a further squeeze on getting the design to fit in the frame opening even if the fabric had been cooperating.  

So I pivoted on the finish, deciding instead to mount it onto an 11" x 14" piece of painting canvas.  To fill it out, I added fabric borders and padded the bordered piece with batting before bringing the fabric edges around to the back and securing them to the back of the canvas.   

Since I wasn't using a frame,  I wanted to find a way to give my MIL a way to hang it if she'd like to display it that way.  To accommodate that option,  I made twisted cording from the four colors of floss I stitched the piece with using a cording tool I had purchased for finishing another piece.    

To finish the backing neatly, I cut a piece of  flannel fabric from my stash,  stitched a label onto it and used spray adhesive and hot glue to secure the backing over the fabric edges.  

Since I was going to use the cording tool,  I figured I might as well also "fully finish" the piece I had purchased it for!  All the way back in April,  I had started on finishing this year's Frosted Pumpkin "Year of the Dragon" piece which I had finished stitching up in February(!).  


Considering that the year is now almost over, it's about time I git 'er done and display it!

I had purchased both the cording tool and a tassel maker to add embellishments to the piece after I had decided on finishing it to look like a lantern.

The cording tool instructions were all in Japanese but thankfully the University of YouTube came to the rescue to explain how to use it!  


And now it's finally done and hanging with the pieces I stitched to commemorate 2023

I've already decided not to do another "Year Of" for 2025 -- well, at least not as a "New Year's Stitch" as I have done the past two years.  I have two other cross stitch pieces that I'm anxious to get started in January.  But who knows, I may decide to do the 2025 Year of the Snake (also available as a printed pattern) later since I've had fun doing this series so far.  The downside of them is that once the year is past, they are not as pertinent for display so I will admit it dampens my enthusiasm for pursuing it.  But now's not the time to stew over such things, there are two more days left before the New Year rings in and more than that many projects left to tackle!

My thanks to Kathy for another year of providing a place for us to share our Slow Sunday Stitching projects.  Wishing everyone a safe and happy entry to another year of relaxing and comforting hand work!  

Sunday, November 24, 2024

Slow Sunday Stitching: Two Cross Stitch FFOs

It's been awhile since I've had something to share at Kathy's Quilts for the weekly "Slow Sunday Stitching" showcase!

In the last two weeks, I had two big cross stitch "Fully Finished" projects.  They were not big stitch designs in size per se, just big in my cross stitch heart!  First is that I made my first quilted project bag!

"Just Fudge It" Project Bag featuring Pat Sloan's "Sunday Drive"


While project bags are big in the quilt world, they are HUGE in the cross stitch world!  You can buy inexpensive vinyl bags for your projects but a lot of cross stitchers add to the fun by buying or making pretty fabric bags to hold their projects. 

Many CSers use bags where the fabrics used for it may coordinate to the theme of the piece they are stitching on: for example having a bag made up in Halloween fabric to hold a Halloween stitching project.  

I had resisted the urge to go there since I am trying (fairly unsuccessfully at this point) to keep my cross stitch projects to a minimum.  So I didn't mind the plain vinyl bags since I can reuse them for any project.  That said, I do admit to getting a variety of them, each with a different colored zipper and then have been known to coordinate THAT with the project in it, LOL!   

In this case though, making a bag was a chance to make and utilize a CS pattern I really liked.   As I have noted in previous posts about CS,  I am particularly fond of the "snarky" designs and had loved this one by Brenda Gervais of With Thy Needle and Thread.  I was then turbo charged to make it once I found one of Pat Sloan's older fabric lines while on a shop hop and realized that the fabric colors coordinated perfectly with the cross stitch piece.  Then I lucked up that the shop I had bookmarked as having the pattern had it on sale when I went to get it!  

At this point I couldn't "fudge" that "G" -- I had to "rip it"!!

Since this CS design spoke to an aspect of "the process" of doing cross stitch, I didn't mind creating a bag and putting it on it since it could be used for any project I might store in it.  An added bonus is that the theme of the fabric line will be really appropriate if I use this bag to carry projects in it while travelling. 

I have seen various tutorials for making project bags but in the end decided to make this one just like my favorite kinds of vinyl bags.  This one has two zippered sections because I like having a clear vinyl front pocket for storing the pattern and "in progress" piece and then a big top load pocket for all the project supplies and stitching notions.   The only thing I forgot to do was to add an additional divider inside the big pocket.  Oh well, something to consider for the next one!  

And now that I've opened that flood gate, I've since kitted up two more CS patterns to use to make two more bags!

This is one of them!

The other cross stitch "fully finish" is also another of my snarky projects:

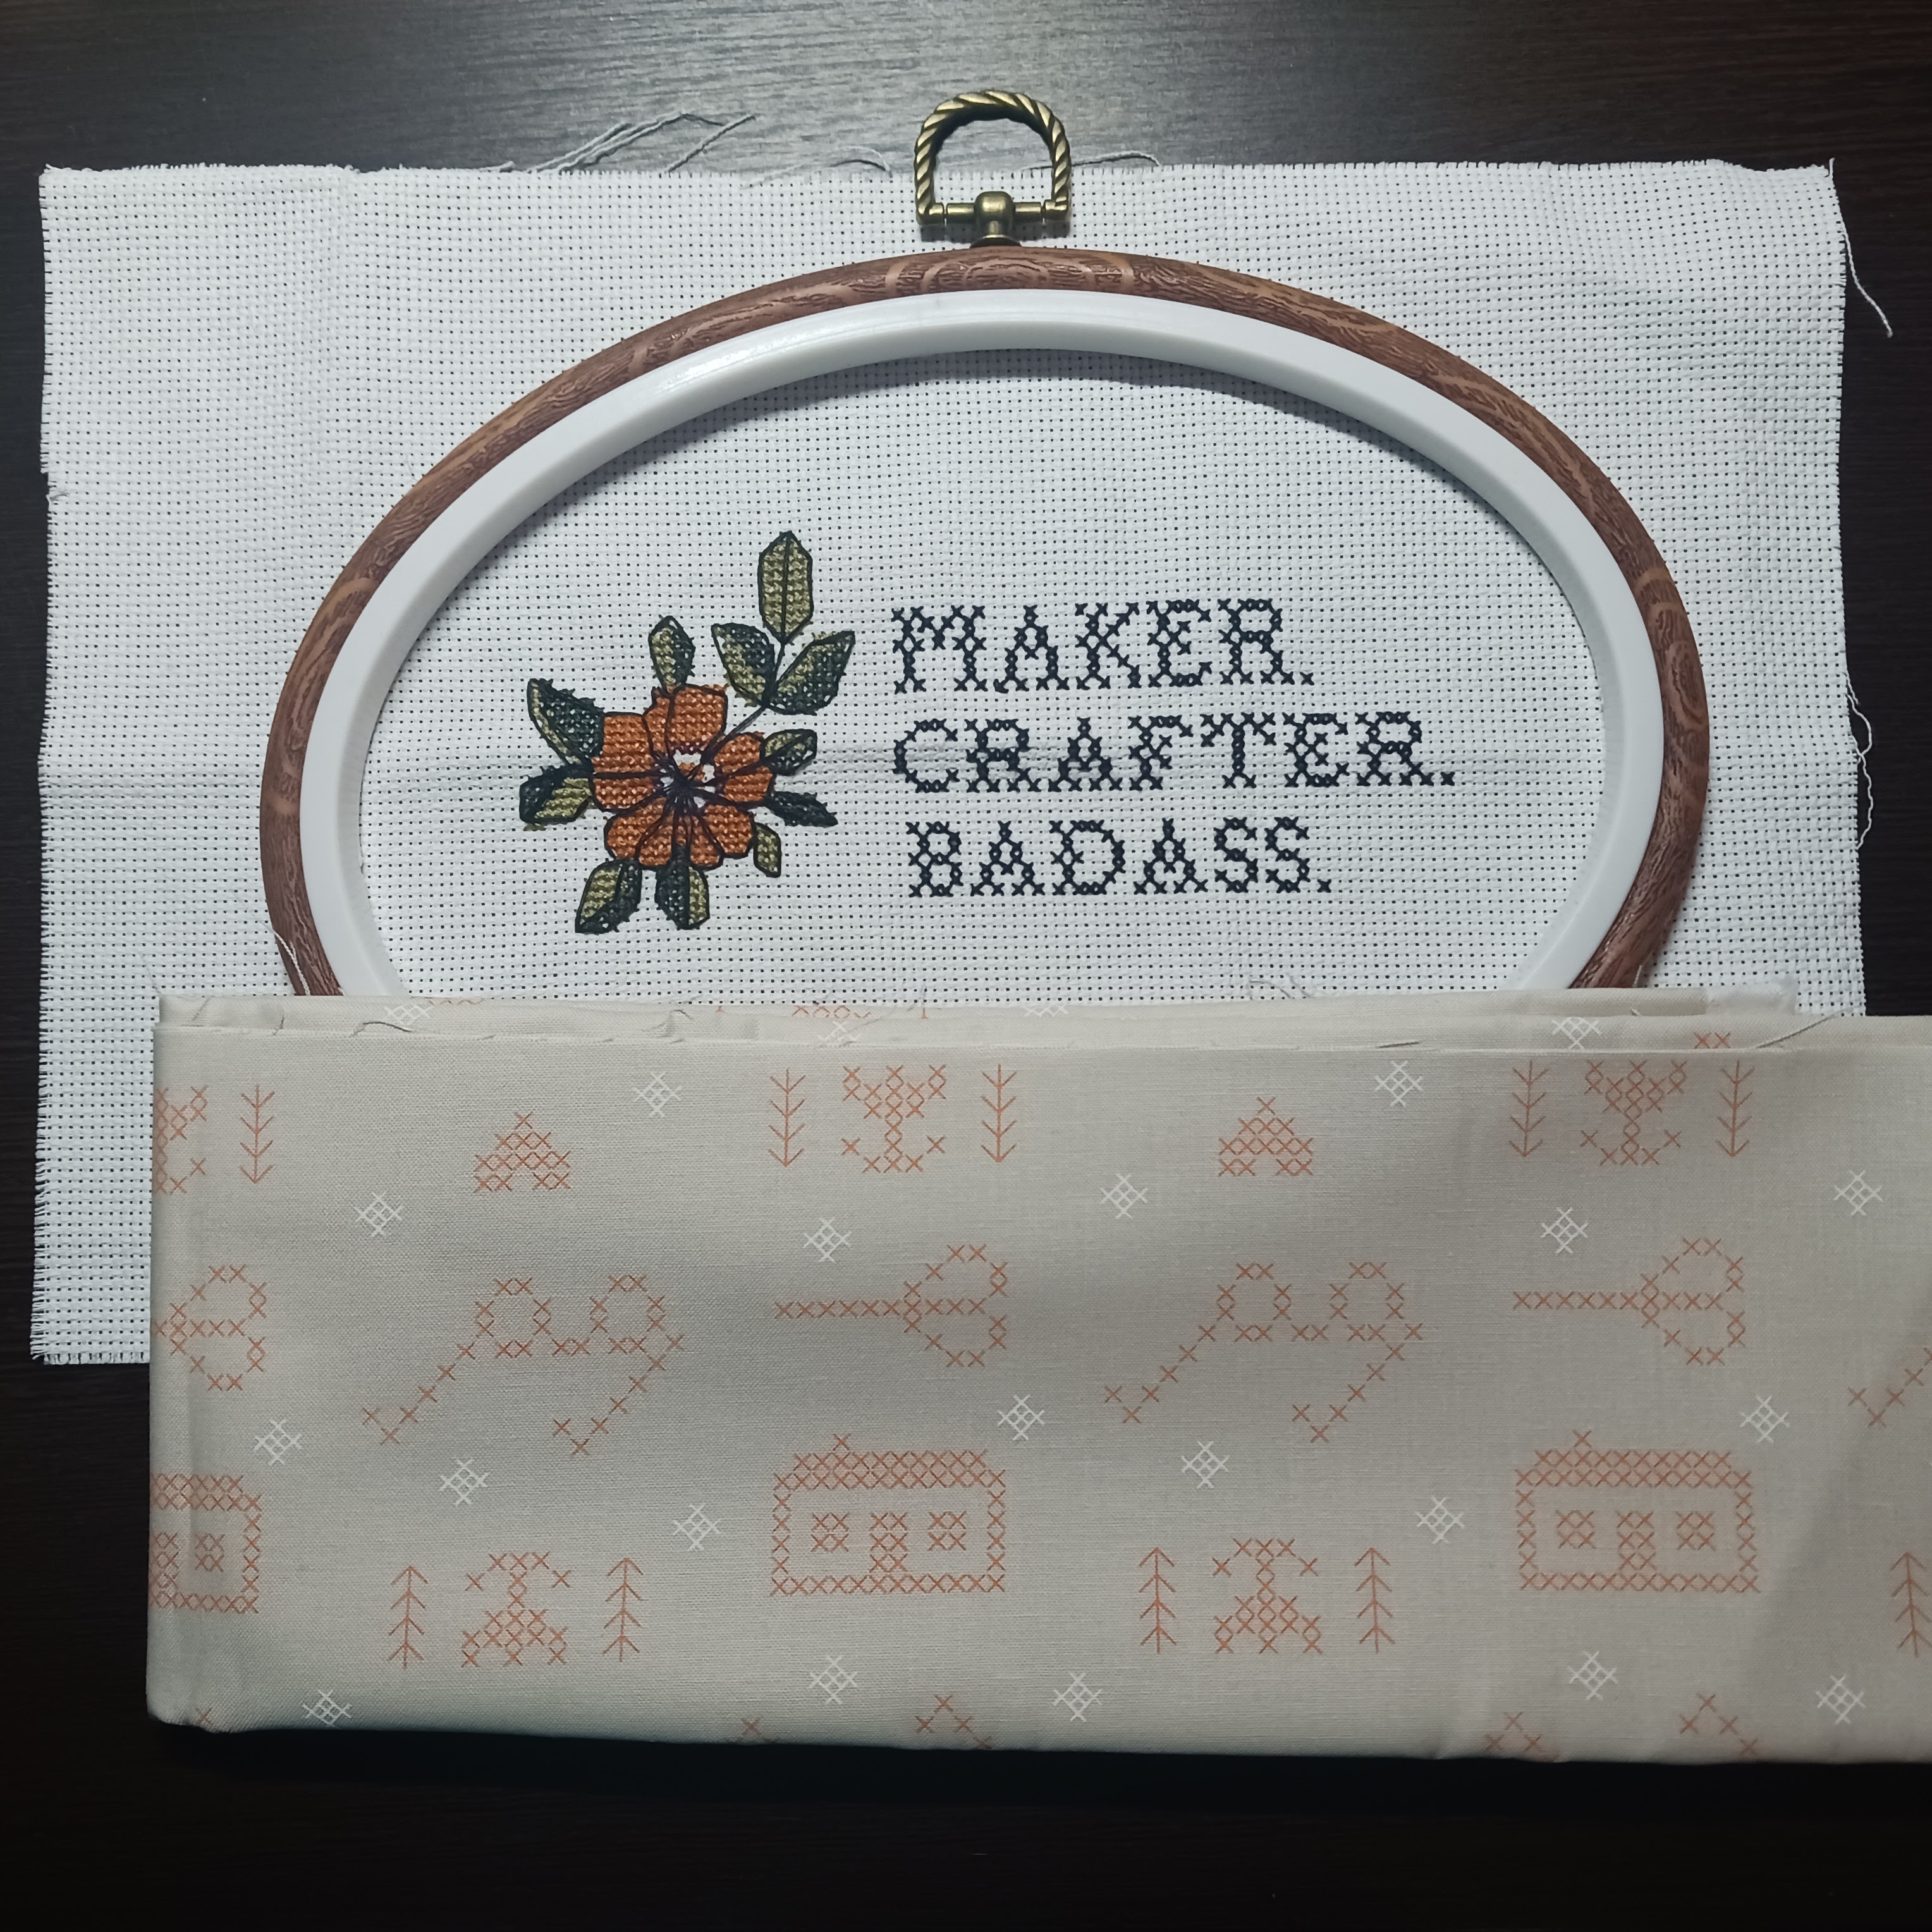
Maker/Crafter/Badass

The pattern for this one was an impulse buy from back in September.  I fell in love with it when I saw a kit for it that included a frame.  However, when I realized I had most of the supplies for it and already knew a source for a frame that I've shopped with before, it immediately went on the "must make" list!  It was a pretty quick stitch and not too long after finishing it, I went on a Shop Hop and found the perfect fabric for a simple cross stitch backing finish.  


As I've done for other framed cross stitch pieces, I laced it around the frame before popping on the outer frame edge.  With it in place I then had to determine how much to draw up the backing fabric in order to hand stitch it in place so it fit snugly (if not terribly neatly) around the back.  

It remains how ironic it is to me that when I started quilting I swore I would do no hand work and yet every new thing I pick up related to quilting has pushed me in that direction!  Even better it is now hanging in place!

I have a few other stitched finishes that still need to be "fully finished" however at this point and I am not sure that will happen before the end of the year.  But two down still feels good!

Linking Up With Slow Sunday Stitching at Kathy's Quilts

Friday, November 1, 2024

Finished Or Not Friday: Spring Quilts and Gifts

This week I am once again joining in with those reporting their finishes along with our esteemed hostess Alycia for Finished or Not Friday!  

It's always interesting to me how projects get started or evolve.  This quilty finishing tale started back in 2014 when I made "Fabric Gal" to use to decorate my bed for Spring.  

In 2016, we gifted that quilt to my husband's convalescing aunt to brighten her hospital room.  Everyone that visited enjoyed the quilt and when she passed away we gave the quilt to her daughter.  Of course that meant I now needed another Spring quilt.  

In 2017, I purchased a "juicy" bright fabric bundle from the Turning Twenty online store.  Since this was not the usual kind of colorway I worked with, I did not immediately come up with a design to make with it.  In fact, that didn't happen until 2020 while we were stuck in our homes due to the COVID quarantine.  

We quilters were fortunate that so many quilt designers came up with new designs and quilt alongs to keep us busy while under lock down.  That year Gudrun Erla of GE Designs held a free quilt along for her new pattern "Elvira".  I was excited to participate as it also meant using my favorite Stripology ruler.  I added fabric to the bundle I had purchased to fill out the amount of fabric I needed for the project....

....then followed along and made up the top.

However with loads of other quarantine projects afoot, it sat while I debated on how to quilt it up.  

In 2023 and still without a Spring quilt for my bed,  I found in my stash what I thought was a yard of the Peach floral fabric I had used for the borders of the "Fabric Gal" quilt.  By now I was a big fan of the Fabric Cafe "3 Yard Quilts" and saw this as an opportunity to make one.  I purchased some coordinating fabrics to go with what I had and took it with me down to my MIL's in North Carolina for our annual Fall visit and mini Quilt Retreat (she is also a quilter).  

When I started cutting the fabric for the pattern I picked for it -- "Heartland" -- I realized I actually had a little more than two yards of that border fabric.  I decided that rather than make the lap size quilt that the 3 Yard patterns typically make, I could "upsize" it to a twin if I could get more of the coordinates.  I was able to find one while in NC but had to wait until I returned home to NY to get more of the second.  Before long I had doubled the basic design into a twin top!

Finished top and backing purchased on a Shop Hop while in NC.

When I didn't get around to quilting it by the end of that year,  I planned to bring it back down to my MIL's and try to quilt it on her new long arm.  We returned in May of this year for the funeral of another of her sisters.  While there I did load the quilt onto the longarm but for reasons I didn't understand at the time, I couldn't get the pattern I wanted to stitch out.  

While there, I was showing a friend of my MIL a picture of the "Elvira" top that "Heartland" was now replacing.  She really liked the bright colors of it and since she was in the process of finalizing a move to retire to my MIL's town, I decided that I would bring it back down when we returned to visit in the Fall and quilt it up as a surprise housewarming gift for her.  

In the meantime, after returning back home with the unquilted "Heartland" top, I lucked up on receiving information about a "Free Motion Quilting Summit" being held in August.  Adria Goode who was one of the presenters showed her "Big Flower" stitch pattern and I just knew it would work for "Heartland".  With many other projects on my plate, I didn't start quilting it until late September, getting it about half way done.  

I had to break from working on it because we were now scheduled to return to my MIL's in early October.  While there I finally got the "Elvira" quilting going.  I pieced together a backing that included a strip of scraps leftover from piecing the top and included a label.  I then picked out a large continuous line flower stitch pattern to use to quilt it.

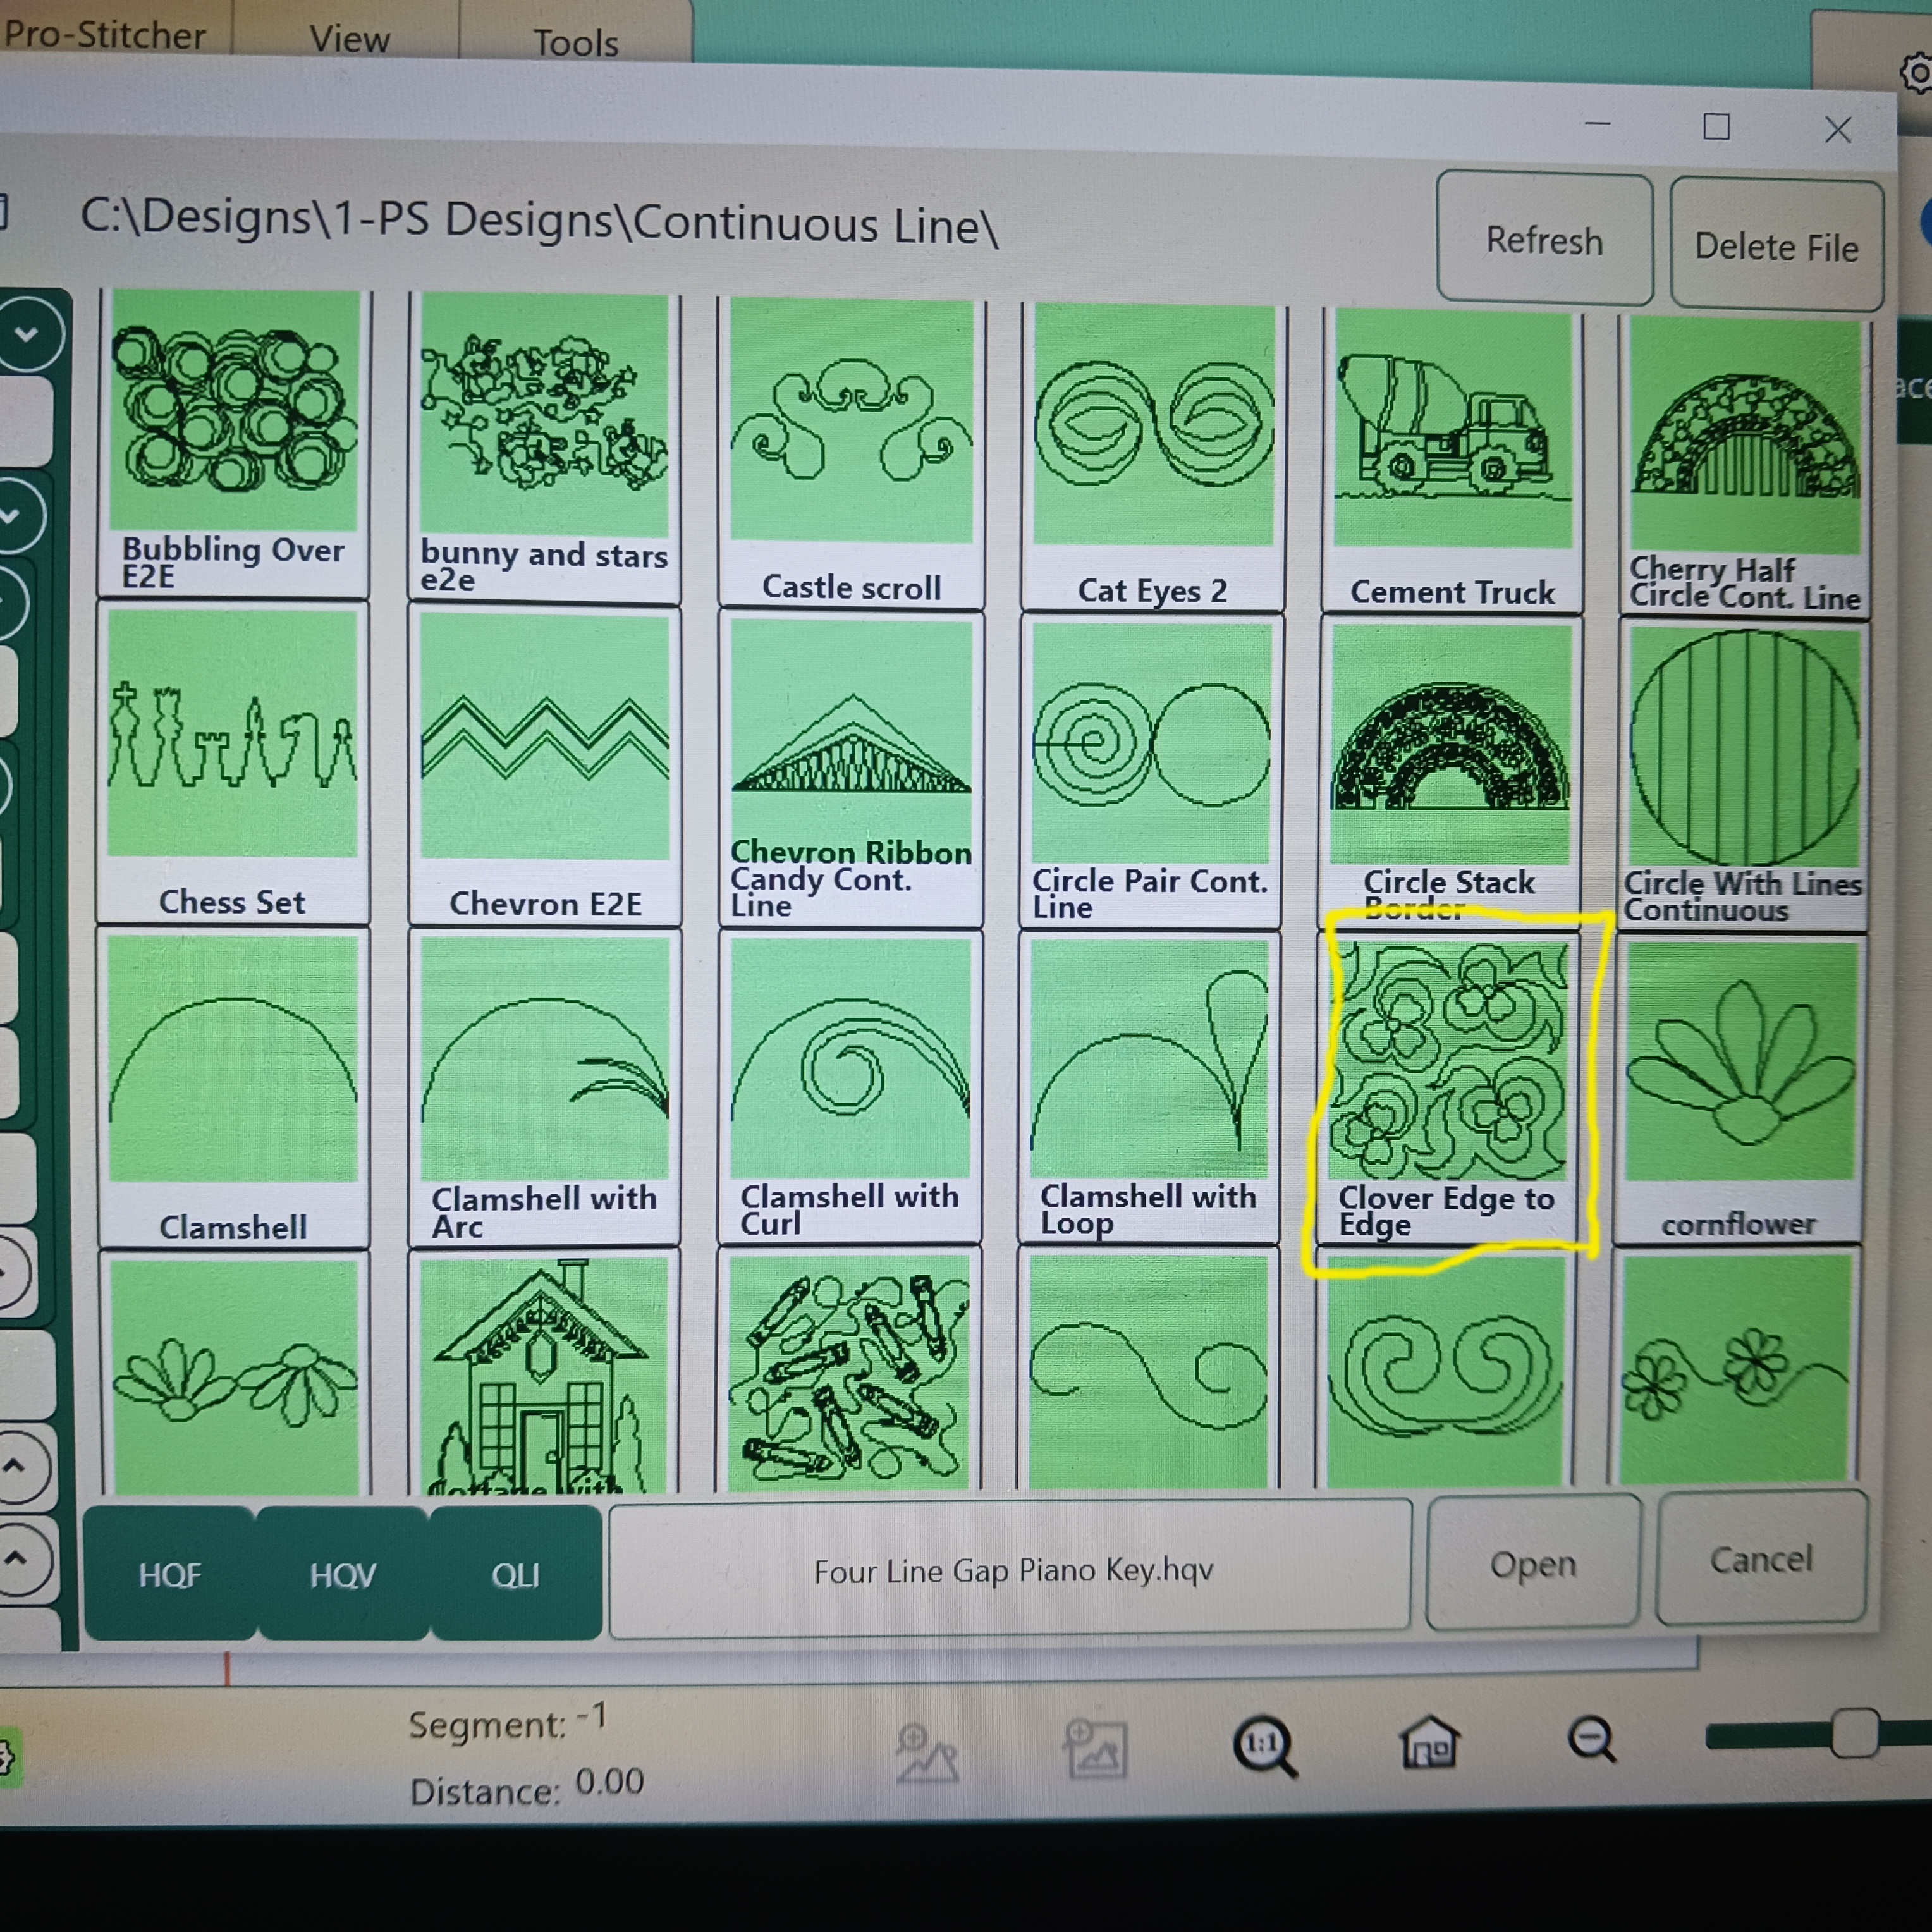
I went with the simpler Blossom E2E pattern.

Luckily with a lot of new lessons learned on this trip about working with the longarm,  I was able to get it all stitched out!

And before you know it the quilt was finished!

Two days before we left I trimmed and bound it and it was ready for gifting along with another little gift that can be seen in this post!


On our return home it was now time to also get the "Heartland" quilt finished.  I worked on that this week and now it too is finished!  


As a throw back to the "Fabric Gal" quilt, I still had some of the panel fabric I used for the label of that quilt so made a similar label for the new "Heartland" one! 

Previous and New Labels!

I look forward to when I can use this one in the Spring!

I also look forward to checking out what everyone else has made up this week over at Alycia's for Finished or Not Friday!  There's always good stuff to see so be sure to check it out yourself!
Thursday, October 31, 2024

Quilting Travelogue - Part 2: Long Arm Quilting and a Gift

I my last post I talked about the piecing, cross stitching and shop hopping I did on our recent visit to my MIL in North Carolina.  In this post, I'll cover the quilt stitching I did and who benefitted from it!

(Long Arm) Quilting

One of the big plans for this trip to was to try to get a lot of quilts quilted.  On the one hand, it was a mixed bag on that.  I had brought one that had already been partially quilted on my Juki and I wanted to finish it to show my MIL how that machine stitches as a mid-arm DSM.

That folded bit of Kente is the layered quilt as I stacked up what I was going to bring.

This is one of the potential gifts for my community garden's Steering Committee members.  I'm not sure why I didn't finish quilting this when I worked on it last year --- I think I got "into my head" on the stitching and then put it aside.  

I was encouraged to get back to it after seeing the same stitch pattern I used demonstrated in one of the sessions I watched during the Free Motion Quilting Summit in August.  I realized that whatever had bugged me was now moot.  Unfortunately, this is another thing that we were too busy with other things for me to get to.  My plans are to try to finish this one up before the year ends.

I will say that I DID make a lot of progress on longarming!  I really learned a lot on this trip and most of that education came as we went about solving problems!  As a result, I think I now fully understand (and remember!) the steps to load a quilt on to the frame.  

The store that my MIL purchased her longarm from was on the Shop Hop and we stopped there so she could buy some "leader grips". 

You can see a demo of how they work in this video.

They really do help make loading faster as opposed to pinning your backing and top to the frame leaders.  The woman in the store advised getting a two-leader set but after trying them out we realized that a three leader set would have been better. 

I also confirmed what I needed to do to set up a stitch pattern.  It's important to keep whatever pattern I choose (and re-size) within the longarm's "frame space"  which is approximately equivalent to the depth of the throat space.  I also took pictures of all the pattern screens so I can plan before I arrive how I want to set up a quilt to be quilted.

This is just some of the installed designs.

The best news is that a long over due UFO got not only quilted but gifted!  My MIL has a good friend and former co-worker who has retired from New York to North Carolina and now lives in my MIL's town.  I had taught them both to quilt when both were still in NY.  The friend and her sister who was visiting her also came with us on the Shop Hop, a first for both!  

I had shown her a picture of this quilt top when we were both in NC back in May for my MIL's sister's funeral:


When she mentioned that she really, really liked it, I decided right then to gift it to her as a surprise housewarming gift.  This is the "Elvira" top I had made during Gudrun Erla's first Quarantine Quilt Along back in 2020.  Thanks to all the good lessons I learned this trip, I was able to successfully quilt this one on the longarm without too many problems. 

I'll do a full finish report on it tomorrow since there were a few more lessons learned both during and after it was quilted.  Like the fact that I didn't learn until after it was finished that I actually loaded it onto the frame wrong!  Although this is the shot of it fresh off the longarm, before we left it was also trimmed, bound and gifted.  

In my previous post, I noted that I had done some additional piecing and that was for another gift -- this time to christen the friend's new craft room in her new home.

This is a "Sewing Fairy" made from the pattern by Deborah Fisher of Fish Museum and Circus.  I learned about Deborah's designs when she was one of the presenters at July's Quilt Summer Camp.  Her session at Camp was on decorative "fussy cut" binding.  She has designed fabric lines for Windham Fabrics that are printed to facilitate the technique.  I purchased some of it from her after the Camp which is when I also saw her "Fairy" pattern.  Knowing that I planned to make a quilt housewarming gift, I figured a "Fairy" stuffed with little quilty notions would be a cool "new craft studio" gift as well!

 After "Elvira", we loaded my MIL's "Monochromatic Quilt" that was a guild challenge project and also finished that one.  


I did bring a second quilt for longarming.  Now that I know a little more about how to set up the patterns for stitching out, I also understand better how to position them on the quilt top.  I picked out the designs I wanted to use for that quilt and figured out where I wanted to position them on the top.  However, understanding that I needed to do that within the limits of the longarm's throat space, it meant I would need to stitch out the patterns in sections.  That was too big a task to try to tackle in the last day we were there.  So, yet another project is now packed away for the next trip down.  Whew!  Those two weeks went so quick when you have so much to do!