Showing posts with label Foundation Paper-piecing. Show all posts

Sunday, May 7, 2023

Slow Sunday Stitching

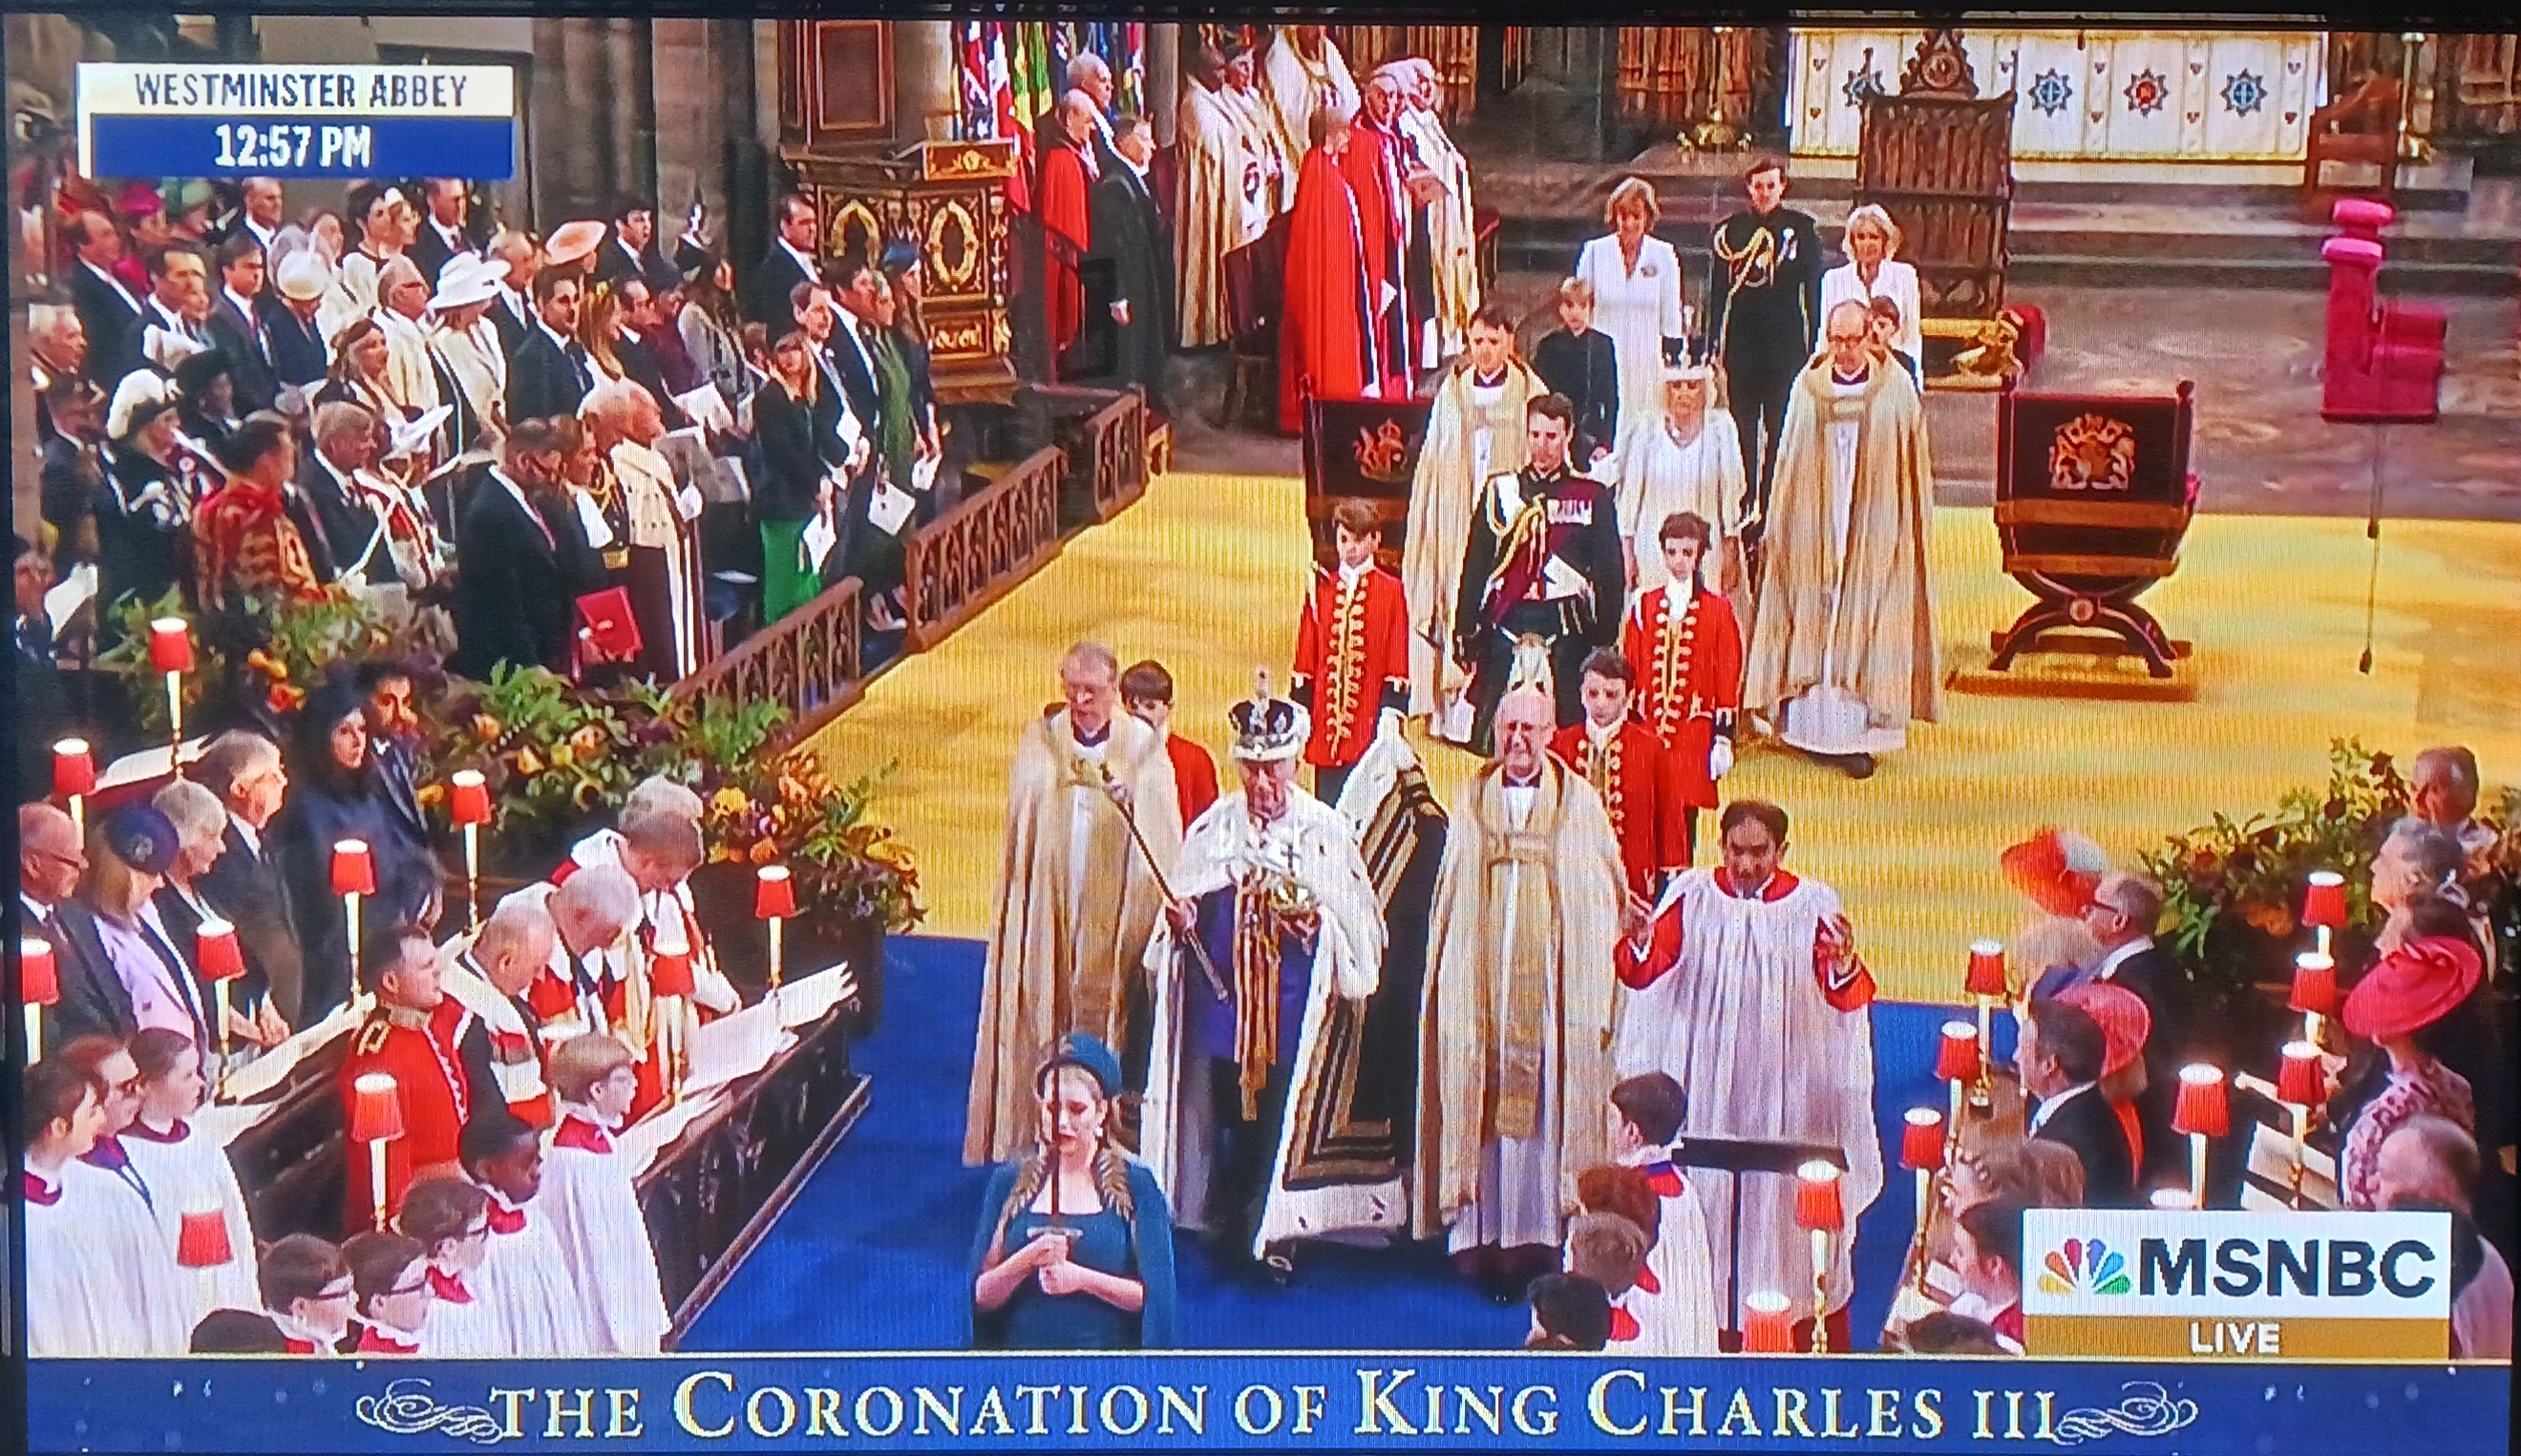
Yesterday, for a day of Pomp and Circumstance....


I had a few stitched keepsakes in honor of the day that are now ready for finishing!

Cross stitch keepsake pattern by Helen Phillips on Etsy

Mug Rug made with Astrid Bordush's Paper Piecing pattern    

Fun mementos of a historic event!

Linking up over at Kathy's Quilts for Slow Sunday Stitching today

Saturday, April 30, 2022

April Recap and As Usual A Lot of Changes In Plans.....

Can you believe that April is now over?!?  This year is going by just too fast.  For a month in which I thought I had clear plans, things just tumbled and jumbled until where I came out in the end was not where I planned to be in the beginning!  

The Raffle Quilts Were A Bust

So I knew it was a long shot when the month started but I had hoped that it might still be possible to get the raffle quilts for my community garden's opening day made up.  Nope!  I continued to have an issue with the basket blocks coming up a wee bit short of the patterned size.  And of course since I was now rushing to try to get this done, I also did things like this:

So before too long, an Executive Decision was made to "Abort Mission!"  Since I had not promised the quilts, there was no loss in not having them ready.  Additionally, there is a whole garden season ahead of us and we hold at least one other big event each year.  If I can eventually get them made up, I could still offer them for raffle at a later date.  At the very least, I am now well ahead of the game for next year, Lol!

Added to that, the wide-back fabric I had pre-ordered to fill out around the panel I had purchased for the back of the light version of the quilt still has not come in!  Had I gotten to that point, that would have been yet another complication to my plans anyway.  

On a plus note, while shopping for border fabric for the leader/ender project I worked on while trying to make up the basket blocks (more on that later), I found a lovely panel depicting realistic images of butterflies to add into the back of the black version of the quilt:

The original plan was to make the black butterfly version with just a solid black backing and the light version was to have the "Be Kind" panel and the "still missing in action" wide-back print.  Now that both quilts will have pretty panels in their backs, I think I will buy more of the Kona white to complete the light backing so they are truly "fraternal twin quilts".  

Additionally, I decided to purchase two of the butterfly panels so I can use the second one to make a quilt for myself with the leftover pieces that Jenny Doan has us put aside when cutting the fabrics for the basket blocks.  Score!      

So despite the disappointment in not getting that project done, I did still get to do something special for the Opening Day ceremony.  Back in March our Garden's President had asked if I could make a sash for the Grand Marshal for this year's event.  I wasn't thrilled with the idea since I had by that time already come up with the raffle quilt plan and had never made a sash before.  However, she sent me a link to a site that sold sashes and it didn't look like all that hard a task.  I rolled around ideas in my mind for a good while and what eventually resulted was this:


Finally a chance to use some of the "food fabrics" I have been collecting for years and the little Bernina Deco embroidery machine I purchased a while back!  I used fabrics from my stash that each represented things we grow in our garden.  The letters were die cut using black Kona from my solids stash (separate from what I purchased for the raffle quilts) and the Accuquilt "Classic Alphabet" die.  

I decided to use some burlap that I had on hand as the sash base and chose a tan print from my "backgrounds" stash to use as the lining fabric.  I used pieces of the lining print "wrong side up" under the burlap and positioned where the embroidery was to be placed in order to minimize the additional stabilizer I would add showing through the burlap.  I then applied iron-on tear-away stabilizer to the back (right side) of the lining pieces to further stabilize the embroidery as it was stitched.  After the embroidery was done, I used more of the tan print (right side up this time!) to line the whole sash, attaching it using the "pillow turn" method and edge stitching around it to finish it off.  

The two ends of the sash were secured together with a safety pin to make it easy to adjust the fit.  I decorated the pin with a fabric covered button with a shank placed on it.  We don't grow blueberries but that was the only print in my stash where the images centered perfectly on the button!   Our local councilman was the Grand Marshal and the sash was gifted to him at the end of the event.  And yes, I did put a label on it too!

Details about our Opening Day event can be seen on page 3 of our community paper which can be viewed on the issuu.com website.

Leader/Ender Work

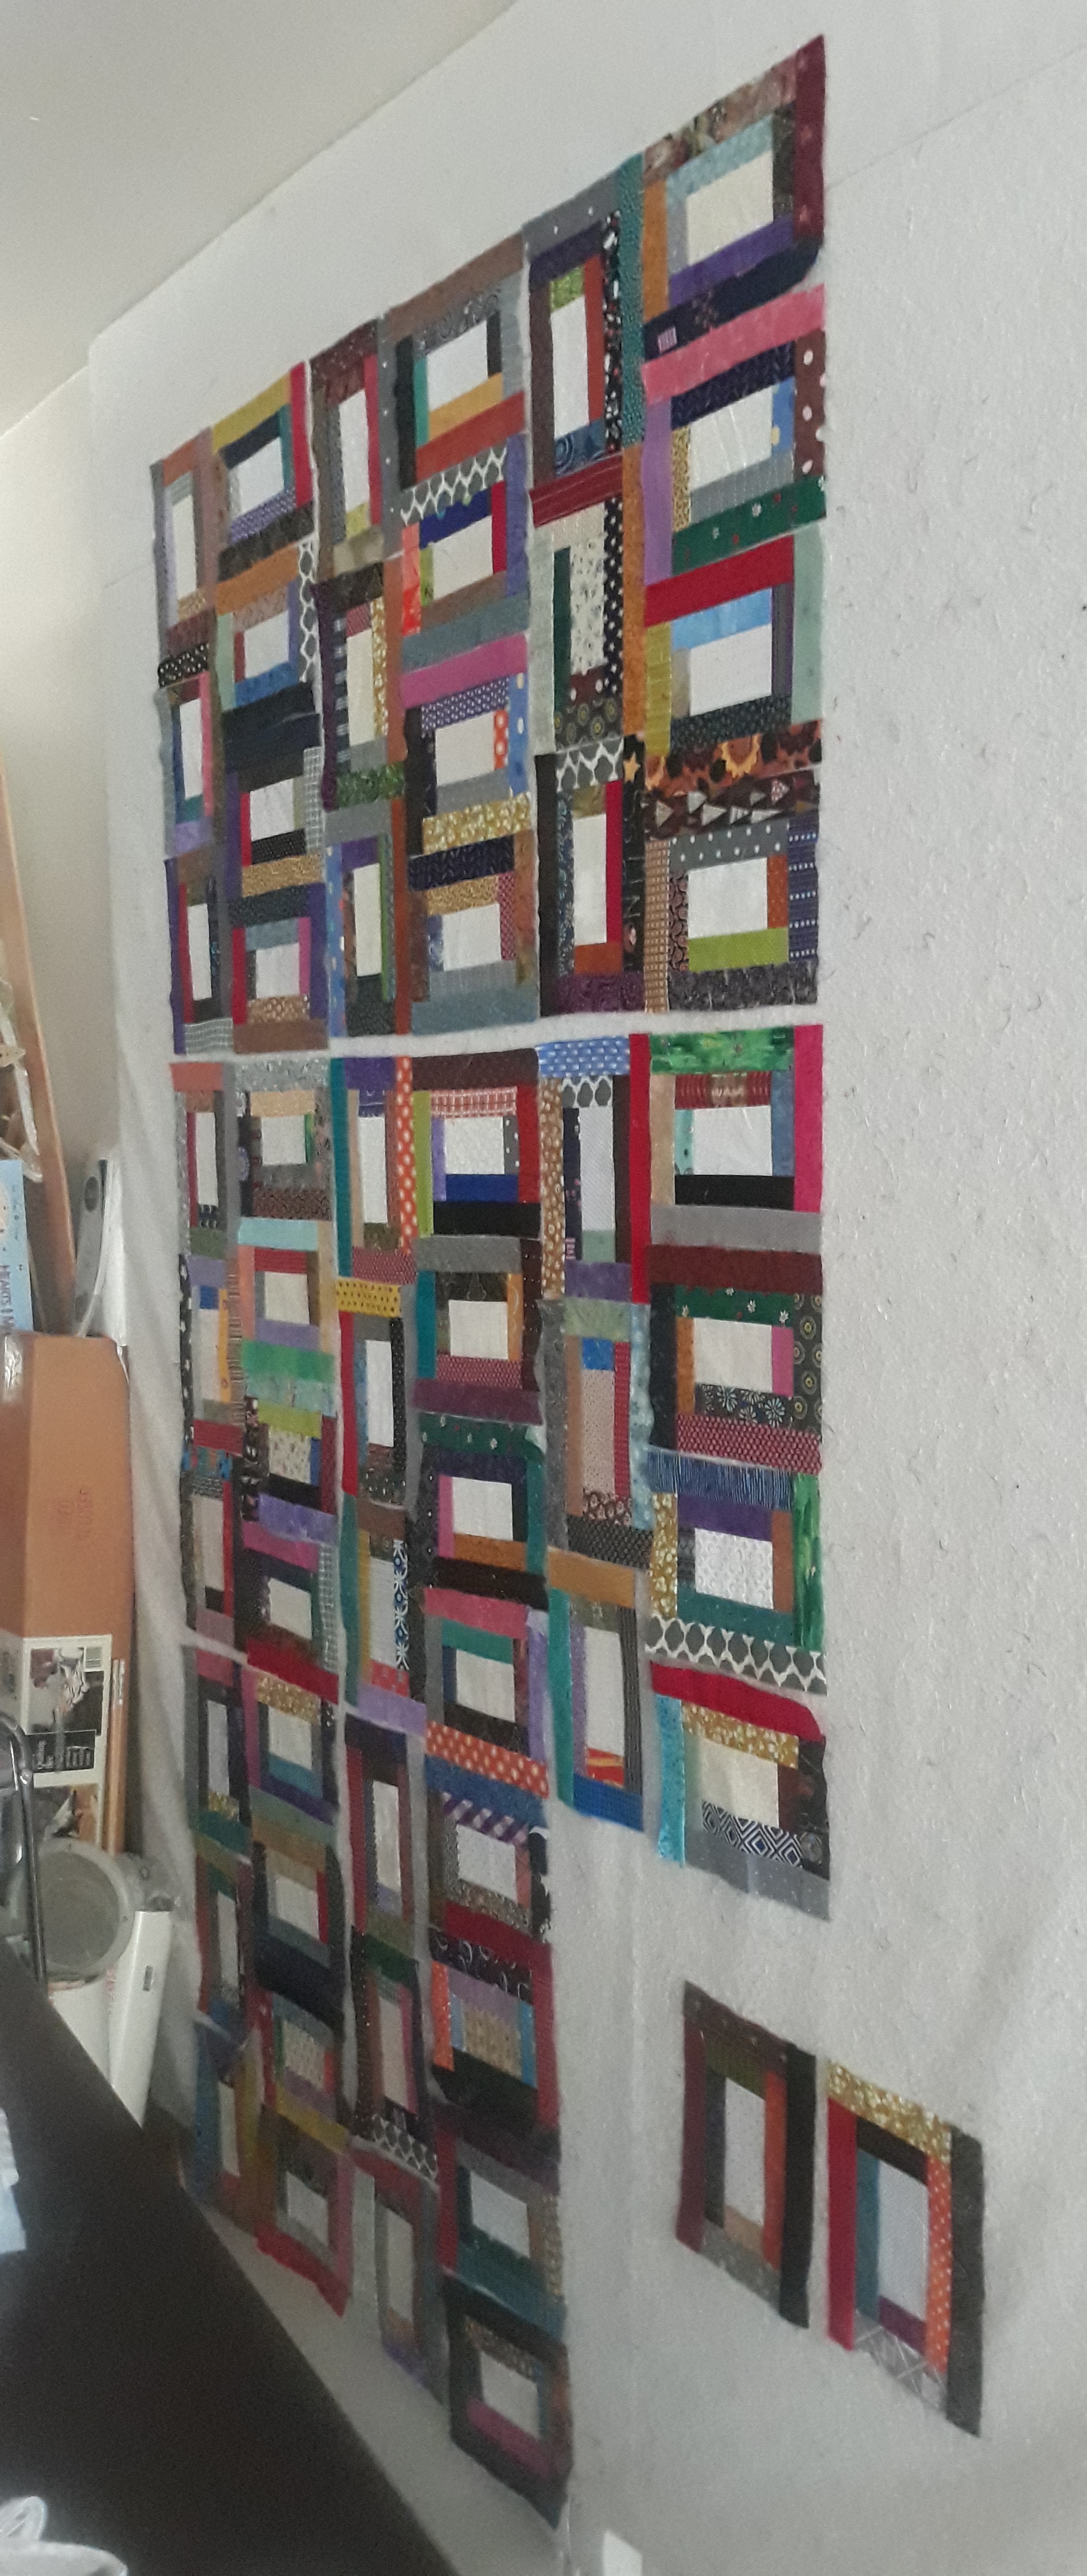
While trying to sew up the basket blocks, I decided to also begin sewing together the layout for the "String Bean" blocks I had finished up at the end of March.  So those went from this:


....to this.


The top still wasn't quite wide enough for my taste so as noted earlier, I went looking around for something to add on as borders.  I was pretty sure that with the red sashing squares I also needed something red for the borders and found it.


The center is longer than it is wide so visually I found that it worked better to do the side borders wider than the top and bottom borders.  That complicated things slightly as I had already pieced together the scrappy corner squares as a nine patch with a red center.  I had to re-do them into a 4x3 patch rectangle so moved the red squares to the outer corners so it all remained balanced.  

While debating about the borders and still in "pieced back" mode from March, I wondered if I might do something along those lines again for this project.  Then I remembered this easy quilt design by Mary Johnson (who blogs at Making Scrap Quilts From Stash) which I had picked up from her free pattern site Mary Quilts years ago:  


So I made it a point to purchase extra of the border fabric to use as the "focus" print (the wider strips) and more of the solid black from my solids stash for the accents.  Still needing something else for the "tone on tone" strips in the design, some of the prints I had purchased for my "Scrappy Figs" project came to mind.  When the border fabric came I realized that I really liked one of the "Figs & Shirting" prints in that position.  I found a shop that still had some so now that everything is in house, first thing for May is to get this backing made up!

More Harry Potter Work

The other project plan for April was to finally get to the "Realigned" quilt stitching practice.  However once I did not start on it in the first few days of April, I lost the momentum to do it and so it too now moves on to May.  I decided that what I could steal some moments to work on were the other two paper-pieced blocks needed for my son's Harry Potter quilt.

I made the dragon in March while we visited my MIL.

These three were the only blocks I had originally planned to piece into the center using blocks from Maaike Bakker's book.  Of course now, I'm thinking that maybe a few more might make it all a little more balanced (there's that word again!).  This time though, I wanted blocks a little more specific to the HP lore.  Well, where do you go when you want to find PP patterns that are story specific?  None other than Fandom In Stitches of course! 


After going through all the offers for HP lore blocks I settled on blocks for the "Sorting Hat" and "Hogwarts  Castle".  There is a castle block in the Bakker book but it is pieced in kind of a fan shape and I wanted one that was smaller and squared.  So I guess this project will also continue on into May.  

Now that the garden is open for the season, DH and I have already volunteered for shifts (we did our first on the day after the Opening Day).  Our anniversary was also in April and he was on vacation this past week so more diversions from quilting happened.  We have been doing a little "in person" RV and tow vehicle research.  I don't think it will happen this year but with any luck, I may be an "On the Road Quilter" by next year, finger crossed!  

I hope your April stayed more on track than mine did and we both have a very productive May!

Thursday, March 31, 2022

It's Time for the March (Madness) Recap!

Although there will be no talk of Basketball here, LOL!  Is it as chilly where you are as it is here in NY?!?  If so, then I'm guessing you are as glad as I am that March is on its way out!   Looking forward to the (hopefully warmer) April showers and May flowers!

Once again, I am here at the end of the month reviewing that what I had planned to do and what I did do proved to be two different things.  As noted in Part 1 of my Recap for February, the Rainbow Scrap Quilt Challenge color for that month was Teal/Aqua.  In order to provide scraps for that, I had started working on improv piecing a backing for my "On Ringo Lake" mystery top.  I had left a significant stash of fabric scraps and cuts in those colors with that project for that purpose.  
Top finished in 2018

The good news is that the backing is now also finished!

Back when the mystery started, the quilters from the Chandler AZ Quilt Guild had sent Bonnie Hunter pictures of the quilt labels they made for people who participated in their kick-off day for that mystery.  


I loved that idea and had made a note to do the same when I was ready for that step.  As I was piecing the back, I realized it was helpful to add those in now to help fill out the backing design.  The label information was printed on fabric and inserted into the backing layout. 


That meant I had to also provide the finishing date now so I have also committed to quilting and finishing this in May.  I hope I won't regret that!  

Although  the Teal/Aqua scraps were now freed up, I never did get around to doing any RSC work for the month after all.  The other downside to all of this is that I thought it would only take me a few days to choose which scraps and extra pieced units to use, make the different sections, figure out what to put where and get the backing all pieced up.  

To my surprise, in the end it took ten days to get it all done!  While I did leader/ender some other sewing while working on this (See the "Daily Blocks" later in this post), there were other things I wanted to also get started but just didn't have the head space to juggle any additional projects until I was finally able to put this backing to bed.

Pleased with the final backing that I created and still in "pieced back mode", I wondered if I had any others I might want to work on as well.  Lucky for me, the APQ UFO number for March was #3 which on my list just happened to be another Quiltville mystery project: "Old Tobacco Road". 

 I had finished this top in February of last year and had planned to also piece its back so figured I might as well get that done and let that be what I did to move that UFO forward for this month.   

This one was a lot easier (and faster) to get done as I had a simple plan for it already in place.  I had pieces of two backing fabrics already cut for it but the top turned out to be just a little bit wider than originally planned.  Since I just needed enough extra to add to the width to allow for "quilting take-up", I decided to insert some pieced strips comprised of the leftover Flying Geese blocks and fabric "Bricks" not used in the front of the quilt.  In the right side strip I added a light "Double Brick" that will serve as the label area when the quilting is done.  Easy peasy and this one did only take two days to complete!

As noted in the "Plans for March" in Part 2 of last month's recap, I had also decided to go back to work on last year's "Daily Blocks" project.  In that I was influenced once again to join in on Pat Sloan's "Daily Blocks" project for this year.  The good news is that they are for the most part now done!

All of the 3-1/2" (unfinished) blocks for the "Wishing Rings" year long project are now completed.  I had started these last March and last left off with only five blocks pieced for the month of November.  With four months of blocks still to do, I decided that it was doable to work on four blocks a day (!) to finish up all the blocks for the final months.  Doable, yes --- as easy as I thought, no!  The hardest part was processing the scraps for the block sets which took a lot more time than I remembered.  I have to give my MIL a big shout out because I don't know that I would have been able to get a year's worth of blocks done at all without all the additional scraps she had passed my way.   

There was also this year's "String Bean" blocks that I had decided to make:

As noted in the previous recap, I had decided to make my blocks smaller than Pat's in order to make use of a big stash of pre-existing strips already die cut with my Accuquilt Log Cabin die.  However this also meant I needed to make two blocks a day for this project in order to have enough blocks for a reasonable sized lap quilt when the month was done.  The picture above is where I am with those as of yesterday, the last day Pat was piecing blocks.  

I had decided on piecing my blocks together into "Seven-Block Sections" to optimize how the finished size of my blocks fit together.  As you can see, I still need five more blocks to fill one more section to complete the layout.  I've already made three of those today and will do the last two tomorrow.  Even then the top will be a little narrow so I now plan to add sashing and cornerstones between the sections and add additional borders to bring it all up to size.  That however will be work for another month! 

The other thing that helped me get all of this up to date was that my DH had a vacation scheduled for last week so we headed down to spend it with my MIL in North Carolina.  For DH it's a vacation, for me a mini quilt retreat!  My MIL had purchased a Featherweight last year although it turns out it was missing the drip pan and bottom screw which I helped her order from The Featherweight Shop while there.  We also almost ordered the same thread stand as I have but looking around her space for something else, I discovered she already had one!  Her electronic machine is in the shop right now so at one point we were set up to sew with "dueling Featherweights"!
My MIL was also doing the "String Bean" challenge.  This is her first stab at working really scrappy although she limited it to her Teal/Aqua batiks.  At first she had just picked different fabrics for each position in the block but then was making the blocks all exactly the same.  I helped her "scrappy it up" more, encouraging her to vary where the fabrics were in each block.  We managed to get her blocks done (hers are made the same size as Pat did them).

After we got them to this point, she cut narrow sashing strips in a light batik and cornerstones from the block fabrics to put between the blocks.  However after seeing how much additional work that was going to be, she decided instead to just sew the blocks together and add light borders around the outside.  She has also prepared scrappy binding by piecing together the leftover strips.

Oh and she thought I couldn't make use of even the littlest bits?  Challenge accepted!

Can you say "Crumb-Pieced Mug Rug"?!?!  I brought it home with me to finish the backing for it.  I'm going to use the no-longer-needed cornerstones and turn the cutoffs from the diagonal binding-joins into HSTs to also help fill it out.  When finished, I can send it back to her as a memento of our working together!  

Although I brought a lot of projects with me, other than working to catch up on the two "Daily Blocks" projects and helping her with her "String Beans" blocks and Featherweight upgrades, the only other thing I was able to work on was getting started on the quilt for my son:

In last month's recap, I had talked about how my son asked me to make him a quilt.  He gave me some colors he wanted but I had also long been stashing "Harry Potter" fabrics with the intention of making him a quilt.  He was more than open to getting both!  My MIL had purchased an Accuquilt 6-1/2" strip die during one of their sales shortly before we arrived.  The good news was that the design I had come up with for the quilt needed a bunch of 6-1/2" squares cut as well as 2-1/2" strips for an inner border and she also has the die for that.  So this trip was a perfect opportunity to get all that done.     

Additionally, in the design, I plan to add (freezer) paper-pieced blocks for an Owl, a Wizard and a Dragon using patterns from the book "Spellbinding Quilts" by Maaike Bakker.  I had two fabric sets for the latter that I couldn't decide between so I started piecing those first to help make that choice.  Once again, doable but way more fiddly than expected!  The bottom one wins and the other may wind up as a pillow since I already have "Potter" fleece for the quilt back so don't want to use the remaining block to make a label.  

A big help to me is that when I told my MIL about the other quilt my son also wanted she was excited to volunteer to take on the making of that one!  She is looking forward to deciding what design to use and to go fabric shopping for it.

So that's all I got done for March.  Needless to say there was a bunch of other things I was supposed to get to but didn't so I'll review all of that in the next post outlining my plans for April!

Wednesday, September 30, 2020

September Wrap up: The End of National Sewing Month and Mini Madness

September was National Sewing Month and for me it was a month for a bunch of mini quilt finishes!


"Lidia"

First up is a project in my continuing obsession with Edyta Sitar's Laundry Basket Quilts designs!  I learned about her mini log cabin quilt design when I saw one of her "Quilting Window" videos on You Tube.  She also offers it as a stand alone pattern and in her book "Little Handfuls of Scraps".   

I started piecing the blocks for it at the end of  July and the fabric for the block "logs" came straight out of the crumb bins.  The blocks were only two inches finished and the logs started out at 3/4".  I probably needed to block the quilt top when I finished it so the borders are a little wonky.  It didn't help that in order for it to fit the space I want to hang it, I had to make my borders smaller than patterned.  I fussy cut them from the stripe fabric pictured.  Making it with larger borders might have helped me square it up a bit more.  

What was cool was that I found a quilting motif for it in an unusual place. 


 A couple of weeks ago, I read a post by Rebecca on her Cheeky Cognoscenti blog about how she had received a bunch of old Quilters Newsletter Magazine issues from a guild member cleaning out her studio.  She had even found a solution to a piecing problem she was having in one of them.  I commented that I still love my QNM issues even though the magazine ceased publication back in 2016.  I have an almost complete collection of them and often find new things of interest or education when I thumb through them.  

It just so happens that the same week I finished the top for this project, I had received an old QNM back issue that I didn't have and found for sale on eBay.  It was a case of perfect timing since the issue from July 1976 (!) had the perfect quilt design for this little mini quilt!  Even better, all the gentle curves in the design meant it could be executed with a walking foot.  The only issue was how to mark it?  I took the "Golden Threads" paper template route although I used regular wrapping tissue paper to make my templates.


This project was another fun little Laundry Basket Quilts diversion and I look forward to getting it hung up and displayed. 


"Gertie"

 Next up is my micro-mini version of one of Carrie Nelson's Schnibble quilt designs. 


The original quilt is lap-sized and made from charm squares.  Mine is another mini pieced from the crumb bin starting at the end of  July.  This time I used 1" starting strips and scrap triangles (save those cut offs!).  Working so small, it was a bit of a challenge to sew together and I had to press the seams of the triangle squares and all the rows open.  That allowed it all to lay flatter given the tight confines of the seam allowances after the blocks and rows were stitched together. 

Ironically it was only after I had finished the top that I happened to read a blog post by Janet of the Rogue Quilter blog who is a phenomenal mini quilt maker.  Back in 2016 she made a mini quilt by using 1/2" finished gridded fusible interfacing.  If I had thought of that, it would have saved me a ton of effort!  And wouldn't you know it, I already have some here.  Hmmm, guess that means I have to do another one of these, you know for scientific testing purposes, you understand!  

This one was also quilted with a walking foot, this time using the freezer paper template techniques from Mary Mashuta's "Foolproof Walking Foot Quilting Designs" book.  I used the same technique last year on a baby quilt I made for a relative. 


The "binding" on this one was the backing turned to the front using a tool:  


"All In A Days Work"

Back in June, I had set up some hand work projects to work on while recovering from surgery.  I had started a wool piece that's been a "Hussy" (HSY = Haven't Started Yet) project for years.  

Well now it is finished:   The original penny rug pattern by Wooden Spool Designs was designed to finish about 16 inches in diameter.  For my project, I reduced that to 9 inches so it could be used as the header for a holder for my shopping list pads.  

Back in 2015 (which lets you know just how long this HSY has been hanging around!), I saw a similar penny rug design by Bonnie Sullivan called "Sunflower and Chickens".  I loved her idea to have some of the eggs on the tongues have "yolks" and decided to do that with mine as well.  And don't you just love when a plan comes together:  I had the absolutely perfect fabric in my stash to back it with:

I had always planned to make this penny rug design to hang in my kitchen because I have a few other chicken themed pieces in there and have long wanted to add more.  I have an old dry erase board for the grocery lists that has seen better days and I've been trying for a while to figure out a way to replace it.  Now I have it!  I'm thrilled to get this one done and put to use!


"The Purple Pineapple Mug Rug"

Ok, last but not least:  my best friend from high school is a grandma and faced with taking on the duties of homeschooling her kindergarten grandson.  He and her daughter live with her and her daughter works two jobs.  My friend works from home so it was easier for her to take on that task. 

 As have so many other parents during the pandemic, she is forced to learn how to manage her grandson's school days while juggling her own work.  It's an adjustment for everyone, particularly since it's the first structured school experience for her grandson.  From what she tells me, what they study in Kindergarten these days is way more advanced than it was in our day! 

Since she's working so hard to meet the challenges of teaching from home, I wanted to send her a little "pick me up".  I saw these at our local supermarket and just knew she'd love it!

Well, as a quilter if you send a mug, 'ya gotta send a mug rug right?  In a recent Skype chat with another friend of ours, she mentioned she liked purple so I rummaged through the stash and pulled as many purple fabrics as I could.  But what to make?  I've made a few mug rugs featuring inspirational panels from a June Tailor kit I have and still had some left so I started there.  

The kit has patterns to use with the panels but none would allow me to use as many fabrics as I wanted to, Lol!!  So I went looking for another design that could accommodate the panel AND a generous fabric pull.  As I was reading blogs,  I read about someone making a Pineapple quilt and I thought, that just might be the ticket!  Particularly since I knew I had this:  

Very early in my quilting journey, I wanted to make a Pineapple quilt.  Back then, most were patterned to be made by paper piecing the blocks.  I did start one using that method and quickly found that to be very tedious and that project is still a UFO (but will have its day in the sun again one day).

BTW, This pattern is in the June 2000 issue of QNM.

Eventually, I found out about the Pineapple Rule by the Possibilities/Great American Quilt Factory ladies Lynda Milligan and Nancy Smith.  The sales pitch was that you could make Pineapple blocks without having to paper piece them.  When I got the ruler, I immediately made a test block.  That "orphan block" eventually became a journal cover.

Unfortunately, I haven't used that tool since -- that is until now!  Their method uses 1-1/2" strips.  Normally the block would start with a 2-1/2" square but the June Tailor panel I was using is 4-1/2" square.  No matter, that just meant less rounds of strips to sew to get to the 12" finished size!  

I kept this one simple: I only had four light fabrics so used one in each of those rounds.  I placed the medium and dark fabrics scrappy throughout the block.  Then it was a simple pillow turn finish (no binding!)  and some simple stitch in the ditch and stitching down the center of the logs and it was ready to be mailed out!


I  still have two AQS BOM blocks to finish up for September and I had another BOM project I had hoped to work on.  I guess they will instead be early October projects!

Thursday, January 5, 2017

Catching Up On Quilt Labels - Part 2

With a little focus earlier in the week for the first two and some help from the Patchwork Times Quilt-A-Thon today for the rest, I got five of the eight labels I needed done for my Labels Pledge.

Flying For Cover

Quilt
 Label(s)

The bottom label is a transcription of a speech called "Lessons From Geese" given by Angeles Arien at the 1991 Organizational Development Network that was based on the work of Milton Olson.  I had come across it when I was making the quilt and immediately wanted to incorporate it into the label.  You can see the same article quoted in a blog post of the Distracted Quilter from back in 2011 (and my comment on her post shows you how long I've waited to make this label!). 

Lincoln/Obama Embroidery Update

This quilt was labeled when originally made (bottom label).  I took some more of the original label fabric and sewed on the second label for the update.
Brrr!

Label 

The label for Brrr! was foundation paper-pieced using Freezer Paper.  It's so much less tedious than regular paper-piecing because there's no paper to tear away.  The design is drawn on the paper side of the freezer paper.   The wrong side of the first piece of fabric is ironed to the waxy side of the template.  Each subsequent piece is then layered right sides together to the previous piece and you stitch along side the folded back section of your design.


The best part is that when you are done and pull the template away from the fabric, it is reusable! 

I had picked out this design back when I finished making the quilt top.  It is  #10 - Square In A Square from a great book called "Foundation -Pieced Quilt Labels" by Linda Causee (ASN 2001).   It was nice to take a look back through the book and note that this is the third label I've made from it.  I also used labels from this book for:

Bits 'N Pieces (2008)

Label #21- Chevrons:


I added the little silk flowers to hide the lousy job I did of turning the corners on the label binding.  Definitely a "design decision"!!

Label #12 - Flower Basket on the Alex's Baskets quilt (2009):


Edited To Add:  If you have access to a library of Quilters Newsletter Magazine back issues, there are some more paper-pieced label designs in an article titled "Easy Pieced Labels" in the January/February 2006 issue.

Now, getting back to the current label work:

Vintage Treasures

Label

This quilt was partially made from kits from a 2004 Joann's BOM (that story started here).  They offered a preprinted blank label but I never got that kit and since I had substituted one of the fabrics used in it anyway, I decided to make a label with my fabrics but using the same square-in-a-square design.  

I printed the label information out onto fabric when I had finished the top thinking that I would quilt it up quickly.  Unfortunately, that didn't happen until a year later so while I still used the label I had originally printed up, I did write in the actual finish date on it now as well.  I also added some of the extra clamshells I had leftover from the binding around it.

All Spruced Up

This was one case where I needed to make a label because I had cut a small hole in the backing (where the pin is) when I had trimmed the seams of the backing pieces and wanted to cover it up to protect the quilt.


I had originally planned to do a more elaborate pieced or picture label.  However, in the interest of getting this done quickly, this turned out to be the easiest label I did.  I decided to just take a piece of one of the fabrics leftover from the quilt, write the label information onto it and sew it on.


The fabric is a little dark so it was hard to get a good picture of the writing but it's there!

Now back to the grind.  I'm still trying to get used to quilting on my old machine again so I can finish the pieced picture Cardinals label I talked about in Part 1.  There are only two more labels in addition to that one that I have to finish to fulfill my pledge!

More Links For Label Ideas

Another good thing that came out of going through the label stuff I have is that I found some more interesting "links" that I had collected in the past about good label techniques.  When I find stuff on the web, I generally print it out and put it in books that I have that correspond to the information. 

So you can find out about doing a "Curved Bias Quilt Label" from Joanna at the Seams Likely blog here.


Note:  "Seams Likely" is her old blog, Joanna now blogs over at Joanna Masko Quilts.

Krista over at the popular Poppyprint blog did a post back in 2011 about:


.....which you can find here!

2/13/17 Updated To Add:

I came across another great article on creating labels by Maria Elkins titled:  Last But Not Least -- Label Your Quilt" that appeared in the November/December 2013 issue of Machine Quilting Unlimited magazine


In it she talks about what contact information to supply on your labels, offers great examples of decorative labels and discusses the Lost Quilt Come Home website she founded (a big reason why she is a proponent of labeling).   View the table of contents of the issue here and the back issue can be purchased  here

Another Update 3/2/17:  MQU has graciously provided a link to Maria's article on their website which you can pick up here:  http://machinequilting.mqumag.com/wp-content/uploads/2017/02/MQU-13-11-Nov-p14-18-Labels-Maria-Elkins.pdf !

3/2/23 Updated To Add:

Just found another fun way to create a label using scraps of the fabrics from your quilt.  Check out the end of  Pat's post over at her "Life in the Scrap Patch" blog where she explains how she makes these great signature block labels.