

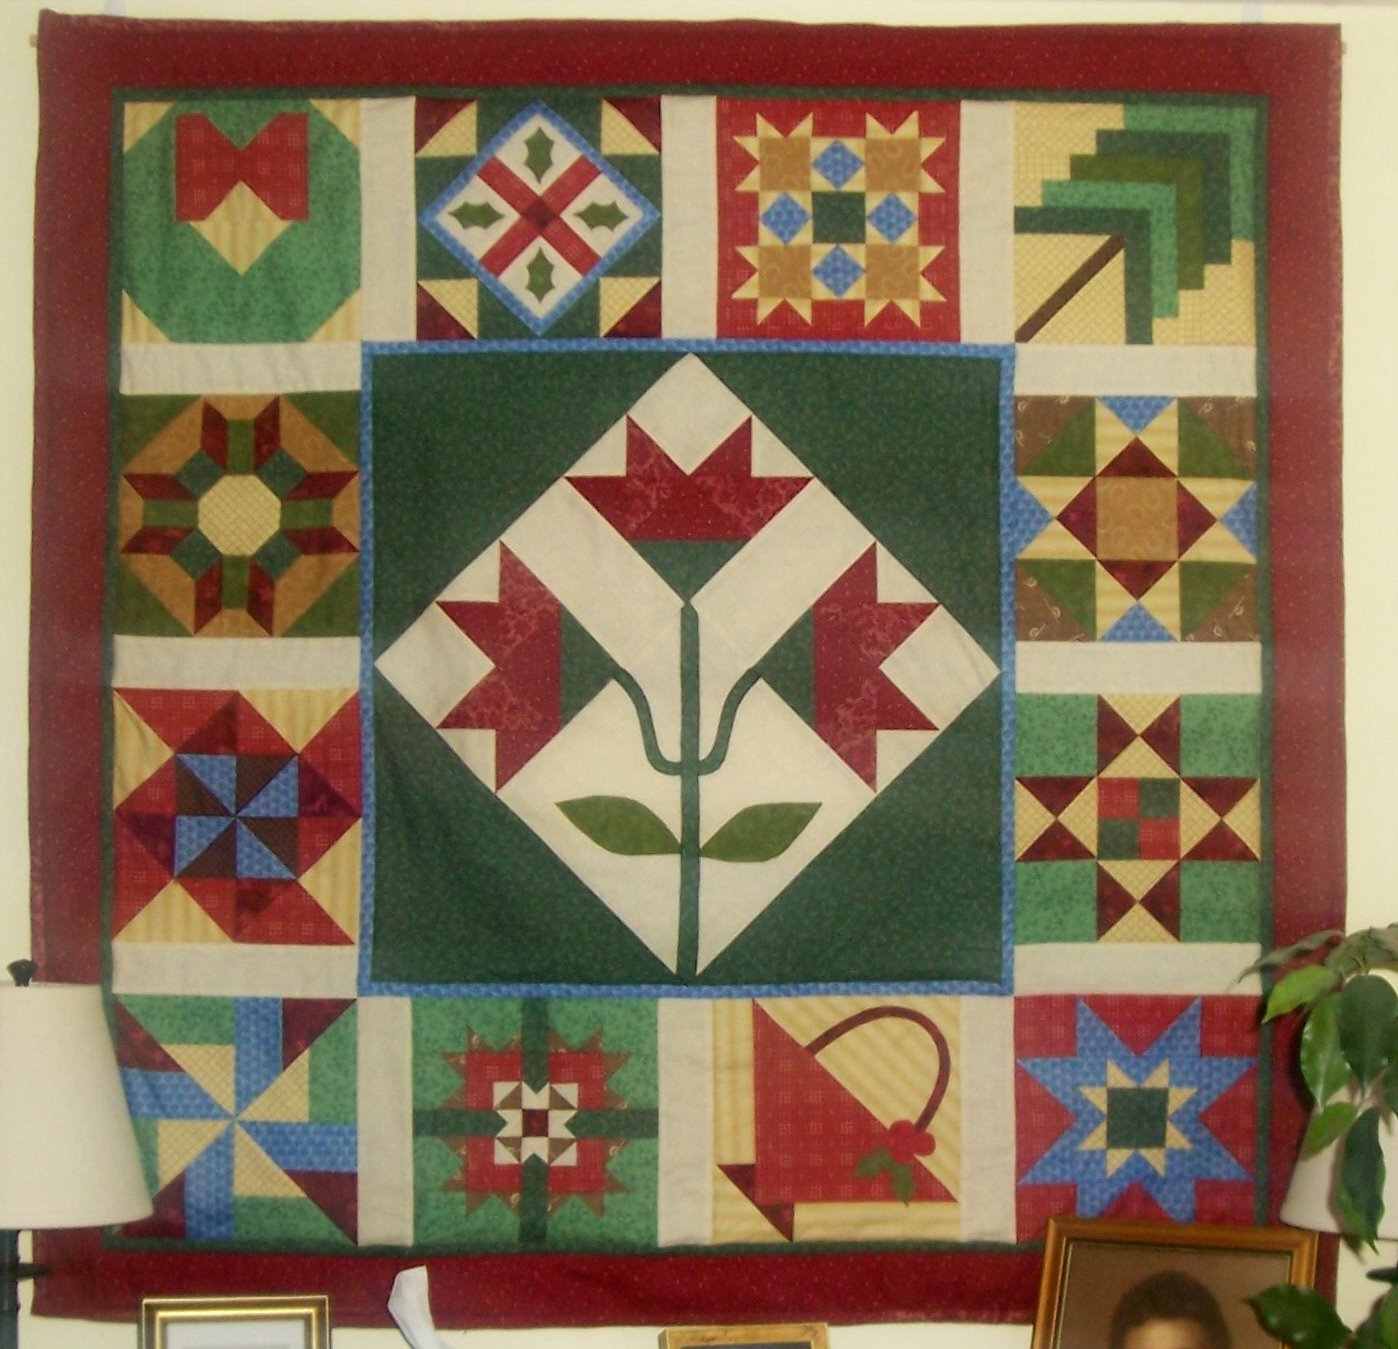
I finished piecing this back in March of last year but it has taken until now to finally finish the label for my "High Strung + 2" Christmas quilt. This journey started back in December of 2014 when I was able to get the book "Christmas at That Patchwork Place" (published in 2001). It was of interest to me for one big reason:

This is the "Cardinals" wall hanging by Deborah Moffett-Hall that is in the book. When I saw the Cardinals design in a "Stitch This!" blog post on the Martingale site at the end of 2014, I just knew I had to have the pattern because back in 2008 I had made this:

...another wall hanging also by Ms. Moffett-Hall which had appeared in the December 1997 (#298) issue of Quilters Newsletter magazine. That time, I had reduced the original by half (made the finished squares 1" instead of the patterned 2") and used it to make a label for this:
This was my first Christmas quilt, a free Block of the Month offered by Debbie Mumm in 2008.
After I got the book, I wondered how I wanted to make the pattern up. At the time, I had already started work on the "High Strung" quilt but it wasn't until I was finishing up the top in May 2015 and needed an idea for the label that I thought of this design. I decided it would be fun to "continue the tradition" of using Ms. Moffet-Hall's designs as a label for a Christmas quilt. Knowing I had plans to custom quilt the quilt because of all the applique on the front, I decided not to plan to piece it into the backing (which had not been purchased at that point). When I finished (hand) quilting the quilt in early 2016 and was finally ready to make the label, this time I didn't change the size of the finished piece because leaving it full size would help me solve a problem:
I bought the backing fabric for "High Strung" after I had to commit to hand quilting it (because both of my sewing machines went on the fritz) and with the idea that I'd be stitching the header area with a light gold thread. The thread I wound up getting and using was actually cream colored -- fine for the background I was stitching on but now not so great for the backing fabric I had chosen. So the label size was perfect for covering up (most of) the light stitches on the back!
Most of the fabrics used in the pieced picture came from my stash but some (the cardinal bodies, the gold border print and gold splattered label area) came from fabrics I won back in 2013 in a "de-stash" giveaway by Vicky who blogs at LA Quilter. The light green and gold print was purchased at last year's New Jersey Quilt Fest show (which is coming up again in March).
Construction of these pieced-picture designs are fairly simple: just follow a piecing chart and fill in squares, HSTs and "tipped" squares (squares with a smaller square sewn diagonally to form a triangle in the corner) in the appropriate color to create the picture. In the border, the design has appliqued "berries". Lucky for me, I was working on this right after I purchased my Accuquilt Go! machine so could make short work of the 35 (!) circles that needed to be cut to fill out the design. I was able to cut them with fusible web already attached to the fabric (and luckily I had just restocked some Lite Steam-A-Seam 2) which made it easy to position them and fuse them down before sewing around the edges.
I really expected to get to this during the year but it wasn't until December when I made the Label Pledge that I was finally motivated to make a push to finish this up. Unfortunately, just as I started stitching down the berries, my primary Janome machine malfunctioned (again). Fortunately, I had my Euro-Pro backup machine serviced over the summer so it was able to jump right in and pick up the slack.

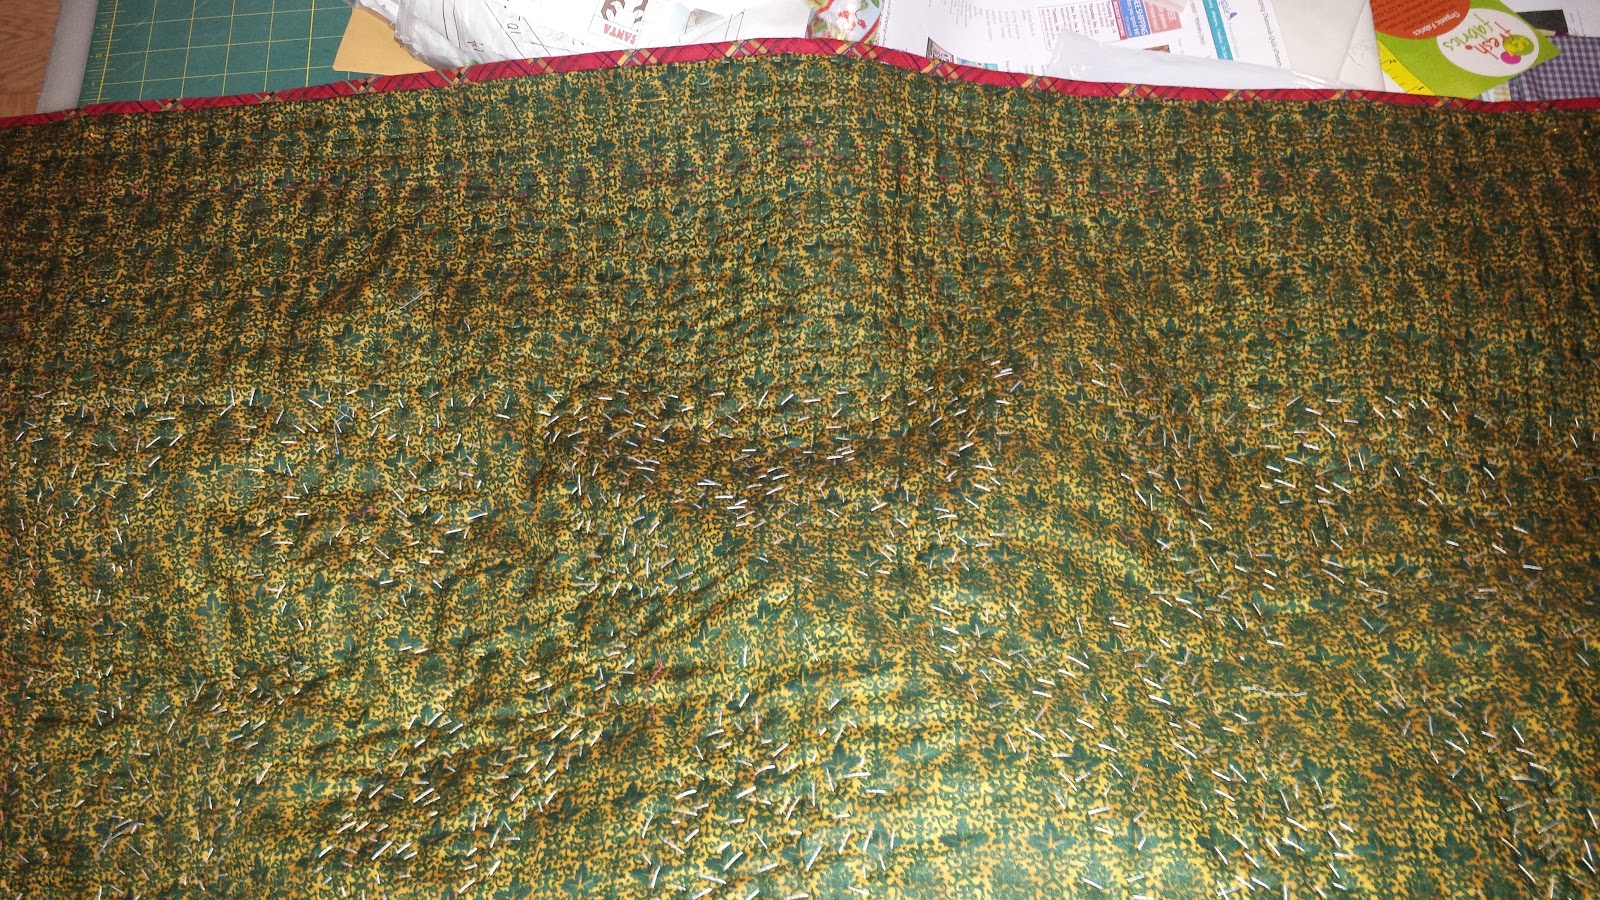
Then the issue was how to finish it. Just do a (pillow turn) facing with a backing fabric and sew it on? Add piping into the edge? Add binding? In the end, I decided that I wanted to quilt it. I had some of the binding fabric from the quilt leftover (and already cut) so figured I could finish the edges that way so it wouldn't even need the extra layer of a backing. Then was the challenge of "quilt whispering" (how to quilt it?). Even once I was ready for that, the next challenge was the fact that it's been years since I've free-motion quilted on my Euro-Pro and it took a while to get my muscle memory and coordination back and being able to stitch well on that machine. Maybe because I was stitching on batting only, I found I had to stitch at high speed with stitch length set to "0" and with the feed dogs up (which is what Leah Day does) to get half way decent stitch length control. I don't remember using the feed dogs up in the past with this machine but hey, whatever works!
 |
| The "back" after the quilting was finished. |
I admit, in the end this was a bit much to do for a label. In the future, I'll have to carefully consider whether I want to do a label as complex as this and see if there is a possibility of piecing it into the back before quilting the quilt rather than quilting the label separately.
The good news is that with this finished, every quilt I have made now has a label and I have fulfilled the pledge I took with the Quilt Alliance. There will be no anonymous quilts in my future (so it is written and so it shall be done)! Please do your descendants and future quilt historians a favor and do what you can to add a label to your quilt projects. The world should know that you are the astounding creator and craftsperson behind your wonderful quilt!


No comments:
Post a Comment