Sunday, November 24, 2024

Slow Sunday Stitching: Two Cross Stitch FFOs

It's been awhile since I've had something to share at Kathy's Quilts for the weekly "Slow Sunday Stitching" showcase!

In the last two weeks, I had two big cross stitch "Fully Finished" projects.  They were not big stitch designs in size per se, just big in my cross stitch heart!  First is that I made my first quilted project bag!

"Just Fudge It" Project Bag featuring Pat Sloan's "Sunday Drive"


While project bags are big in the quilt world, they are HUGE in the cross stitch world!  You can buy inexpensive vinyl bags for your projects but a lot of cross stitchers add to the fun by buying or making pretty fabric bags to hold their projects. 

Many CSers use bags where the fabrics used for it may coordinate to the theme of the piece they are stitching on: for example having a bag made up in Halloween fabric to hold a Halloween stitching project.  

I had resisted the urge to go there since I am trying (fairly unsuccessfully at this point) to keep my cross stitch projects to a minimum.  So I didn't mind the plain vinyl bags since I can reuse them for any project.  That said, I do admit to getting a variety of them, each with a different colored zipper and then have been known to coordinate THAT with the project in it, LOL!   

In this case though, making a bag was a chance to make and utilize a CS pattern I really liked.   As I have noted in previous posts about CS,  I am particularly fond of the "snarky" designs and had loved this one by Brenda Gervais of With Thy Needle and Thread.  I was then turbo charged to make it once I found one of Pat Sloan's older fabric lines while on a shop hop and realized that the fabric colors coordinated perfectly with the cross stitch piece.  Then I lucked up that the shop I had bookmarked as having the pattern had it on sale when I went to get it!  

At this point I couldn't "fudge" that "G" -- I had to "rip it"!!

Since this CS design spoke to an aspect of "the process" of doing cross stitch, I didn't mind creating a bag and putting it on it since it could be used for any project I might store in it.  An added bonus is that the theme of the fabric line will be really appropriate if I use this bag to carry projects in it while travelling. 

I have seen various tutorials for making project bags but in the end decided to make this one just like my favorite kinds of vinyl bags.  This one has two zippered sections because I like having a clear vinyl front pocket for storing the pattern and "in progress" piece and then a big top load pocket for all the project supplies and stitching notions.   The only thing I forgot to do was to add an additional divider inside the big pocket.  Oh well, something to consider for the next one!  

And now that I've opened that flood gate, I've since kitted up two more CS patterns to use to make two more bags!

This is one of them!

The other cross stitch "fully finish" is also another of my snarky projects:

Maker/Crafter/Badass

The pattern for this one was an impulse buy from back in September.  I fell in love with it when I saw a kit for it that included a frame.  However, when I realized I had most of the supplies for it and already knew a source for a frame that I've shopped with before, it immediately went on the "must make" list!  It was a pretty quick stitch and not too long after finishing it, I went on a Shop Hop and found the perfect fabric for a simple cross stitch backing finish.  


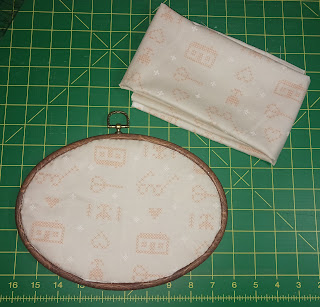
As I've done for other framed cross stitch pieces, I laced it around the frame before popping on the outer frame edge.  With it in place I then had to determine how much to draw up the backing fabric in order to hand stitch it in place so it fit snugly (if not terribly neatly) around the back.  

It remains how ironic it is to me that when I started quilting I swore I would do no hand work and yet every new thing I pick up related to quilting has pushed me in that direction!  Even better it is now hanging in place!

I have a few other stitched finishes that still need to be "fully finished" however at this point and I am not sure that will happen before the end of the year.  But two down still feels good!

Linking Up With Slow Sunday Stitching at Kathy's Quilts

Friday, November 22, 2024

Quiltville Mystery Season Starts TODAY!

It's that time of year again:  It's time for Bonnie Hunter's annual Quiltville mystery quilt!  This year's project is called "Old Town".

It is inspired by the sights and sounds of Krakow, Poland that Bonnie visited last year.   Even though the colors were inspired by her trip, as always you do not have to make your version in only those colors.  I always look forward to seeing how creative people get with their mystery color choices.  You can follow what other mystery quilters are doing on the Facebook page for the mystery here.

Bonnie will be leaving to travel to England on the Friday after Thanksgiving which is when the mystery season usually starts so she is posting the first part of it today.  If you haven't already done so, also pick up the Introduction post with the fabric requirements here.  

As Bonnie notes, be sure to pick up and download the mystery parts each week and save them to your computer or phone.  Once the mystery is completed in January, she will remove the instructions from her blog.  After the mystery is over, you can still get the full pattern by purchasing it in her Quiltville store when she releases it.  

As for me, my mystery season will be just like last year's:  I will be trying to finish up one of the tops I still have to quilt.  I've settled on finishing "En Provence".  I completed this top back in 2018.

Top

Prepped Backing

I had made up the backing back in January of last year so all that's left to do now is to layer it and do the "quilt whispering" to decide how to quilt it.  Not always an easy task for me, LOL!  However, I really want to be quilting my quilts more frequently in the coming year as I have a lot of accumulated tops and want to make space for all of the accumulated project kits I have set up.  Which brings to mind this hilarious "Bonnie-ism" I saw on Instagram:

Or at least I hope so!

I had originally planned to quilt up my "On Ringo Lake" mystery during this period because the colors of it are similar to what is being used for "Old Town".  

Top and Scrappy Backing

However, it has a scrappy back and I have some new quilt hangers that should arrive soon that I want to  try using.  I am trying to fix up my younger son's former bedroom into more of guest room rather than the junk depository storage space it's functioning as right now.  The hangers are made to be used with a hanging sleeve, something I don't typically add to my quilts.  It will be easier to blend a sleeve into the back of "En Provence" hence why it tops the finishing list this round!   

Are you participating in this year's mystery?  Have you done one of Bonnie's mysteries before?  They are a lot of fun and there is no pressure to get it done by the end of the mystery period.  Check it out as well as what everyone else is doing and consider joining in on the fun!  

Friday, November 1, 2024

Finished Or Not Friday: Spring Quilts and Gifts

This week I am once again joining in with those reporting their finishes along with our esteemed hostess Alycia for Finished or Not Friday!  

It's always interesting to me how projects get started or evolve.  This quilty finishing tale started back in 2014 when I made "Fabric Gal" to use to decorate my bed for Spring.  

In 2016, we gifted that quilt to my husband's convalescing aunt to brighten her hospital room.  Everyone that visited enjoyed the quilt and when she passed away we gave the quilt to her daughter.  Of course that meant I now needed another Spring quilt.  

In 2017, I purchased a "juicy" bright fabric bundle from the Turning Twenty online store.  Since this was not the usual kind of colorway I worked with, I did not immediately come up with a design to make with it.  In fact, that didn't happen until 2020 while we were stuck in our homes due to the COVID quarantine.  

We quilters were fortunate that so many quilt designers came up with new designs and quilt alongs to keep us busy while under lock down.  That year Gudrun Erla of GE Designs held a free quilt along for her new pattern "Elvira".  I was excited to participate as it also meant using my favorite Stripology ruler.  I added fabric to the bundle I had purchased to fill out the amount of fabric I needed for the project....

....then followed along and made up the top.

However with loads of other quarantine projects afoot, it sat while I debated on how to quilt it up.  

In 2023 and still without a Spring quilt for my bed,  I found in my stash what I thought was a yard of the Peach floral fabric I had used for the borders of the "Fabric Gal" quilt.  By now I was a big fan of the Fabric Cafe "3 Yard Quilts" and saw this as an opportunity to make one.  I purchased some coordinating fabrics to go with what I had and took it with me down to my MIL's in North Carolina for our annual Fall visit and mini Quilt Retreat (she is also a quilter).  

When I started cutting the fabric for the pattern I picked for it -- "Heartland" -- I realized I actually had a little more than two yards of that border fabric.  I decided that rather than make the lap size quilt that the 3 Yard patterns typically make, I could "upsize" it to a twin if I could get more of the coordinates.  I was able to find one while in NC but had to wait until I returned home to NY to get more of the second.  Before long I had doubled the basic design into a twin top!

Finished top and backing purchased on a Shop Hop while in NC.

When I didn't get around to quilting it by the end of that year,  I planned to bring it back down to my MIL's and try to quilt it on her new long arm.  We returned in May of this year for the funeral of another of her sisters.  While there I did load the quilt onto the longarm but for reasons I didn't understand at the time, I couldn't get the pattern I wanted to stitch out.  

While there, I was showing a friend of my MIL a picture of the "Elvira" top that "Heartland" was now replacing.  She really liked the bright colors of it and since she was in the process of finalizing a move to retire to my MIL's town, I decided that I would bring it back down when we returned to visit in the Fall and quilt it up as a surprise housewarming gift for her.  

In the meantime, after returning back home with the unquilted "Heartland" top, I lucked up on receiving information about a "Free Motion Quilting Summit" being held in August.  Adria Goode who was one of the presenters showed her "Big Flower" stitch pattern and I just knew it would work for "Heartland".  With many other projects on my plate, I didn't start quilting it until late September, getting it about half way done.  

I had to break from working on it because we were now scheduled to return to my MIL's in early October.  While there I finally got the "Elvira" quilting going.  I pieced together a backing that included a strip of scraps leftover from piecing the top and included a label.  I then picked out a large continuous line flower stitch pattern to use to quilt it.

I went with the simpler Blossom E2E pattern.

Luckily with a lot of new lessons learned on this trip about working with the longarm,  I was able to get it it all stitched out!

And before you know it the quilt was finished!

Two days before we left I trimmed and bound it and it was ready for gifting along with another little gift that can be seen in this post!


On our return home it was now time to also get the "Heartland" quilt finished.  I worked on that this week and now it too is finished!  


As a throw back to the "Fabric Gal" quilt, I still had some of the panel fabric I used for the label of that quilt so made a similar label for the new "Heartland" one! 

Previous and New Labels!

I look forward to when I can use this one in the Spring!

I also look forward to checking out what everyone else has made up this week over at Alycia's for Finished or Not Friday!  There's always good stuff to see so be sure to check it out yourself!

Thursday, October 31, 2024

Quilting Travelogue - Part 2: Long Arm Quilting and a Gift

I my last post I talked about the piecing, cross stitching and shop hopping I did on our recent visit to my MIL in North Carolina.  In this post, I'll cover the quilt stitching I did and who benefitted from it!

(Long Arm) Quilting

One of the big plans for this trip to was to try to get a lot of quilts quilted.  On the one hand, it was a mixed bag on that.  I had brought one that had already been partially quilted on my Juki and I wanted to finish it to show my MIL how that machine stitches as a mid-arm DSM.

That folded bit of Kente is the layered quilt as I stacked up what I was going to bring.

This is one of the potential gifts for my community garden's Steering Committee members.  I'm not sure why I didn't finish quilting this when I worked on it last year --- I think I got "into my head" on the stitching and then put it aside.  

I was encouraged to get back to it after seeing the same stitch pattern I used demonstrated in one of the sessions I watched during the Free Motion Quilting Summit in August.  I realized that whatever had bugged me was now moot.  Unfortunately, this is another thing that we were too busy with other things for me to get to.  My plans are to try to finish this one up before the year ends.

I will say that I DID make a lot of progress on longarming!  I really learned a lot on this trip and most of that education came as we went about solving problems!  As a result, I think I now fully understand (and remember!) the steps to load a quilt on to the frame.  

The store that my MIL purchased her longarm from was on the Shop Hop and we stopped there so she could buy some "leader grips". 

You can see a demo of how they work in this video.

They really do help make loading faster as opposed to pinning your backing and top to the frame leaders.  The woman in the store advised getting a two-leader set but after trying them out we realized that a three leader set would have been better. 

I also confirmed what I needed to do to set up a stitch pattern.  It's important to keep whatever pattern I choose (and re-size) within the longarm's "frame space"  which is approximately equivalent to the depth of the throat space.  I also took pictures of all the pattern screens so I can plan before I arrive how I want to set up a quilt to be quilted.

This is just some of the installed designs.

The best news is that a long over due UFO got not only quilted but gifted!  My MIL has a good friend and former co-worker who has retired from New York to North Carolina and now lives in my MIL's town.  I had taught them both to quilt when both were still in NY.  The friend and her sister who was visiting her also came with us on the Shop Hop, a first for both!  

I had shown her a picture of this quilt top when we were both in NC back in May for my MIL's sister's funeral:


When she mentioned that she really, really liked it, I decided right then to gift it to her as a surprise housewarming gift.  This is the "Elvira" top I had made during Gudrun Erla's first Quarantine Quilt Along back in 2020.  Thanks to all the good lessons I learned this trip, I was able to successfully quilt this one on the longarm without too many problems. 

I'll do a full finish report on it tomorrow since there were a few more lessons learned both during and after it was quilted.  Like the fact that I didn't learn until after it was finished that I actually loaded it onto the frame wrong!  Although this is the shot of it fresh off the longarm, before we left it was also trimmed, bound and gifted.  

In my previous post, I noted that I had done some additional piecing and that was for another gift -- this time to christen the friend's new craft room in her new home.

This is a "Sewing Fairy" made from the pattern by Deborah Fisher of Fish Museum and Circus.  I learned about Deborah's designs when she was one of the presenters at July's Quilt Summer Camp.  Her session at Camp was on decorative "fussy cut" binding.  She has designed fabric lines for Windham Fabrics that are printed to facilitate the technique.  I purchased some of it from her after the Camp which is when I also saw her "Fairy" pattern.  Knowing that I planned to make a quilt housewarming gift, I figured a "Fairy" stuffed with little quilty notions would be a cool "new craft studio" gift as well!

 After "Elvira", we loaded my MIL's "Monochromatic Quilt" that was a guild challenge project and also finished that one.  


I did bring a second quilt for longarming.  Now that I know a little more about how to set up the patterns for stitching out, I also understand better how to position them on the quilt top.  I picked out the designs I wanted to use for that quilt and figured out where I wanted to position them on the top.  However, understanding that I needed to do that within the limits of the longarm's throat space, it meant I would need to stitch out the patterns in sections.  That was too big a task to try to tackle in the last day we were there.  So, yet another project is now packed away for the next trip down.  Whew!  Those two weeks went so quick when you have so much to do!

Wednesday, October 30, 2024

Quilting Travelogue - Part 1: Piecing, Shop Hop and Cross Stitch

We came back from visiting my MIL in North Carolina last week right into another busy week at home!  My community garden was scheduled to host the annual Fall visit of the Fifth Grade from one of the local elementary schools.  So that meant going in the day before to set up for the visit and back in the next day for their visit.  Then on the following day, staff and volunteers from Bronx Green-up, the community garden outreach program of the New York Botanical Garden came to help us get more of our new garden bed builds built and in place.  We've gotten a lot done since the start of the season back in March!

Then and Now!

After that I needed to recoup from the hard work of the garden days, do some food shopping for the house and follow up with relatives regarding our return which all managed to kill the rest of the week.  

Over the weekend I did pull out a few of the things from the trip and ordered a few things in follow-up to projects or purchases from the trip.  After a few appointments to start off this week,  I am finally, slowly getting back to what I had been working on before I left! 

The trip itself was also busy but very productive.   Here's what I did while we were away:

Piecing

I finished up my "Rainbow Log Cabin Heart" blocks.  These had been started to participate in the Rainbow Scrap Challenge all the way back in 2021.  I had brought with me the blocks sets for the Turquoise, Orange, Red-Purple, Black and Grey blocks that had been on my design wall since the Summer:

Those done, I realized I needed one more block for the layout.  I had considered a number of options but decided to raid my MIL's scrap stash and made a Brown block:

I also came up with an idea for what to do for the alternate squares so will try to work on that now that I am back home.

My "leader/ender" project for this trip was to start my blocks for Bonnie Hunter's "Shoo Fly Shoo".  This was her annual Leader/Ender project from back in 2019 and I got a few done while making the "Heart" blocks.  

I had liked Bonnie's quilt that was made up of "oodles of blocks" but this past weekend I spied a pattern at Quilting Daily  (they are having a $5 sale until 10/31) that I might prefer to do:

I like this one because it would mean making a whole lot less of the "Shoo Fly" blocks!  After finishing up the "Scrap Vortex" top back in March (and the backing for it is one of the post-trip purchases), I really wanted to continue working down my "string scraps stash" and this would give me another opportunity to use some of them.  Additionally, I've always wanted to make one of these string pieced Lone Stars which would then use up even more strings.  So I think I see a project-pivot developing!    

I did do another bit of piecing but will talk about that when I report on the "Quilting" portion of the trip.

Shop Hopping

We almost completed the whole East Central Region of the All Carolina's Shop Hop.  I've still got to mail in my Hop "Passport" so I can be entered in to win some prizes.  My MIL won a fabric bundle last year after submitting hers!  

We didn't find out until right before we went down that Rocky Mount in North Carolina where my MIL lives also got hit by a tornado during the Hurricane Helene storm period.  The damage while intense wherever it did touch down was no where near what was suffered in Ashville in the Western part of the state.  I was sorry to learn that many of the quilt shops in that area, a few of which I had visited in 2022 while camping along the Blue Ridge Parkway, were greatly impacted by the storm.  

Needless to say I picked up a lot of goodies and we went to three stores I hadn't been to before.  One of them was a store recently opened by a woman I discovered when I attended the virtual Summer Quilt Camp back in July.  

My MIL and I both purchased fabrics to make up the bag patterned in this year's issue of the Hop magazine.  

My MIL plans to make hers out of the fabric designed for last year's Hop.  She already had a few pieces in her stash and found additional prints while we shopped this year.  Mine will be made out of the ones for this year which I purchased while Hopping.  However, neither of us will be making them using the fabrics the same way as patterned in the magazine!  We never got around to working on that project so I'll be keeping this packed up for our next trip back down which is tentatively scheduled for February.    

I had also made this pop-up bin to pack in the bag with my Juki sewing machine prior to us leaving on this trip.

When I visit my MIL,  I set up a little sewing station and wanted to have a handy trash can to use when I come.  I also had brought down my Featherweight machine with me because there was talk of us doing a "Sit-'N-Stitch" session with some other quilters.  I had purchased two of the pop up frames so I could also make one while there to put in my Featherweight travel bag.  

When my MIL saw the first one she immediately wanted to also make one and ordered a frame.  I had one red and black Fat Quarter for the second bin and the plan was to find three more plus fabric for the lining while on the Shop Hop.  However, I only found the lining and two more fabrics I liked for the exterior.  Ultimately, I decided that one of them wouldn't be used to make the can.  Instead I purchased enough yardage of that print as well as another one to go with a panel I already have in my stash.  

And hopefully one day this will become another holiday quilt!

It all worked out since we weren't able to do the quilting get together after all.  I brought the extra frame back home and have since ordered yet another a print that I will use for the whole exterior along with the lining purchased on the Hop.  Since this was another of the projects we wound up not having time to work on, it too will travel back down for the next trip. 

Cross Stitch   

While away, I also got some cross stitching done.  I had taken a few projects with me both to work on while there and during the drive down and back:

Before and a finished After!

These two also traveled down with me....

One was finished and one moved forward!

In my last post, I mentioned that I had finished my latest "snarky" cross stitch piece and hoped to "fully finish" it when I returned.  The good news is I found a great backing print for it on the Shop Hop!

So I am hoping in the days to come to "fully finish" it and get it hung up!

In the next post I'll discuss the quilting part of the trip and a big project that I moved off of my quilty "To Do" list! 

Tuesday, October 1, 2024

September Recap: A Lot of Life and Finally A Lot of Quilt Stitching!

Unlike the Summer months, September started off with a lot more "life stuff" than quilting stuff. 

Life:  Travel and Gardening 

For the Labor Day Weekend, my DH and I went camping with some of his co-workers to Watkins Glen State Park here in New York.  It is known for its gorge and waterfalls! 

Click on the pictures to enlarge them.

One of my husband's co-workers is a Nascar fan so we also checked out the race track in the area.

We got to watch cars run the track and then visitors got to bring their personal cars onto the track and drive a few of laps around it! 

On this trip, for the drive up and back and for sitting around the campfire, I brought my "Open Your Heart" cross stitch project with me.  When we got back home I continued working on it and got another page of it completed! 

The left side of this is what I worked on. 

In our community garden, the new beds are still under construction.  

My husband and I had demo'd our old bed back in May and I had to move whatever we had in the bed into Grow Bags and keep them on our terrace until we had a bed again.  Then in June we were assigned one of the beds that had been renovated last year since the members who had that bed are no longer using it (although they are still members of our garden).

I returned the pots of mint and the Swiss Chard plants I had salvaged from our old bed although the garlic starts I had planted last Fall didn't survive the move.  I planted a new Collard start that settled in well and we were able to harvest some which we cooked for one of the meals on our camping trip.  I had also seeded a bunch of tomato plants but admit it was a bit too late of a start for those.  I also didn't go over to the garden much due to the very hot Summer weather so only two plants grew enough to fruit and ultimately neither yielded much.    

Determined to do better for the Fall, I watched videos of some of my favorite gardeners on "You Tube University" for tips on what to plant in August but then never got that done.  So I watched what to plant in September and finally got a late start on that during the second and third week of the month.   Luckily, at this point things are starting to sprout so I'll see how it goes as the Fall progresses into Winter.  

Finally A Finish!

As I had talked about in Part 1 of my July Recap, this was the month I finally quilted my "Apple Crisp" project that I started back in June. 

The full finish report is here.

 More Cross Stitch

Cross stitch is slowly but surely becoming the kind of obsession for me that quilting is, LOL!  Despite having "Open Your Heart",  two "Christmas In July" starts and the Summer Camp project going,  I started yet another new cross stitch project!   

If you've read my cross stitch posts, you know I love "snarky" cross stitch designs.  I also love that crafting (either cross stitch or quilting) helps with decorating.  I've had an area on one of my dining room walls that I've long wanted to fill.  I have plans for a mini quilt for it but had also thought about adding cross stitch to the space. Then I saw this kit and had to have it:

However, at almost $35 it was expensive for an impulse buy!  However, I realized that a lot of what was in the kit I already had in the house.  The only thing I needed to purchase was the pattern and frame.  Fortunately, the pattern was available on Etsy.  The frame looked like the ones I have purchased before: 

Sure enough it was and I ordered it, bringing the total cost of the supplies down to $13!  Score!  This turned out to be a relatively quick stitch for me and I got it done in about a week.  In order to prep it for framing,  I realized that a Gadget Fanatic opportunity also presented itself:
I'd long wanted this ruler because the pattern seen here and purchased back in 2021 needed it.  Well now I can justify the ruler purchase, LOL!  Once the cross stitch piece has been washed and cut with the ruler, it'll be ready for framing and hanging!

Pat Sloan Quilt Alongs

This month I started following two of Pat Sloan's quilt alongs.  The first is one I am actively participating in: her  "Ode To Our National Parks" Block Wednesday quilt along.  This is the first time I've been ready to participate in one of her quilt alongs while it is actively going on!  This was partially due to the fact that I knew right away what I wanted to use for it and already knew where to find them.  

I had become familiar with what was offered in Riley Blake's National Parks fabric line when I had shopped for a panel to make a quilt that will chronicle our own National Park journey.  So I mapped out which prints and colors I wanted to stash.  This is what I got:

I'll also be adding some "Grunge" and "Freckles" tone-on-tones to the mix.  One of the prints I wanted to get was the black one in the middle which was on sale at Missouri Star Quilt Co.  Ordering that gave me the opportunity to add something else to the order I had long wanted to buy:

I needed these for the other Pat Sloan project I am following!  Pat has been doing another quilt along for the "Piece and Quilt Sampler" from the book "Celebrate With Quilts" by Lissa Alexander and Susan Ache.  She is using fabrics designed by Joanna Figueroa of Fig Tree Quilts for that.  Rather than doing the sampler, I decided that when she worked on hers I'd work on catching up on my "Scrappy Figs" project.  

I was inspired to make that project when Pat made Joanna's "Christmas Figs" sampler back in 2018.  I started on this project as a self-directed BOM in 2020.  I had made a few more blocks for it back in January when the project came up on my APQ UFO Challenge list.  Now Pat can help me move it further along!  

However, one issue I've had as I have stashed Fig Tree fabrics for this project is storage.  Until now I had used this bag...

...but it was getting difficult to keep the fabric organized and to easily see what I had.  I had seen the MSQC bags earlier this year and figured they might help corral the stash.  Since I was ordering the National Park fabric (and admittedly a few other things during their Labor Day Weekend sale), I decided to also get the bags.  What's lovely is now my Fig Tree stash is neatly stored and visible!

Admittedly though while I did the cutting for one block and pulled stash for another, I didn't get to sew them up.  Sigh!  Oh well, when Pat works on this next month I'll be ahead!   

Quilt Stitching On National "Sew A Jelly Roll" Day 2024

When I saw announcements early in the third week that it was once again time for "Sew A Jelly Roll Day", I decided it was the perfect opportunity for me to continue what I'd been doing!

The term "Jelly Roll" when referring to a rolled up bundle of 2-1/2 inch precut strips was coined by the MODA Fabrics company so they take the lead on promoting this quilty holiday.   Each year they also offer fun free patterns to get your quilt along motors running!  However, all of the quilting fabric industry has enthusiastically embraced this pre-cut which can be also found under names like Rolie Polies, Maple Rolls, Roll Ups, Pixie-Strips or Bali Snaps.  So you can celebrate the day with strips no matter what they are called!

I did so last year with a kit bundled with strips from Windham Fabrics "Gala" line in order to make a quilt I'd wanted to make for years:  Bonnie Sullivan's "Over and Down Under" quilt.  

Last year I spent Jelly Roll Day cutting and piecing the parts and then finished putting the top together about a week later. I had started quilting it right after that but ran into some snags.  My then relatively new Juki 2010Q didn't seem to like the monofilament thread I was stitching with and broke constantly.  Also I had wanted to outline stitch along the "woven look" strips and my Juki walking foot didn't have a guide bar so I had to tape off the rows and columns adding considerable time to the process.  As a result I wound up setting the project aside partially quilted in order to move on to other projects.

Since that time, I've discovered some things that have helped address those problems.  I learned there actually is a guide bar contraption that can be attached to the Juki walking foot and got that.  

I also picked up some tips about working with monofilament during the virtual "Free Motion Quilting Summit" I viewed in August.  The other good news about this project is that since I am currently participating in Pat's "National Park" quilt along, I'd love to finish this quilt during that series for this reason:

I had purchased this Riley Blake Pillow Panels yardage to insert into the back of this quilt for two reasons:  the colors went so well with the strips from "Gala" and I had started the quilt right before my DH and I took a camping trip to the Great Smoky Mountains National Park. 

I had actually hoped to finish the quilt to take with us on that trip but that didn't happen.  We were supposed to go back to the park again this year but we've been so busy with other trips that we did not start the planning for it until late.  By that time there was so much news of increased Bear activity and wildfires in the park that we decided to hold off and do the trip another time.  Good thing we did too since now there's the issue of the hurricane storm damage in that area.  Now that this quilt is a little closer to being finished, one day it may still get to the park!!

So for this year's Jelly Roll Day, I was able to move the quilting on it a little further along which encouraged me to continue stitching on it until it is complete.  It was also great to find another way to enjoy this quilty celebration whether you are able to work on an old or new project!   At this point I am about three-quarters of the way through on finishing the quilting up.  

Unfortunately, I will have to break off from it to work on a deadline project but will probably finish it up when we come back from North Carolina later this month.  

Last Stitching Project:  Heartland

In my August Recap post, I talked about finding inspiration for free-motioning a Fabric Cafe 3 Yard Quilt design that I had made the top for last year.  I had tried to longarm it at my MIL's earlier this year but couldn't get the machine to stitch out the pattern I wanted.  Armed with a design learned in the "Free Motion Quilting Summit",  I've got this one about half way done too!


As with the "Over/Under" quilt, this one will now have to wait until we return from our upcoming trip down South to be completed.  

Lastly, Another Big Quilting Industry Loss

This month I also learned of another loss to the quilting industry.  On Kimberly Jolly's Jelly Roll Day live stream, she mentioned that Daniela Stout of  Cozy Quilt Designs had passed.

I have many of Daniella patterns but admit I haven't made any yet.  Interestingly, Kimberly noted that while Moda gave the name to Jelly Rolls, it was Daniella who started the whole thing about cutting and using 2-1/2" strip cuts for workshops in her store!  Then eventually the quilting fabric industry picked up on the idea of adding strip pre-cuts to their fabric line offerings.  Once again another huge light in the industry has gone out and she will be missed!

Now that I'm all caught up, hopefully I can keep up to date on posting the progress of projects as we zoom towards the final quarter of the year!