
It's time for "Finished Or Not Friday" but I also need to shout a big "Whoop Whoop"! Why is it the supposedly "easy" ones that give you the most trouble?

I my last post, I was here with this project:
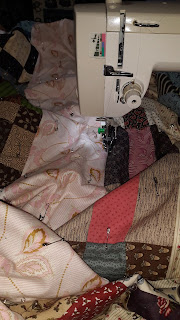
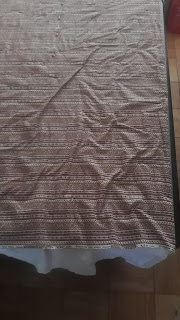
Then earlier this week, I finally got to here:
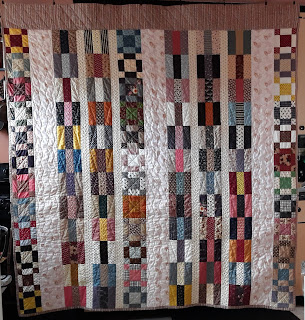
The quilt I call my "Civil War Strippie" is D-O-N-E! This was a squirrel moment project that started back in September because I've been obsessed with Edyta Sitar's Laundry Basket Quilts designs since last year's pandemic. This one is her quilt design called "Cinnamon Stix". I've also made these:
 |
| "California" 2020 Mystery Quilt (top), "Lidia", "Snow Day" |
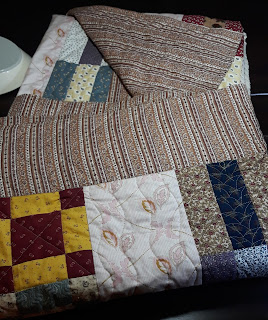
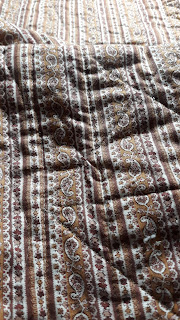
"The CW Strippie" is a queen topper made up of simple Uneven Nine Patches and Rail Fence blocks with wide and narrow sashing strips between them. I saw the design and loved it! Then I saw the brown stripe (with enough for the back too!) and the coordinating large pink leaf print and thought this would be an easy, quick quilt to make to use up more of my Civil War repro stash. So of course the piecing took many more weeks than I thought (helped by the fact that I was working on multiple other projects at the same time).
When I finally had the top done in mid-October, I thought I'd baste it quick and quilt it even quicker when we returned from a trip at the end of that month. Yeah right! I didn't start the basting until late in November (those other projects again) and spent almost three weeks pinning and re-pinning when the continuous border/backing I decided to use would just not lay flat!
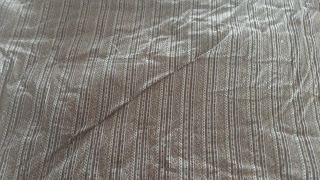
The fabric I had purchased was pre-washed and I had decided that rather than piecing a separate front top border and backing, I would leave it as one continuous piece. I won't do that again! Fortunately, after starching the backing and re-pinning it again, I managed to get it smooth enough to start the quilting. In fact, I only managed to pick up one very small tuck in all of the back quilting, not bad considering where I started with this.
 |
| And fortunately it is hard to find in the sea of brown stripe! |
At this point, it's time to talk about the quilting, so I'm also joining in with the "FMQ Mavericks" over at Muv and Andree's at Lizzie Lenard Vintage Sewing!
I had come up with what I thought was a simple quilting scheme about mid-way through making the top. I used my usual threads too: for pretty much all of my CW projects, Aurifil #5011 blends in perfectly for the lighter fabrics (and was used here across the whole top) and #2370 for the darker ones (used here for the back and "binding"). I am still trying to get back to the comfort level I once had when it comes to free-motion quilting. I figured I'd employ some help to get there:
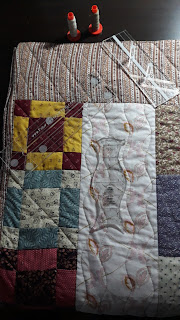
I used the "Line Tamer" straight-line ruler with the channel when I needed to make sure I hit the corner block intersections when stitching across the Uneven Nine Patches and the side rails of the Rail Fence blocks. After trying free-form waves on a quilt earlier this year, I decided to get some rulers for those times when I need the waves to be even and precise. I used Angela Walters "Elvira" ruler to stitch them over the wide pink sashing. For the grid quilting in the top "border", I used a regular straight-line ruler by Accents In Design which I've had for years (this is the only link I could find to one and here is a great review of it). It has markings that allowed me to evenly space the grid lines without having to mark the lines in advance.
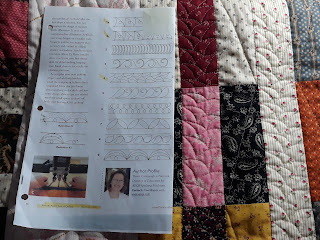
In the centers of the Rail Fence blocks and the narrow tan and pink sashing, I relied on a narrow fill stitch (#4 in the picture above) that I've used before and love. Dawn Cavanaugh wrote about them in the article "Bitty Border Quilting Ideas" in the March/April 2012 issue of Fons & Porter's Love of Quilting.
Edited To Add: Good news! If you don't want to buy the whole magazine, APQS has posted a copy of that same article which you can pick up here.
The rulers both helped and didn't: it took a bit to get the stitching smooth especially when I was trying to stitch backwards from the bottom of a column back to the top. There is also something to be said for taking breaks. At least two times after struggling with lots of thread breakage, I came back to it the next day and it was smooth as silk. Go figure!
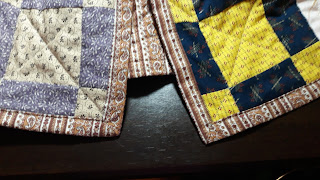
Once the quilting was finally done, the finish for this was simple: backing turned to the front using the Quick Easy Mitered Binding Tool as always when I do this kind of "binding" and then machine stitching it down.
This was at the top of my WIPS-Be Gone list for this quarter as I considered it the closest to being finished. I am glad to see it done and I think I'll take one more "Whoop!" before moving on!
Linking up with:
Alycia at Alycia Quilts for "Finished Or Not Friday"
Sarah at Confessions of a Fabric Addict for "Can I Get a Whoop Whoop?"
Muv and Andree at Lizzie Lenard Vintage Sewing for "Free Motion Mavericks"


5 comments:
Congratulations on finishing it! It is always a nice feeling to cross something off the list.
I like that spiky "No. 4" filler you used on the narrow strips. I might have to try that some time myself.
Great scrappy finish for the year.
Oh Heck ya!! I would be whooping from the roof!! this one just wanted to challenge you and see if you *reaaallllyyyyy* wanted to be a quilter!! and you conquered!! its Beautiful!!!!
What a great finish!
The video was helpful - who knew that I needed that ruler, those scissors and that special foot for doing a mini-zigzag? :-)
Hello Vivian
I absolutely love your scrappy quilt, such great fabrics, and what a lovely way to end the year! It sounds as though you had quite a tussle with the quilting - you must be so pleased it's all over.
Thank you for linking up with Free Motion Mavericks - your quilt is this week's featured project!
Love, Muv
Post a Comment