Saturday, September 28, 2024

July Recap: Part 1 - A lot of FMQ Plans and Summer Camp

All the FMQ Stitching Plans

July began with a project teased in June:  

With an upcoming Angela Walters "How Do I Quilt It" Free-Motion Quilting Challenge I was pushed to start Apple Crisp,  a project which I had long wanted to do (the link is to the free pattern).

This is a picture as it originally appeared in the Oct 2010 APQ issue.

I spent the end of June and the first half of July piecing the blocks for the project.  I changed the patterned blocks in it from eight inch to six inch so I could use my Accuquilt Snowball block die to make the cutting and sewing easier.  

Trying to meet the deadline, I even pieced some of the blocks while away on a camping trip!

During the FMQ Challenge,  Angela was going to discuss stitching patterns that could be used to fill Chevron, Snowball, Log Cabin and Curved blocks and Applique borders.  

She covered Snowball blocks in the second week of the challenge.  I watched that episode and for the first time watching one of her challenges, I did not immediately get ideas for how to stitch my top.  However, as I looked beyond the stitching she did in the blocks, I did find ideas for filling other spaces in my top.  That combined with some of my own ideas led to what I used to eventually finish this one up.  

Since I spent most of August trying to come up with a definite stitch plan, I didn't actually get to layering this until the start of September.  It is now done and you can read about how it finished up here.

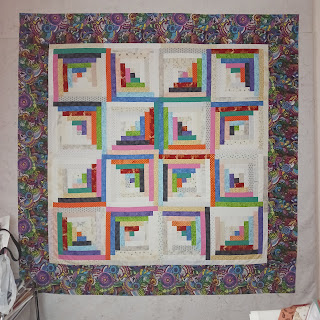
Since the Challenge also covered Log Cabin blocks, that encouraged me to also pull out the Rainbow Log Cabin top I finished back in 2023.  I was hoping I could keep up the quilt stitching momentum and get another UFO completed. 

However I had the same problem with the Log Cabin stitch patterns from the challenge:  she showed some great designs but none I really liked for my top.  Then just like for "Crisp",  I did take one cue from how she stitched the dark side of one of the blocks she demo'd and figured I could combine it with another simple plan on the light areas.  Angela had also suggested just using filler designs to stitch some blocks and that was something else I decided I could accept for doing the stitching on this project.  

However, I never did get around to actually layering or quilting that top because of road blocks I had hit with deciding on the final combination of stitch patterns to use on "Apple Crisp" which I considered my first priority.

Summer Quilt Camp

In mid-July, I participated in a series of workshops called "Quilt 2024: Summer Camp" which has now been renamed Quilt and Learn.  For this event, you could sign up for free to watch five days of workshops.  There was also an option to pay $20 to get an extra week of access to all of them or $49 for six months access.  Here is a list of the workshops presented:

Click on the picture to enlarge.

There were a lot of great workshops covering a range of creative techniques and the majority of the instructors were new to me.  This is the first time I had done something like this and I am looking forward to participating in it when they run it again in January 2025.

In addition to all the FMQ planning, I also did a lot of "Christmas in July" stitching but I will talk about that in the next post!

Friday, September 27, 2024

Quilt Stitching Inspiration Finally Leads To A Finished Quilt

Whew, it's been a while since I've checked in!  It's been a busy summer and I will be posting recaps of all that has been going on quilt-wise.  However in recent weeks I have also been trying to focus on getting some finishes done.  So for starers, I'll debut the first one this week over at Alycia's Finished Or Not Friday !

In July a lot of my piecing focus went towards "Christmas in July" projects.  However, my original plan for that month was to do a lot of quilt stitching!  The impetus for that was the latest Free Motion Quilt Challenge announced by Angela Walters at the end of May and scheduled to run in July.  Titled "How Do I Quilt It",  she planned to discuss stitching patterns that could be used to fill Chevron, Snowball, Log Cabin and Curved blocks and Applique borders.  

That was just the push I needed to start a project I had long wanted to do:  "Apple Crisp" is a design I thought I first saw in an American Patchwork and Quilting "Fall Quilts" compilation (scroll down to #20 for the link to the free pattern).  Later I discovered I had the October 2010 back issue it was originally published in. 

The magazine version and my finished top!

After learning about the challenge, I spent the latter half of June working on the blocks.  I changed the size of all the blocks so I could use my Accuquilt Snowball block die to cut those particular blocks.  In order to get all the blocks done by the time of the challenge,  I even pieced some while we were away camping in Shenandoah National Park!

I finished the top in early July just in time for the part of the Challenge for the Snowball blocks.  However, for the first time watching one of Angela's challenges, I did not immediately get ideas for stitching my own project!  The issue for me was that most of  the stitch designs she showed called for detail stitching in the centers of the blocks.  I was stopped in my tracks by one of the fabric choices I had made during the piecing:

Also didn't realize until this point that I should have pieced those chain blocks differently to line up with the Snowball corners!

I didn't really want to stitch over this guy.  The designs she demo'd were great but wouldn't work for this one block and I wanted to stitch all the blocks the same.  So this time it took looking beyond what she was stitching in the blocks to find inspiration from what she used to fill other spaces around them.  It took me most of August to figure that out as I continued to work on other projects.  Eventually I combined that inspiration with some of my own ideas which led to what I used to finish this one up.

At this point, I'll also join in over at Denise's  "Put Your Foot Down" to share the stitching part of this finish....

and over at Andrée's Quilting & Learning - What A Combo!

The stitch plan started with deciding to just straight stitch through the chain blocks which would also help stabilize the center of the top.  At some point in Angela's demo I saw her do stitch patterns in the Snowball corners -- okay, I can do that.  However, I was still stumped for what to stitch in the block centers.  

I often go very literal when I work on quilt projects.  Since the name of this quilt is "Apple Crisp" why not do an "Apple Core" stitch motif?  But will I need to mark it?  Well, it just so happens that I had this in my template stash:  

This is actually a piecing template that I've had for years.  I've always wanted to make an Apple Core quilt but never got around to it.  I even considered getting the Accuquilt die for making one.  I held off on that because I felt I should at least try using this template before I spend money on another one.  I also don't really know if I'd ever make more than one of these types of quilts anyway.  

Now that I had my stitch plan, I finally layered the quilt sandwich earlier this month.  Luckily for me, it turns out that using the piecing template worked just as well as a quilting ruler since I have a non-hopping ruler foot!  I even used the template in the borders and tessellated the motif like it would be when pieced.  

It's not as even in the borders as it would be pieced since I just used the edge of the template to stitch along instead of lining it up along the seam allowance slots.   

After employing those two stitching motifs,  I felt that I needed to also stitch something in the sides of the Triple Four Patch blocks.  For that I had another ruler -- this time one that is actually for free-motion quilting and that I hadn't used up until now:

I had purchased this Handi Quilter ruler a few years after quilting "Flying For Cover" with free hand clamshells.  For that quilt, I had marked the spacing of the clamshells using Inchie Tape.   However, after quilting it, I realized that while I liked the stitch design, I wanted a way to insure that I could quilt various size arcs as evenly as possible.  This ruler is 1/4" high so is actually for use on a longarm but I had no problems using it from all sides on my high shank Juki machine.  

Doing this many different stitch patterns -- even simple ones --  is essentially considered custom quilting.  So needless to say, it all took far longer than I had expected to spend quilting this project.  

Photographed under the Crabapple tree in our community garden!

Now that it's done, I am happy to say that this is a pretty addition to my Fall decorating.

Linking up with:

Saturday, June 29, 2024

Finished or Not Friday: A New Tote and a Wall Hanging UFO Finish

I had to do some late Friday finishing so am a little late joining in with Quilty Girl Alycia for some "Finished or Not Friday" review! 

First off, a new project:  I made another tool tote for travel sewing:  I present my Catch-All Cutie II:

In 2021, I made my first “Catch-All Cutie” for my entry in a blogging challenge on the topic of “Zippered Accessories”.  

I love this pattern and its instructions are straightforward although not intuitive – it's best to just follow them verbatim step by step and in the end is actually very easy to make.  I added a twist to it in the form of a little container with a stuffed pincushion top to hold clips and pins which was inspired by a similar gift made and given to me by my MIL.  

This little tote is ingenious and indispensable when I travel with a sewing machine. I had made the original bag out of a "sewing themed" line of fabrics from a bundle that I had in stash.  With Red, Yellow and Aqua accents, it went well enough with the Red tote bag I had made for my Singer Featherweight sewing machine.  I made a point of putting Aqua and Yellow tools in it to coordinate.  It holds all the basic working tools you need when sewing while away.  Even better, when I fold down the sides, the inside pockets hold all the tools neatly and are easy to grab and put back as you sew.  Did I mention I love this bag?!?

So when when I purchased a new Juki machine last year and wanted to take it down to my MIL's, I also purchased a bag to transport it in.  I wound up getting an aqua colored one and admit I was thrilled my little “Cutie” coordinated with it too.  

However, eventually I found that I didn't like that if I alternated between which machine I carried, I had to make sure I moved the “Cutie” to that bag before traveling.  I have always held to the practice that with the exception of my house keys and ID, if I needed a specific thing/tool/item in more than one bag, I prefer to have multiples of that item and stock each bag I use them in with their own supply.  It only took about three trips (especially one where I started out with the plan to take the Featherweight but then switched and decided to take the Juki) to realize that I'd really like another “Cutie” – this time designed specifically for the Featherweight's tote.  

So I looked around for fabric to do just that.  I would have loved to get more of the Robert Kaufman Singer-themed fabric but that line had gone out of stock years ago.  I had a few scraps left though and knew just where in a new bag I could incorporate them if I could find other fabrics to coordinate with it.  

I lucked up on that when I saw prints from the “She Who Sews” line by J. Wecker Frisch in an Etsy shop one day.  There were Black and White and Red and White sewing themed prints with an “old-timey” look which was perfect for my needs.  I checked the fabric requirements in the pattern and saw that I only needed about a half yard of each to make the bag.  Sweet!  

Eventually I also caught both red and black Lori Holt zippers that were long enough for use on the exterior and interior on sale at Sentimental Stitches.  Later, the same vendor offered a beautiful pair of small black embroidery scissors with gold sunflower motifs on the handles.  The product description said how they reminded one of a Featherweight machine!  I agreed and even though they were on the pricey side, I ordered them anyway to add to the tools for the new bag.  

With an upcoming trip that I planned to take my Featherweight along with me, I got this new bag underway appropriately enough on “National Sewing Machine Day”.  Once again the instructions were straightforward although I had overlooked one important thing when I made the bag the first time:  the instructions do say that using directional fabrics is not recommended!  That had not been a factor for the fabrics used in the first bag but of course both of the fabrics I had purchased this time as well as my Singer scraps were just that, LOL!  

To add to the complications,  I wanted to feature certain motifs from the cover fabric on the sides of the bag.  Had I purchased a yard of each fabric it would have made it easier to finagle.  Fortunately, I was able to figure out how to make it all work by adding an additional seam at the bottom of the bag and get it made up for the trip.  Here it is in action:

I also ordered more tools to coordinate with this bag and they came in on Friday so now it is fully outfitted and ready for the next trip! 


Now for the UFO:  Americana Lone Star

As often happens, I decided to make this one to fill a need:     


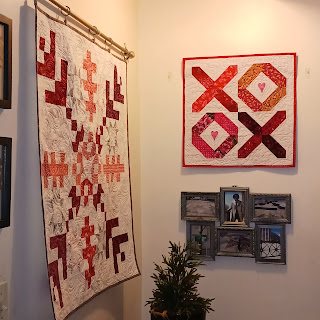
I like to hang Red, White and Blue quilts during the summer or as I call it "the Patriotic Season" from Memorial Day until Labor Day which also includes July 4th.  The wall at the top of our entry stairs is one of my prime display spaces and I had finished the "Hometown USA" wall hanging seen above for it back in 2022.  In the past when I have hung quilts in this spot, I have also made companion wall hangings for the smaller space on the wall next to it like these: 

Pioneer Sampler and Honoring the Journeys

When I put up "Hometown" in 2022,  I had decided it was time to make a companion.  I started by looking through one of American Patchwork and Quilting magazine's compilations for "Patriotic Patterns".  Well it didn't take long to find one I had downloaded years ago and had always wanted to make.  


This was a goodie in that I was more than happy to follow the pattern cues for colors and was pretty sure I had fabrics in my RWB stash to execute it.  Even better, making a Lone Star quilt had always been on my quilt "Bucket List" and even though I have "fabric funded" a few projects, I hadn't made one yet.  

It did not take long to compile a project stash but a read of the pattern presented a new problem:  the pattern was designed to make a wall hanging that finished at 43 inches square but for my space I needed one of about 25 inches.  I figured out that if I made it using smaller blocks (6 inch Leymoyne Star corner blocks rather than the patterned 10 inch), it should fit my space.  However, I wasn't sure what size strips to use to piece the center Lone Star.  I had some estimates but not enough in my project stash to run a test.  

Fortunately at the time I was also embarking on another project that used Shot Cottons and since I had a big stash of those, I tested my block size theories using that stash.  The good news there is that not only did I get that done but I used the test block in the backing for that other project which at the moment is still awaiting quilting:


Strip size settled (1-1/2”), and after strip piecing the first star points I then realized I had to replace the diamonds cut out of the stripe fabric I wanted to use in the star point tips with "fussy cuts".  This was the only way to have the stripe run pointing into the tip the way I wanted.  For the Lemoyne Star corner blocks, I used my trusty Rapid Fire Lemoyne Star ruler and Deb Tucker's techniques to make the 6 inch finished blocks needed.  


Once the top was finished it sat for the usual reason:  how do I want to quilt this?  Then it continued to sit until now for the other usual reason: the season passed and other projects became a priority.  So much for an “I can make this up quick” project!  This year however, when the RWB quilts went out on display again, I decided I really wanted to get this done.  Even better, looking at the top with fresh eyes, I also immediately came up with a very simple quilting plan.

Right before we were due to go on a camping trip for my DH's vacation two weeks ago, I figured I would try to get this layered so I could quilt it as soon as we got back.  To that end, before leaving on our trip, I had hoped to try a new basting technique:  

My MIL had seen some videos on glue basting, tried one of them and liked the results.  While I have done it for bindings, I've never tried it for a whole quilt.  Before we left, I had set up to try to get it done but found that the containers of glue I had on hand wouldn't dispense!  I picked up some new ones and once back did get the basting done.  My opinion:  the method does work but just like when using it for basting a binding, it is important to use a light hand with the glue:  you want thin lines or small dots not glops and slathers!  

I will also note that like so many I've seen described, my center Lone Star block was not exactly “flat” and bubbled a bit in spots.  The condition was helped a bit by giving it a good press.  I also decided to "double batt" it when I layered it.  I was hoping to further minimize how much of the puffiness I would have to try to “quilt out” later.

And yes, these are Franken-batts!

I also had to change machines:  I started quilting this on my vintage Singer 401 because that was what was in the sewing table and I had recently worked on another project that needed its zigzag capabilities.  However, while it started out okay, I started getting a lot thread breakage and I have found that after awhile the walking foot on that machine starts to jam up.  So change of personnel:  I swapped my Juki into the table and got it done!  I was even able to use the new add-on guide unit for the walking foot for that machine.  Good thing I had finally caved and purchased it about a month ago.

So now it's done!


Bound with more of the outer border fabric and up on the wall!

So now the side display space is filled with a permanent entry for when I decorate for this season each year!   Hmm, I had to take down the other frame I normally hang there but me thinks I need to find a little seasonal sign to add under it.  If I don't find one, that need might wind up generating a new cross stitch project, LOL!

That will be it for finishes this month but as always there's a lot on the table for July so hopefully there will be more then.  Now I'm headed back over to Quilty Girl Alycia's to see what everyone else has been up to for "Finished Or Not Friday" this week.  Won't you join me there?

Thursday, June 13, 2024

In Honor of National Sewing Machine Day

 As always a lot going on in the studio this week.  I was pleased to find out that today is National Sewing Machine Day.  

We quilters all appreciate how much the sewing machine contributes to our quilty crafting.  In my last post I had talked about wanting to switch over to my Juki machine but as of right now my Singer 401 is still in my sewing cabinet and the project it had been hard at work on was this one:

I had hoped to have finished these but I hit a snag.  I've put the project in time out for a while and then will try to take another stab at it.

In the meantime, a new project has been started:  

These are blocks for "Apple Crisp", a design that originally appeared in the October 2010 issue of American Patchwork and Quilting magazine and is now available free on their website.  

When I started quilting, "background fabrics" for me were almost always light to dark tans because I worked with a lot of shaded fabrics and Civil War reproductions.  However in recent years as I've embraced more fabrics in the brighter modern palette, I have expanded my use of backgrounds to include more whites and white-based "low volume" prints.  

In the process, the darker tans had been languishing but when I saw this lovely project on the APQ website a few years back, I loved its Fall vibe and thought it a perfect way to cull some of the darker tans from my background stash.  Although I had pulled together the group of tans for it a good while ago, the big push to start it now has to do with an upcoming event. 


 Angela Walters is getting ready to do another of her "Free Motion Quilting Challenge Alongs " this time with the theme of "How Do I Quilt It?".  She will be covering stitching designs on Chevron, Log Cabin, Curved and Snowball blocks.  I have a top ready for the Log Cabin session and realized that this was the perfect time to get "Crisp" started since half of the blocks for it are Snowball blocks.

According to the Challenge schedule, Angela will start showing designs for stitching Snowball blocks on July 16th.  If I can stick to a schedule of stitching "Daily Blocks",  I could have the top ready for quilting by then.  I really look forward to seeing what ideas she has that I might be able to use to quilt this one up quick!

However, having made a schedule for daily stitching I did have one issue:  we are going on vacation next week.  In order to stick to the schedule, that means I'll need to take my stitching with me.  Fortunately that's not a problem as I've already put my trusty Featherweight with the travel stuff:

When I took my Juki on my last two travel trips,  I realized something:  the "Catch-All Cutie" I had made a few years ago and love to bring as part of my "sewing machine travel kit" was colored perfectly to go with the Tutto bag I had purchased for toting my Juki machine.  

Rather than having to move that tote between the two travel bags, I thought about making another one that I can leave in my Featherweight tote bag.  I saw some cute "old-timey" fabric on Etsy and knew I still had a little of the "Singer" fabric leftover from making the Featherweight tote bag:

All of this would be perfect for a new "Cutie"!  Recently I also saw that Gaye at Sentimental Stiches had a pair of scissors that I thought went perfectly with my Featherweight so purchased those too (in the lower left) to go in the new "Cutie" bag.  When we get back, I plan to order one of the Lori Holt Red Olfa Splash rotary cutters to add to it as well.  

So as of right now I've cut all the parts out (although still debating between the handle choices on the lower left) and hope I  can get it made up before we leave on Sunday.      

Because it's that time of the year, the Red, White and Blue quilts have gone up for the "Patriotic Season" (May to September) so I also hope to get back to work on these in the coming weeks:

Two years ago, I got as far as quilting the front and back panels for a cover for a pillow for my living room chair so hopefully this year I can assemble and finally finish it.  I also pieced a Lone Star wall hanging that year but could not decide how to quilt it.  

Looking at a picture of it recently,  I suddenly realized exactly how I want to do that.  When we get back, I'm going to try layering it using a glue basting method from You Tube that my MIL has tried and says works great.  If it works for me too, I can get that quilted and hung up --- hopefully by month's end! 

One of the things that had attracted me to quilting was finding out that all of the construction of a quilt  can be done completely by machine.  Having grown up in the days of Home Ec training in school, I was excited to find a new use for a sewing machine.  Over twenty years on, it is still a thrill to put the "pedal to the metal" and get a quilt out of it, LOL!!  I hope you are having an enjoyable time working with your machine today and if not, pull it out and take it for a celebratory spin!   

Tuesday, May 7, 2024

To Do Tuesday: Trip Recap and Plans For the Rest of the Week

It's been a while but I am back again for another:

Hosted by Carol at Quilt Schmilt

My DH and I are back from the trip for the family funeral that I mentioned in my last post.  We wound up staying an extra day so only got back yesterday.  While you hate for a death to be the reason for extended family to get together,  it was a happy opportunity to re-connect with three generations of family and friends we hadn't seen in a long while.  Another plus is that plans were put in motion for a family reunion for next year.  

However, with all the visiting with family, it meant less time than expected to spend quilting with my MIL.  We did get to a few things:  I made up the backing for the "Heartland" 3 Yard Quilt top I had started on our visit to her last Fall.  I had purchased the backing fabric for it during the shop hop we did then and finished the top once I got back home.  

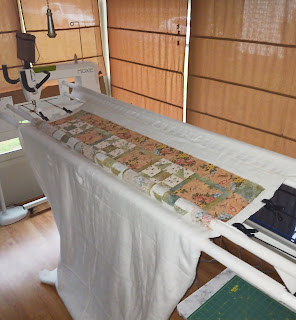
Now having brought it back down with me, I managed to get it loaded on her longarm frame in the hopes of quilting it on this trip.    


The day I did that, I also had the opportunity to show something to the daughter of another of my MIL's sisters.  The last time we were together was eight years ago and I had gifted her mother a quilt while she was in the hospital that I had originally made for myself for Spring decorating.  When her mother passed, the quilt was passed on to the daughter.  Now I have finally used the pretty floral fabric I had leftover from that quilt project to make this new one for myself.  

Once everyone left, I finished picking out an edge to edge design to quilt it with.  The design I wanted to use was kind of dense so I formatted it to be stitched more spread out on the top.  However, that created issues due to the limited experience I have working with the machine and rudimentary knowledge on how to get the design to stitch out.  I spent the rest of the night trying figure out how to get it to work but couldn't.  Knowing we'd be out most of the next day, I ultimately had to pull it back off the frame and initially decided to just bring it back home and quilt it on my DSM instead.  

Because we decided to stay an extra day, we did manage to also load a smaller wall hanging my MIL had pieced.  Once again there was a lot of back and forth and layout changes made to how we thought we could get the design she picked to stitch out.  We ultimately were able to get that one done.  Fortunately that also meant we got to demo the machine in action for her friend, another quilter, who was also staying with her.  It was not perfectly stitched but my MIL was happy with the results.  

The good news is that some of what I learned working on that and from our previous session back in February have given me some insight into how I might take another shot at getting the "Heartland" quilt successfully longarmed.  So I will bring it back again on our next trip down in the Fall.   Like they say, every project is practice for the next one!

Unfortunately, no work done on these two!

I didn't find all the kinds of custom stitch patterns I wanted for the other quilt I brought down (in the Apples bag) that I wanted to longarm so that too didn't get worked on.  Since we were in and out most days, I never got around to doing any piecing on the project I brought for that (in the project bag).  So those two will have to wait as now that I am back home, the machine currently in my table needs a long over do cleaning and oiling session:

And since my 401 is the only zigzag machine in the house, before I take it out of the table I want to work on two projects that need that feature.   

Ever since the pandemic, I've wanted to make a "Jelly Roll Rug" for my kitchen.  I got the pattern and the bulky batting rolls back then and finally caught the jelly rolls I wanted on sale in 2022.  Since I am also trying to Spring clean the quilt space in particular and the house in general, getting this project done will help with both!  

Zigzag Project #2 will be to finally work on Pat Sloan's "Breakfast Club" applique Quilt Along that she hosted from January to March.  

I've had the fabric sitting on my sewing table since then but other projects took priority.  Since this is also planned for the kitchen, getting it done will add to the Spring spruce-up to be done in there.   So I figure those will be the priority quilt projects for this week and possibly the next.  The hope is after that I'll swap my Juki in to the sewing table and try to get in a free-motion quilting groove and work on my "To Be Quilted" backlog until the start of Summer.

On the cross stitch front, the project I took for stitching on the way down has moved forward some:

Pattern by Brenda Gervais of With Thy Needle and Thread

When I left, only the "IT", the "D" and part of the "G" had been done and that last letter had to be re-done because I had started the placement of it wrong.  I had thought this would be an easy stitch since it's so open.  However, I am still getting my sea legs on stitching on Evenweave so didn't get as much done while away as hoped.  I also made some last minute thread changes last night, grabbing two colors from other projects (one finished, one in progress) that had what I was looking for.   So now I'll continue with it this week until I get the stitching done.  Hopefully then I'll get the project bag it is going to be part of done next week.   

That should all be more than enough to keep me busy as I expect we'll also need to sign up for shifts in our community garden now that it's open for the season.  Still hoping May will be a little less frantic than the last few months have been.  It helps too that we are all enjoying more sunshine and warm weather now that Spring has fully sprung!   And when you come back inside, take some time to also check out what everyone else has going on for this week over at Quilt Schmilt!