Friday, November 29, 2019

It's The Most Wonderful Time of the Year!

No, not Christmas --- although now that Thanksgiving is done (and I hope you had an enjoyable one), it is officially time for that too! 

Right now, quilters all over the world are saying.....


----because the latest Quiltville mystery started today!!! 


This year's mystery is called "Frolic" and Bonnie says it was inspired by the Texas Wildflowers she saw on a teaching trip earlier this year.  Bonnie issued the introduction for this year's mystery quilt back on Halloween.  That resulted in quilters around the world gathering paint chips and rifling through their stash to begin putting together their fabric pallette for the new design. 

Once again, I'm not going to do this year's mystery just yet.  A small part of the reason is that that while I do like the color scheme, I'm not sure I want another quilt featuring lime green.   When I'm ready to dive into this one, I will make it a point to review the video that Bonnie and Holly Anne of String & Story did in 2018 on how to choose alternate colors for a Quiltville mystery.  That is something I've always wanted to do but didn't know where to start.  Holly Anne gives you a road map as to how to approach it.

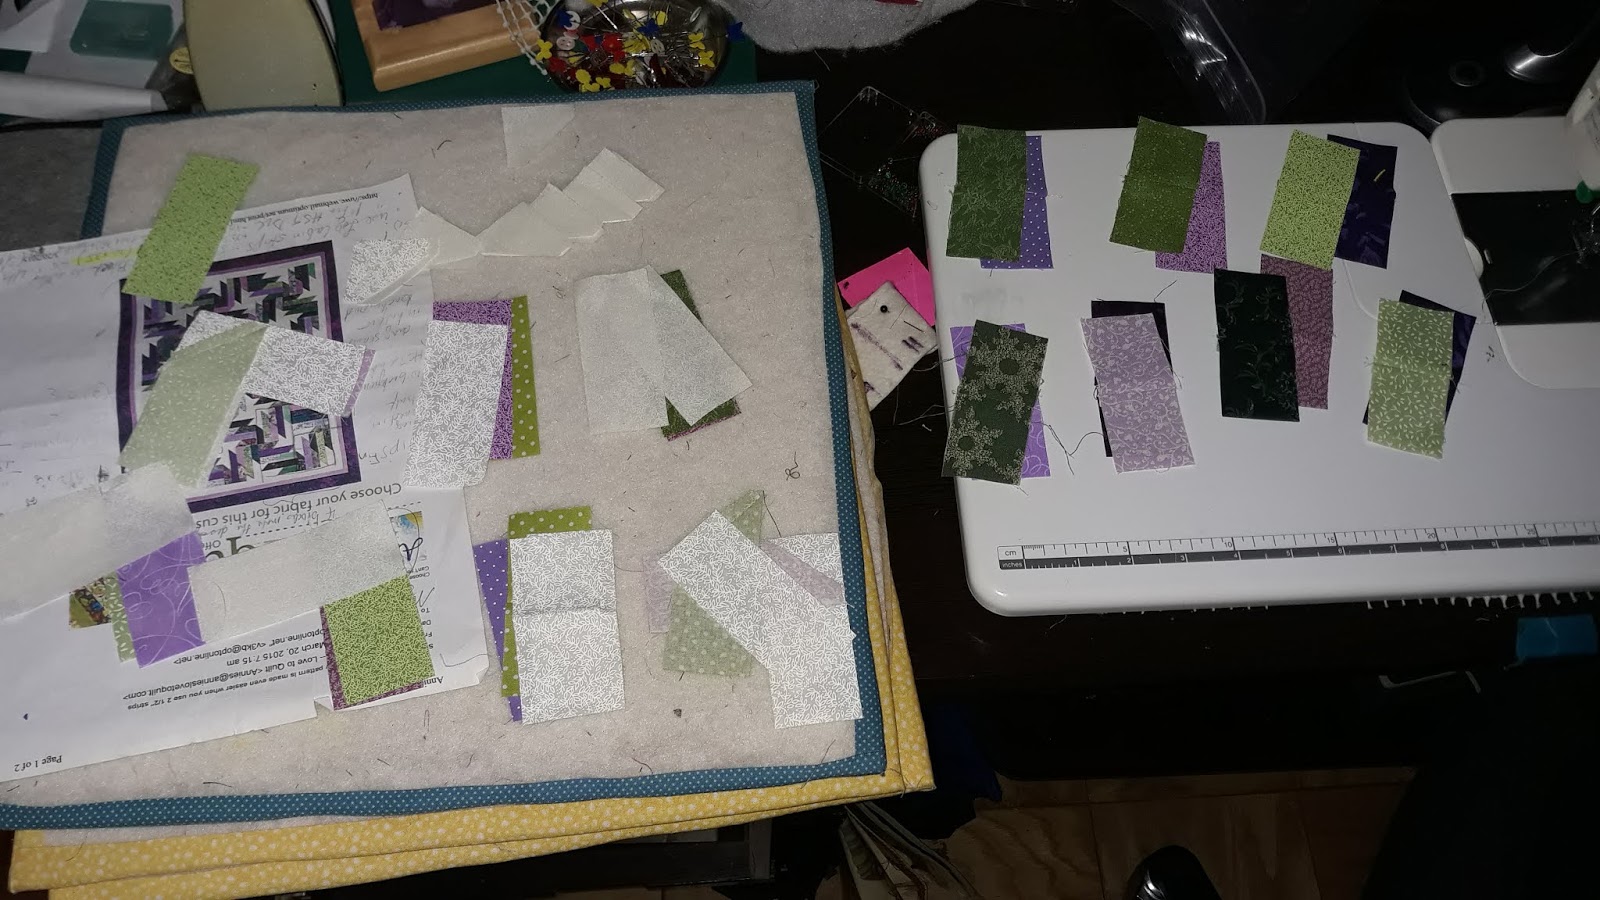
Instead I will be content to do what I did last year:  as the mystery unfolds, I will download the parts of the current mystery while working on the MANY mystery flimsies I have in various stages of construction.  The two that are currently in production are 2008's Tobacco Road and Roll, Roll Cotton Boll which was the 2010 Mystery and can now be found in Bonnie's "String Fling" book.  I had started both this year and this week finally got my sewing machine table all cleared off and have them set up for daily fifteen minute or leader/ender sewing with the hope of getting both tops made up by the time "Frolic" comes to an end.

Scrappy Four Patch piecing for "Tobacco Road" in progress

String blocks made to date for "Roll, Roll, Cotton Boll"

 I have three mystery flimsies that also need finishing:  the top two shown below are 2016's En Provence and 2017's On Ringo Lake, both of which need a backing.  Double Delight from 2008 is ready for quilting and was the project that I worked on during last year's mystery season. 

Talk about PIGS!!

I've put making up the backings and the quilting of all of them on the UFO schedule for next year.  

Once the mystery is over, Bonnie will offer the pattern for sale in her Quiltville online store.  So if you are even a little bit interested in doing the mystery (either now or later), at the very least, download and save the "clues" now while the mystery is underway.  And don't forget:  you can also purchase Quiltville Mystery Swag over at Zazzle.


I purchased the mugs above when I had completed the flimises for those projects and I have pins for all but Roll, Roll Cotton Boll.


I expect I'll be picking that one up before the current mystery ends!  The proceeds from the Quiltville Zazzle sales go to purchase supplies for charity quilt projects.  A perfect way to "give back" during the holiday giving season!

I've scheduled the release of each part in my phone calendar so that I am sure to pick them up as they are released.  I've also scheduled a reminder to check out the links ups on the Mondays following each part release.  Part of the fun and thrill of participating in Bonnie's mysteries (especially when you are doing it vicariously) is to see everyone's progress:  are there parts they have a tip for piecing more easily?  What inventive color choices have they used?  Are they starting to guess how the piced units will be laid out?  Do some of those layout ideas sound like a good plan either for the units already being made (Bonnie DOES NOT REQUIRE that you make your finished mystery quilt EXACTLY like hers!) or do they give you ideas for a completely different project to make once the mystery is over?  The great quilting minds that come together during an event like this can offer up wonderful new ideas and information to expand your creativity beyond the current mystery project.

I hope you will enjoy this year's mystery season --- I know I will!

Thursday, October 31, 2019

Checking In For October - Part 2: Travel and (Finally) Some Quilting

So in my last post, I detailed some October garden and car buying activities.  Of course, when you have a new car you want to "blow it out" with a good long trip.  Fortunately we got our new car just in time because my husband had a vacation coming up and we wanted to go visit his mother and her husband who has been ill.  Right before that though, there was the community garden event I had mentioned.  That happened the day before we took our trip.

Each year, our garden hosts the fourth grade of one of our local elementary schools in the Fall and then again in Spring.  This year was special because the fourth graders that came have been to our garden before -- three years ago they came as first graders and released butterflies they had raised in their classrooms into our garden!

All pictures taken by Debra Levine for Rivers Run CG.
This year, their gardening tasks were to plant tulip bulbs which will bloom in Spring and garlic to overwinter in our new community garlic bed.


They also particpated in workshops on composting (facilitated by two of our members)....


....bullying (facilitated by officers from our community police force)......


....and self defense (taught by senseis from a local martial arts school).


The kids always have a great time, come armed with information learned in their science classes and ask good questions.  They will be back in late Spring just before school lets out for the summer to visit us again.  Hopefully the tulips will still be around then and they will definitely get to see the garlic they planted and which will be about a month away from harvest when they come.   We always hope we have encouraged some future gardeners!

Garden event over, we were off!  My DH, DS1 and I headed down to......


....North Carolina! 

My MIL's husband has been seriously ill for a while now and the plan was for us to stay a week.  However he was released from a physical rehab facility two days after we arrived so we had to stay a few extra days to help out until they could arrange for home care.  We wound up not getting back home until this past Saturday.

The trip did provide a few quilty moments though.  The week before the school garden event, I had demoed a quilt class I'd been asked to do for one of our community's Building Associations.  Our garden's president has been trying to arrange a quilting class ever since she saw my last journal cover when I brought it to a journal writing workshop that was held in the garden.  Her Association got a grant this year to hold a series of crafting events that also address the theme of recycling.  A perfect theme for a quilt class!  Since their meeting room can't accomodate having a bunch of sewing machines, we decided it should be a hand work class.  Of course my first thought was for an English Paper Piecing class.  Popular as ever now, it also is a chance to talk about using recycled materials not only for fabric but also for templates and project storage.

I'd been gathering materials and project ideas since we talked about this in the summer.  I was able to present in the demo to the Association's Class Committee what techniques I could teach.  We agreed to hold the class in mid November.  With my husband taking the first shift for the drive down,  I of course, used that as an opportunity to work on hexies!  


Once we were in NC, the trip was also the opportunity to FINALLY crack open my long awaited "travelling kit" ---  I had packed up Bonnie Hunter's "Old Tobacco Road" last year as a travel kit and now I got to finally start it!


This is a post-trip shot of the pack up -- I forgot to take a shot of my setup while in my MIL's sewing room.  I got this started just in time too since Bonnie's next mystery will be starting soon.   We had been so busy down there that I only manged to get 3/4 of the Part 1 Four Patches done and barely started the Part 2 HSTs.  Now that I'm back home, it's a start that I can build on that's perfect for daily fifteen minute sewing sessions.

To take a break from caretaking, my MIL (also a quilter) and I did a little quilting retail therapy.  For me it was a chance to do some more mystery season prep:  I've long needed to rebuild a stash of the lighter neutral background prints of whites and creams.  As you can see, I did really well there!


All summer Vanessa Vargas-Wilson, The Crafty Gemini, had held "Friday Flash Sales".  Each week she offered a fabric bundle for a project kit.   In July she had one for a zippered pouch.  The kit included a bundle of fat quarters anchored by a cute "Church Kitchen Ladies" print and included a zipper with a cute charm attached and instructions to make the pouch.  Since my MIL is a dedicated church lady (although as far as I know she doesn't help with the kitchen duties!), I just knew she'd get a kick out of it.  I purchased the kit with plans to make it up and gift it to her when we got to NC.  Unfortuately time did not permit me to make the pouch before going down but I was able to make it up while there.  After I finished the pouch, my MIL wanted a strap so she could carry her keys and cell phone around while at church so I obliged.

This shot I DID get in her sewing room!
 As Vanessa had promised, the kit included more than enough fabric to accomodate the addition of the strap as well as provide enough additional fabric for me to make another pouch for myself.  I purchased the zipper for that during one of the retail therapy sessions and hopefully can get mine made up in the next few days (or maybe weeks!).

So now that we are back home this has been a busy week of appointments, checking in on our garden plot, laundry (despite having done a load of wash before we left!), shopping (to restock what DS2 ate while we were away!) and some additional quilty shopping for some things I hadn't been able to find while in NC.  With all of that and a forecast of rain for today, I decided not to buy candy for Trick or Treaters.  In fact, it's been pretty quiet this evening which gave me the chance to finish up these posts!  If you are entertaining little (or big!) visiting ghosts and goblins, I wish you a safe and Happy Halloween! 

Checking In For October - Part 1: Gardens and Cars

It's been busy since my last post and not necessarily with quilting -- at least not the quilting I had planned to do!  After finishing up my friend's desk mat, I expected to get started with quilting my Quilts of Valor for Veterans Day.  However, I had a lot of community garden activities to tend to first.  I had what I thought might be our garden's last pepper harvest to collect and submit (Rivers Run is one of the gardens that grow Serrano Peppers for The Bronx Hot Sauce) and needed to start cleaning our own plot for the start of the Fall growing season.  Our community garden also had a big event coming up so I spent a few extra days with our other members getting it spruced up for the event.  

I aso attended a workshop at another community garden, the Green Patch on Walton,  on natural plant-based dyes.  The brown cap in the picture below was dyed with Black Beans!

Before and After!
Caps were also dyed with onion skins!  


I was able to take another light cap (in the picture with the bean dyed cap) to try it at home.  I'm  collecting skins for that as well as harvested some fennel (which will dye something a navy-green color) from our community garden with plans to try that on some muslin.   I'd love to be able to arrange a workshop on this in our garden next Spring.    


With the preliminary gardening activites done, I thought I'd be free to quilt.  However, then there was an unplanned interruption in my schedule:  the sudden demise of our old car!  Our beloved minivan "Vanessa", a 2000 Mazda MPV breathed her last.  

Vanessa in her younger years
When the repairs she needed were going to cost more than her current value it was time to give her up.  And with that, my DH and I were thust into the world of Cars-From-This-Decade!!  It took us about a week to research models and features and view internet car reviews on YouTube.  My DH was really motivated to get this done as quick as possible since he works nights and in another borough (Queens) so had to take public transportation throughout this time.

Research done, we spent a weekend going around to dealerships and used car lots near us to familiarize ourselves with all the different car makes and models in person. Well, not all, we already knew we still needed to be able to haul cargo (for our youngest, the budding filmaker and our community garden) but figured we could downsize from a seven passenger van (in recent years we rarely used our third row and most of the time kept it "tumbled under") to a five passenger SUV crossover.  After hitting the dealerships and picking two finalists and seeing one really appealing "luxury option", we also searched internet car sales sites to expand our choices of what was available for sale.  We had been scheduled to go to a credit union car sale when a slighty older model of the "luxury option" was posted to True Car at a price that was within our budget.

Going to see it (a trip for us since it was out in Brooklyn!), we ultimately went with that one.  Ironically,  before this search this was a make we had no familiarity with --- a Hyundai.  We had seen the newer model of the car at the dealership but admittedly since we haven't had to carry a car note in ten years, it was more than what we wanted to spend on a car right now.  The tipping point was that when we checked with our insurance company on the coverage rates for all the SUV models we were seriously considering, the Hyundai was the lowest to insure.  Even better, the operator I happened to connect to also owned a Huyundai, had recently upgraded hers to get more features and assured me they were very reliable cars!  Couldn't get a better and better timed recommendation than that!  So we went with the one from True Car: a 2016 Santa Fe Sport that came with all the bells and whistles (Turbo, large touchscreen, sunroof and power everything).

Our New Yara!
To reduce our insurance costs further we also spent another week doing an online Defensive Driving Course.  At first my husband didn't want to do it -- he had done it online the last time and said it was text dense and a bit boring.  He would rather go to an in-person class like we used to do.  However this time one of the courses our insurer recommended was "Traffic School by the Impov Comedy Club".  Pretty funny, the same good information that you get in other classes and definitely not boring!  Even better, you have twenty days to complete it.  Once completed they gave us a discount code to pass along so if you're interested in saving money on your insurance (here in NY the discount is good for three years) use the coupon below:


Ok, so now that we had a car, it was time to move!  There's more to my October doings in the next post and this time it'll actually include some quilting!

Thursday, September 19, 2019

A Quilter's Favorite Reward.....


.... a gifted quilt received, put to use and appreciated! My friend sent this shot of her new desk mat in place.  I'm glad to know it worked out perfectly!

Saturday, September 14, 2019

The Latest Gift Quilt: Have Some Moscato At Work!


I'm happy to go to Alycia's  Finished Or Not Friday link up this week with another finish.  Woo Hoo!  The desk mat for my friend is finally
D-O-N-E!!

That didn't take too long did it?!?

Reiterating the back story (and if you've read this before, please feel free to skip ahead):  I have a friend that I've made a number of projects for.  She has taken most of the things I've made for her to decorate her cubicle at work.  For years, Melinda Pirone's "Moscato Di Asti" pattern was on my wishlist waiting for just the right combination of desire/need/fabrics to make it happen.  My friend's request at the end of 2017 was for a quilted mat for her cubicle desk.  Leftovers from that year's Quiltville mystery project presented the perfect combination of need and the resources to get it started!

My first attempt to actually start working on this was in 2018 when we had planned to travel together to visit another friend of ours.  This was one of two projects I "kitted" up to take along on that trip.


However, even after the trip plans got pushed back, I kept the two "kits"packed up so I could grab them at a moments notice of travel.  Fast forward to this year and my friend was coming to attend a music event in the community garden I belong to that was held back in the Summer (sigh, yes Summer is as good as over!).  I figured it was a good time to start working on her mat and maybe get it done to present to her.  Of course, the usual "best laid plans" (and the fact that I was working on three other projects at the time) meant that I only pulled it out and started on a bit of the piecing.  It took a lot longer than planned to finish up the other projects so only then did I get to really work on this.  Once it became the focus project, it was full speed ahead!


Last week when I posted I had shown my progress (above).  Only problem was that I had pieced some strips in advance and when I put up the blocks already made on my design wall, I also put up ALL the strips already prepared.  What I DIDN'T DO was check back on my plans for the layout. The strips I laid out filled out five rows of seven blocks and I thought that meant I needed to add enough additional strips to complete that many blocks.  At this point, I had to struggle to have enough of some of the fabrics that I started with to do that.  I did get it done (with a few fabric substitutions and some "poverty piecing" of small scraps) and got it finished.


Except --- Yikes! --- it was now TOO BIG!!  I had only needed FOUR rows of blocks!  The good news is that only meant taking a row back off  and fortunately doing so didn't wreck the balance of the colors in the design.  Whew!  The other good news was that I put some of the extra blocks together to use to  make a small quilt stitch sample for that step in the project.


I had a pretty "marbled" (thanks, Rebecca!) print I planned to use for the backing.  I had planned for the finished top to be 20" x 35" (5" finished blocks set in a 4 x 7 layout).  I had measured the backing piece and it was just about that size, possibly only needing a few extra inches in strips around the edges to widen it a bit.  Yet when I finished the (re-sized) top and held up the backing to it, it was not as wide as the top by a significant amount.  What gives?


Yeah, turns out you have to read the measurements on your mat correctly!  Tip:  when measuring from the short side of the mat, DON'T read the numbers at the end on the long side,  LOL!!
So this of course meant my backing piece though tall enough was not actually wide enough to make a one piece back.  No problem, leftovers to the rescue!  I  had enough of some of the fabrics and decided to try something I hadn't done before --- I cut 2-1/2" strips and created a panel for the middle in the style of a "jelly roll race" quilt!


BTW, in my last post I had said that I thought I had used up all of the original light (white on cream) fabric I originally worked with.  Wouldn't you know it, now I found some more under the pile of the other fabrics!  It wasn't that much (only enough to provide two strips for the backing panel) but it would have been more than enough when I was piecing more block strips. Those strips will also serve as my label area.  Even so, I still needed to add some extra strips on the top and bottom to give me extra for the quilting.

As I did with another project this summer, I used preview paper to decide on the quilting.  I wanted to highlight the "stars" and wound up doing a combination of a swirl and outline quilting on them.  For the background the best thing was the simplest:  stippling (fast and easy).


As usual, I didn't really want to change threads too much.  I found a nice medium gray that worked on the dark areas however, it was too dark for the stars.  I was going to use white thread on the stars but realized that using a light gray actually worked better --- it made it all look like it was stitched with the same thread and giving the subtle contrast in color a nice overall balance.


Last was the binding.  For myself, I probably would have gone with a dark purple or burgundy but my friend likes lavender so I went with that for her benefit.  And clearly there's no question that the fabric I used is 100% cotton:


So my friend will have hers and I put a binding on the stitch sample and now have a little mug rug as a momento of working on this project!


My friend has two projects for her home that she wants me to make, but both will require design work.  I bought EQ8 last year so working on those may be an opportunity to get familiar with that program.  No time soon though, I've got QOVs to get to next!

With this project and post done, now I can go see what our gracious link up host Alycia is up to and check out what everyone else worked on this week.  Got a Finish?  Even if not, link up and let us see what's inspiring you this week!

Friday, September 6, 2019

Finished Or Not Friday --- WIP Edition


I can report in early for this week's "Finished Or Not Friday" (hosted by Alycia over at her Alycia Quilts/Quilty Girl blog) because thankfully, I don't have to have anything finished!

The "Emerald's" blocks at the top of the wall are being put away for now.

I am currently working on a desk mat for a long time friend of mine.  I've made her a few mug rugs (seen here and here) and quilted a panel for her (here) that she purchased when she attended her first (and only) quilt show with me a few years back.  All of these are displayed in her cubicle at work.  She had asked for the mat at the end of 2017 and had nudged me about it again in November of last year, hoping to get it for Christmas.  At that moment I had a lot going on so told her it would have to wait until at least the New Year.  Well, I guess it has simmered long enough!

This is going to be my mini version of the "Moscato d'Asti" pattern by Melinda Pirone of Sew Precious Creations.  I had always liked this design and the coloring but never had the project space to embark on making it for myself.  When my friend put in her request, I knew it was the perfect thing to make for her because Moscato is her favorite wine and lavender is her favorite color!  The original pattern used jelly roll/2-1/2" strips to make a lap sized quilt.  Since I'm shooting for a 20" x 35" finished mat, I'm using 1-1/2" strips instead.  I had made note of this pattern when I first saw it yet when I finally had a good reason to go purchase it,  I couldn't find it available anywhere!  Fortunately, the design was an easy one to figure out how to do.

I had hoped to have gotten this done by the end of August but all the recent Red, White and Blue projects got in the way of that.  I had cut the fabrics out back in May 2018 because we had discussed making a trip together to visit another friend of ours and I had hoped to take it along as a travel project.  When the plans fell through, I figured that having it already prepped would make it easy to start working on whenever I was ready to tackle it.

Empty food containers are great for mini quilt kit storage!

A lot of the green and purple fabrics were leftovers from making Bonnie Hunter's "En Provence" mystery.  The problem is that I thought I had cut enough strips to make all the blocks but now find myself short!  In the picture at the top of the post, you can see I have enough of the two-color pieced strips and have placed them where I need to add more blocks to the layout.


I will need more colored long strips and attach light HSTs (which I have) to the ends of them.  I also need  more short light strips to attach to the short color strips I have.  However, I don't have any more of the light fabric I used!  The white-on-cream print I used was leftover from making my second QOV top.  I've searched that stash and checked my project notes --- nope, there's no more.  Fortunately, I've got a couple of scrap stash sources that have yielded a supply of "close enough" light strips that I can cut down and hopefully that should cover my needs.

So maybe just maybe the weekend will yield a finish?  I've got an appointment to go to this afternoon and things to do over the weekend so I'm not holding my breath!  When I get back later today, I'll be headed back over to Alycia's to see what everyone else has got cooking or coming down off of their design wall!

Saturday, August 31, 2019

Three Cheers For the Red, White & Blue! --- Part 6 and The Finale!

As August comes to a close, so does my Summer of Red, White and Blue Projects!  This is the third RWB project to make it to the "Finshed Or Not Fridays" Link Up, now hosted by Alycia over at her Alycia Quilts/Quilty Girl blog.


After spending so much time on my last project, the "Star Spangled Runner", it was a relief to get a quicker one completed.  I had hoped to get this done to post yesterday but I still had some quilting to do on it today along with all the finishing stuff.  So the "Salute To Stars" Table Mat made it just under the wire for the end of August!


Like the runner, this is another free pattern from American Patchwork and Quilting magazine.  As the pattern notes, it is easy to make the original design larger or smaller by adding or subtracting blocks.  The free pattern is actually the "color option" of a larger lap quilt that appeared in the magazine.  I made mine with even fewer blocks in order to fit the 18" square table I want to use it on:


I also recently saw a pattern  made up of the same basic blocks but in a larger size and laying them out in a way that creates a long runner.  A very versatile design indeed!

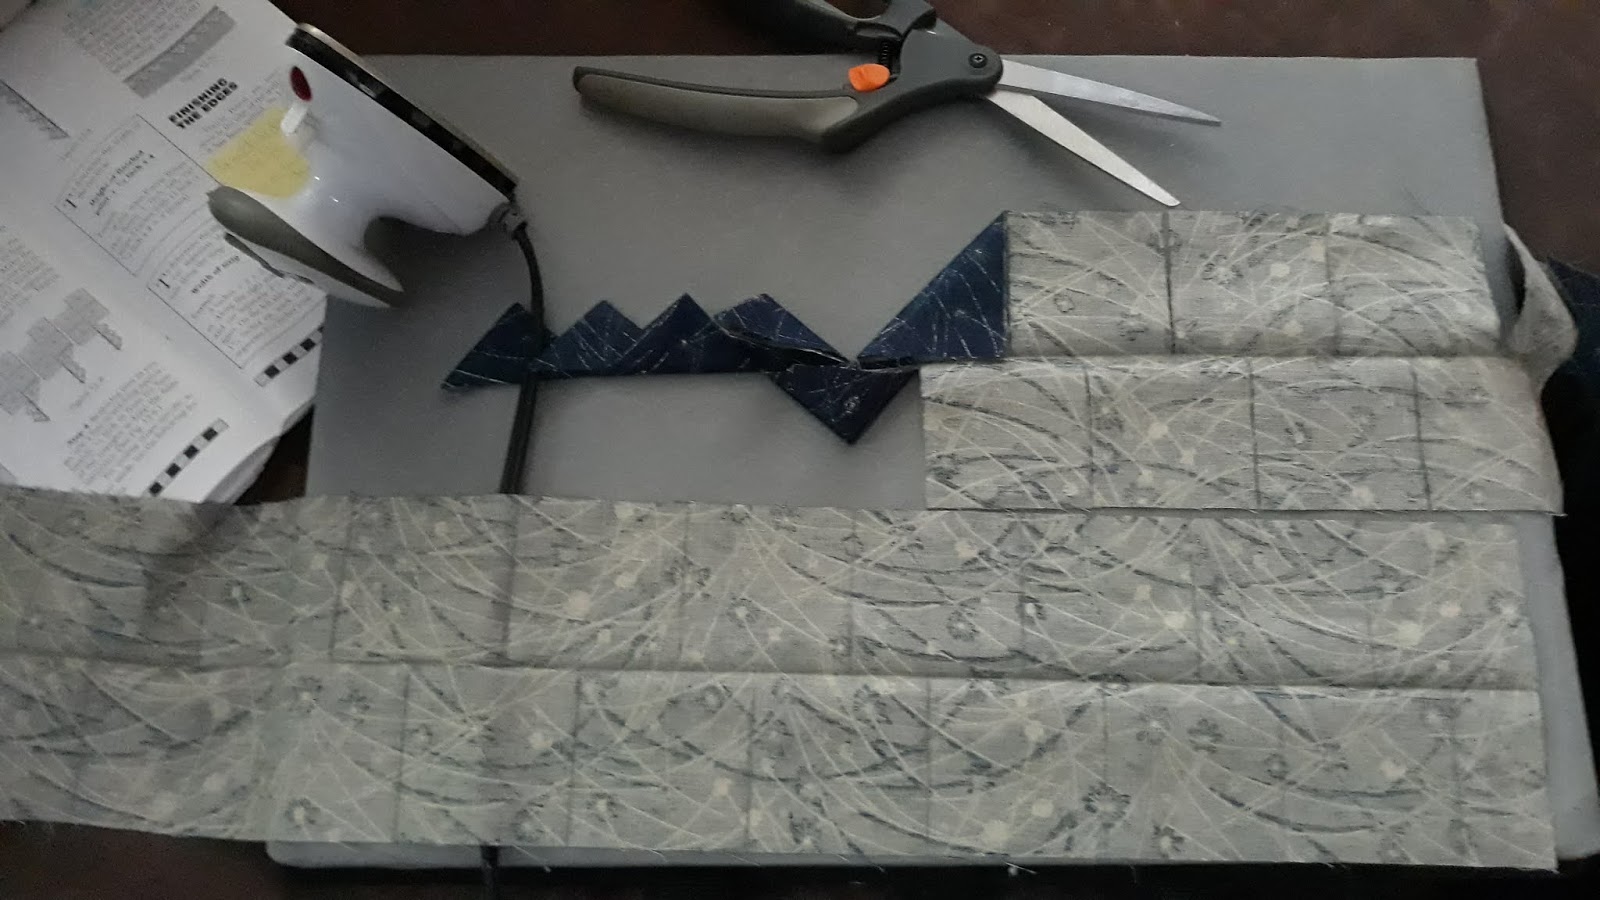
I opted to make a slight change to the design.  The original quilt used Flying Geese blocks to create an outer border around the center of the top.  I opted to go for a 3-D substitute and use a Continuous Band of Nesting Prairie Points instead!   I've only used this technique once before as the "binding" finish for a Feathered Star wall hanging way back in 2003 in my early quilting days.


I learned about the technique from a pamphlet --- one of those "Free with Subscription" gifts I got back when I started my Quilters Newsletter subscription.  I still miss that magazine!!


Even though Flying Geese are my absolute favorite block, I liked the idea of being able to make the triangles float above the striped outer border.  They are easy to make too -- only requiring a strip for each set of points, some marking and cutting (with scissors for a change!), folding and pressing.


There are a number of videos around the web showing how to do the technique.  I also found a PDF from the Utah State University Cooperative Extension (!!) showing how to do two-color and piped variations.  The two sides of the finished band get folded together and the band gets sewn in between the turned under edges of the top and backing.  In my case, I sandwiched it between the center of the top and an outer under-border.  

I had to "Frankenstein" some batting scraps for this and then decided to quilt it with some simple, straight forward grid quilting.  It was easy to do since I just had to follow the lines or edges of the piecing and the striped border print and it could all be done with a walking foot.

When it came time to finish the quilt edges, I was going to bind it with a traditional binding but then this week, Bernina's "We All Sew" blog put out a bunch of tutorials on various binding techniques.  One of them was for an "invisible faced binding", a technique I've seen but haven't tried before.  In addition, the way they did it, it provided a convenient label area and hanging sleeves (in the form of triangle corners) as part of the process so I was definitely in for that!


This was one of those RARE times, I was willing to hand sew down a binding!  If I want to hang this up in the future, I only sewed down the center edge of the triangles --- I left them open at each corner so I could slide in a dowel rod for support to hang it.  Of course, this won't be completely done until I write in the label information on the triangles!

I've been playing in my RWB stash all summer so all of the fabrics for this have been sitting on my cutting table while I worked on each project.  Needless to say repeats abound in the fabrics I used for all of my last few projects.  I had cut the squares for the star fabrics from the some of the same fabrics used for my last QOV top and the blue Prairie Point fabric and the striped print underneath it were also used for the corner squares and borders on it too.


And speaking of QOVs, now that my RWB Summer is done, it's time to focus on the other things I was supposed to be working on this summer --- namely, getting them quilted!  Well, I have that and another small (not RWB) desk mat to finish for a gift.  I admit I also have a new project that I want to embark on this weekend.  Thank goodness it's a long weekend!!

But before all of that, I'm heading back over to Alycia's to finish checking out what others are working on or celebrating finishing this week.  Link up and show us what you got (that we will want to make too)!!